
Comment... Attribuer des objets ?
Comment... Attribuer des objets ?
💡 Les bases
Dans Timly, assigner désigne l'action d'attribuer numériquement des objets à des personnes ou des ressources.
Il s’agit d’une étape clé pour garantir une traçabilité fiable et documentée des mouvements de votre inventaire, permettant de savoir systématiquement où se trouvent vos objets et à qui ils sont attribués.
📘 Ce guide vous présente l’essentiel de l’attribution d’objets dans Timly.
Dans Timly, vous pouvez assigner des objets :
- Depuis la page d’un objet
- Depuis la page d’un emplacement
- Depuis le profil d’une personne
- Depuis le scanner de codes-barres
⚙️ Les étapes
- Assigner depuis un objet -
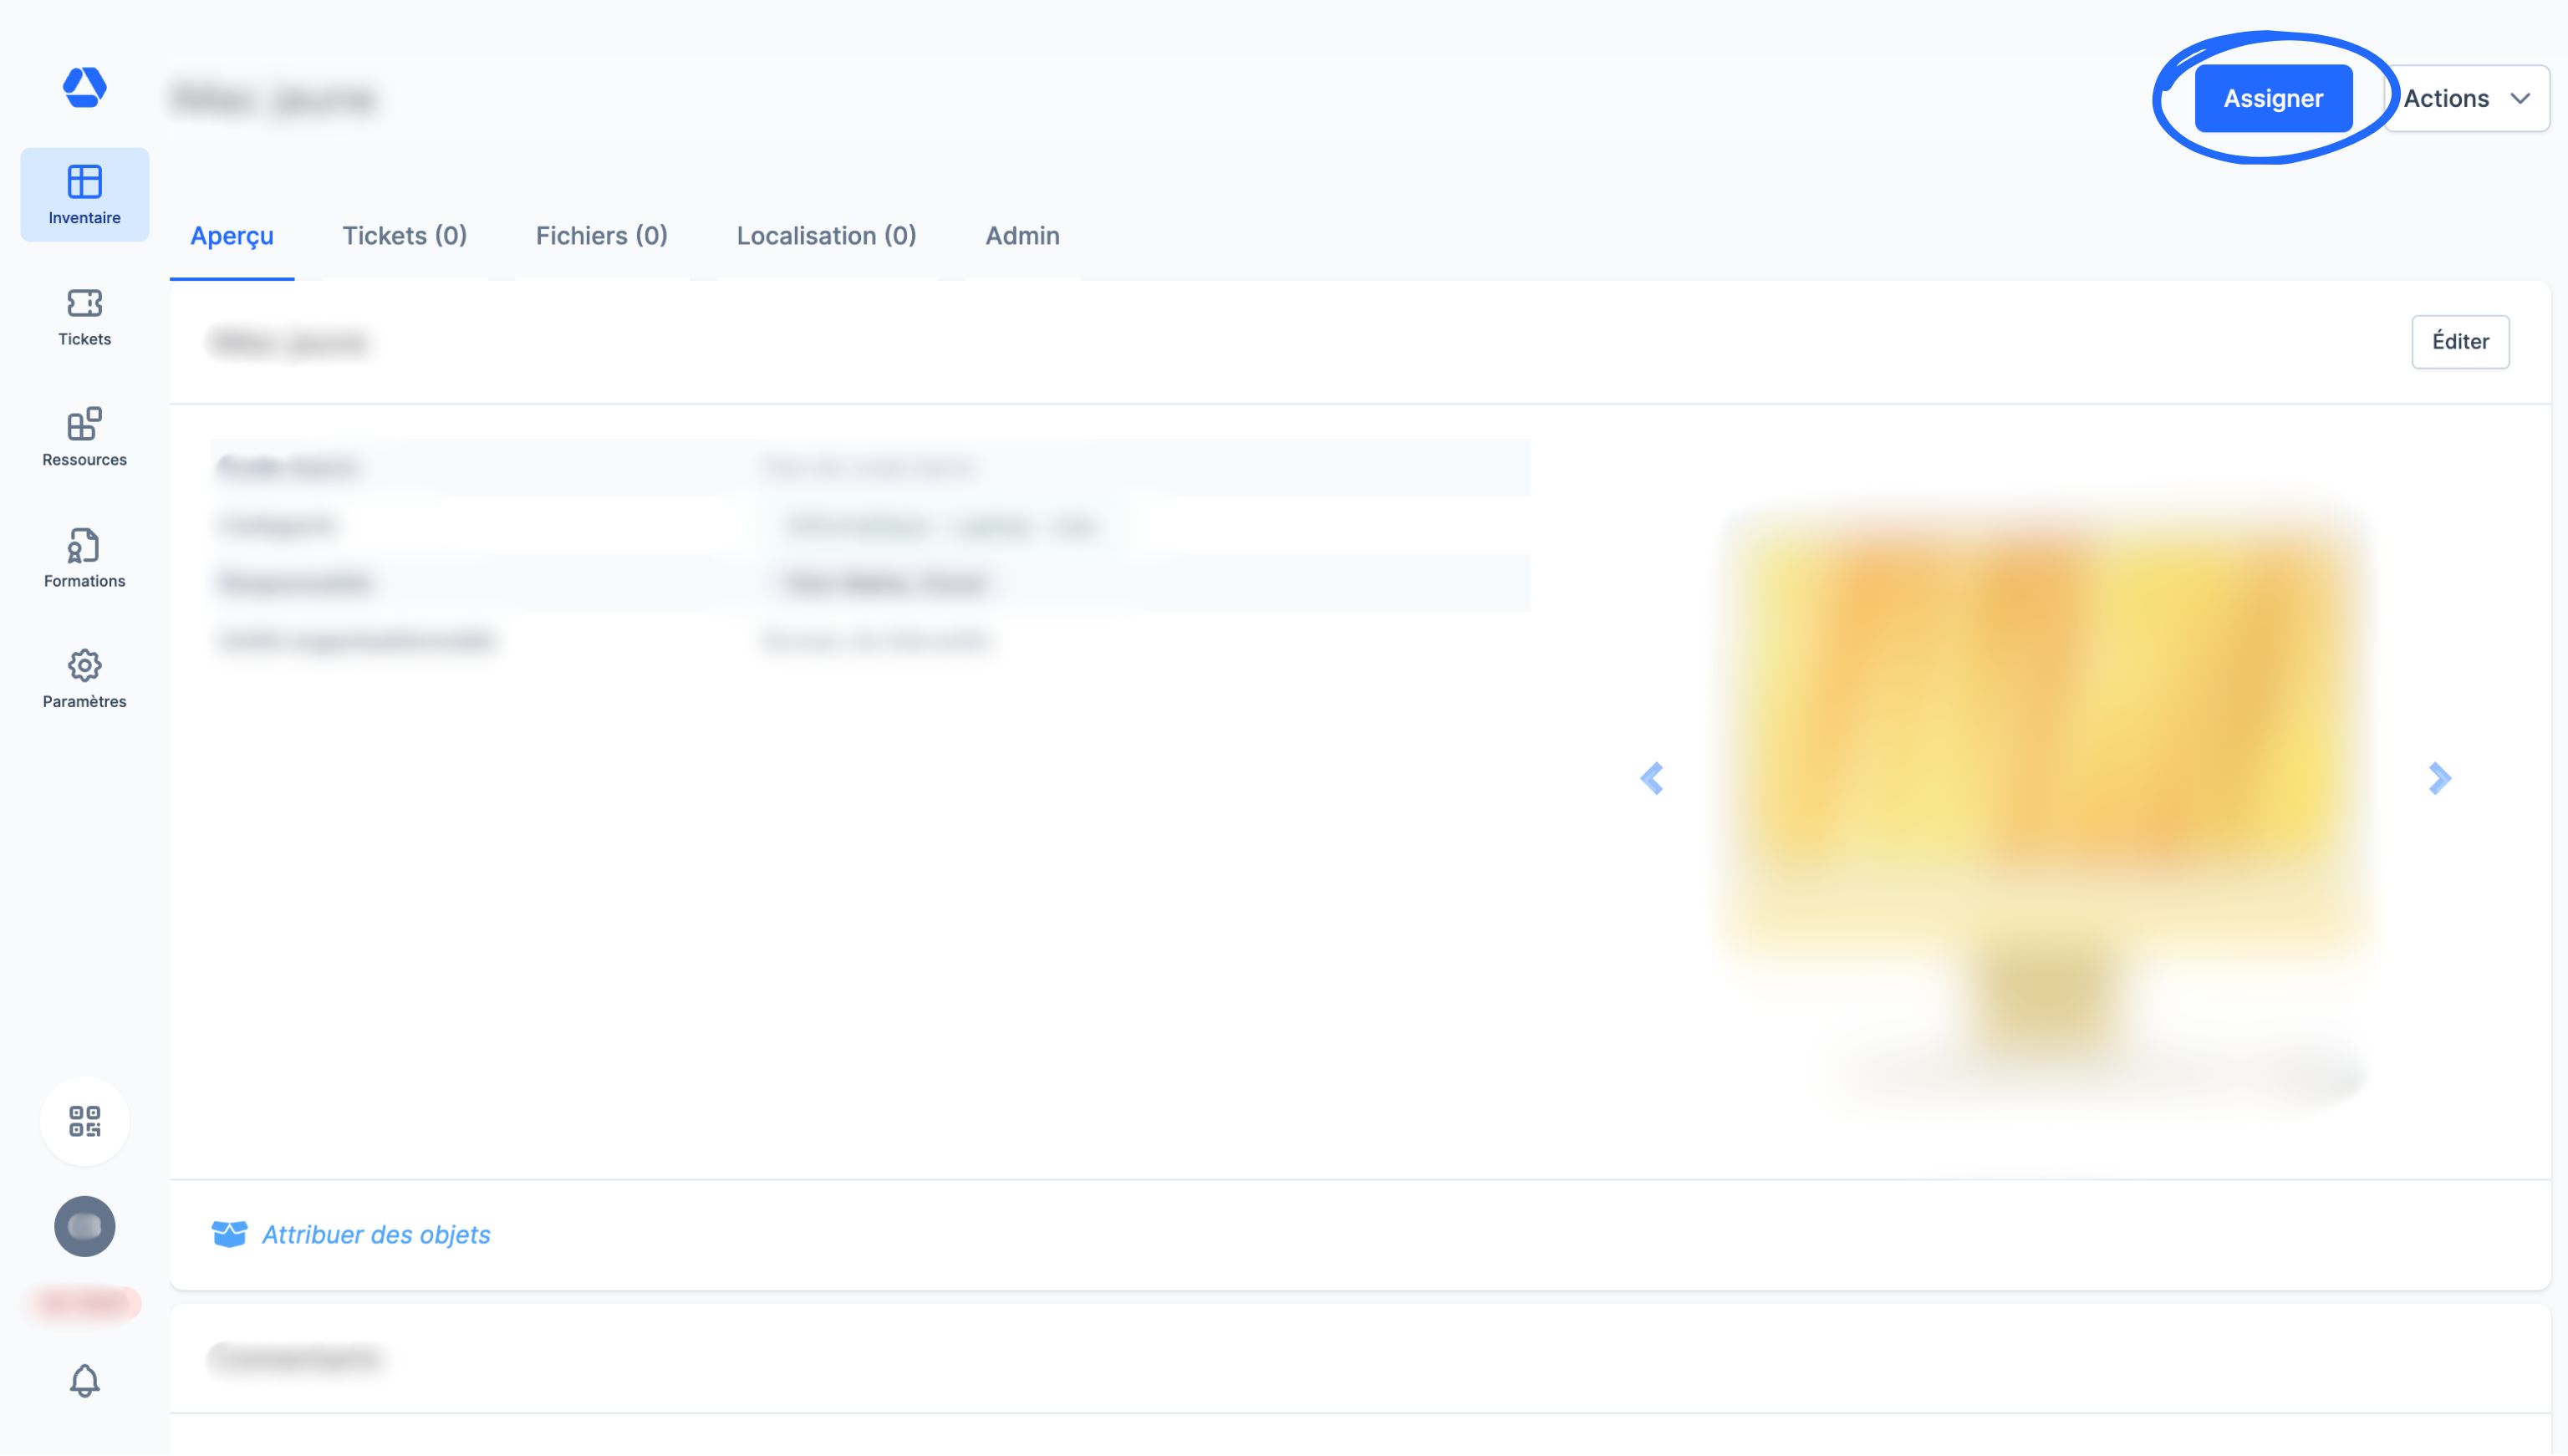
- Rendez-vous sur la fiche d'identité de l'objet que vous souhaitez assigner
- Cliquez sur "Assigner". Sélectionnez à qui ou quoi assigner cet objet :
- Un emplacement
- Une personne
- Un objet conteneur
💡 Vous pouvez utiliser la barre de recherche pour rechercher encore plus rapidement la personne ou la ressource à laquelle vous souhaitez assigner l'objet - Cliquez sur "Assigner" pour confirmer
- Assigner depuis un objet conteneur -
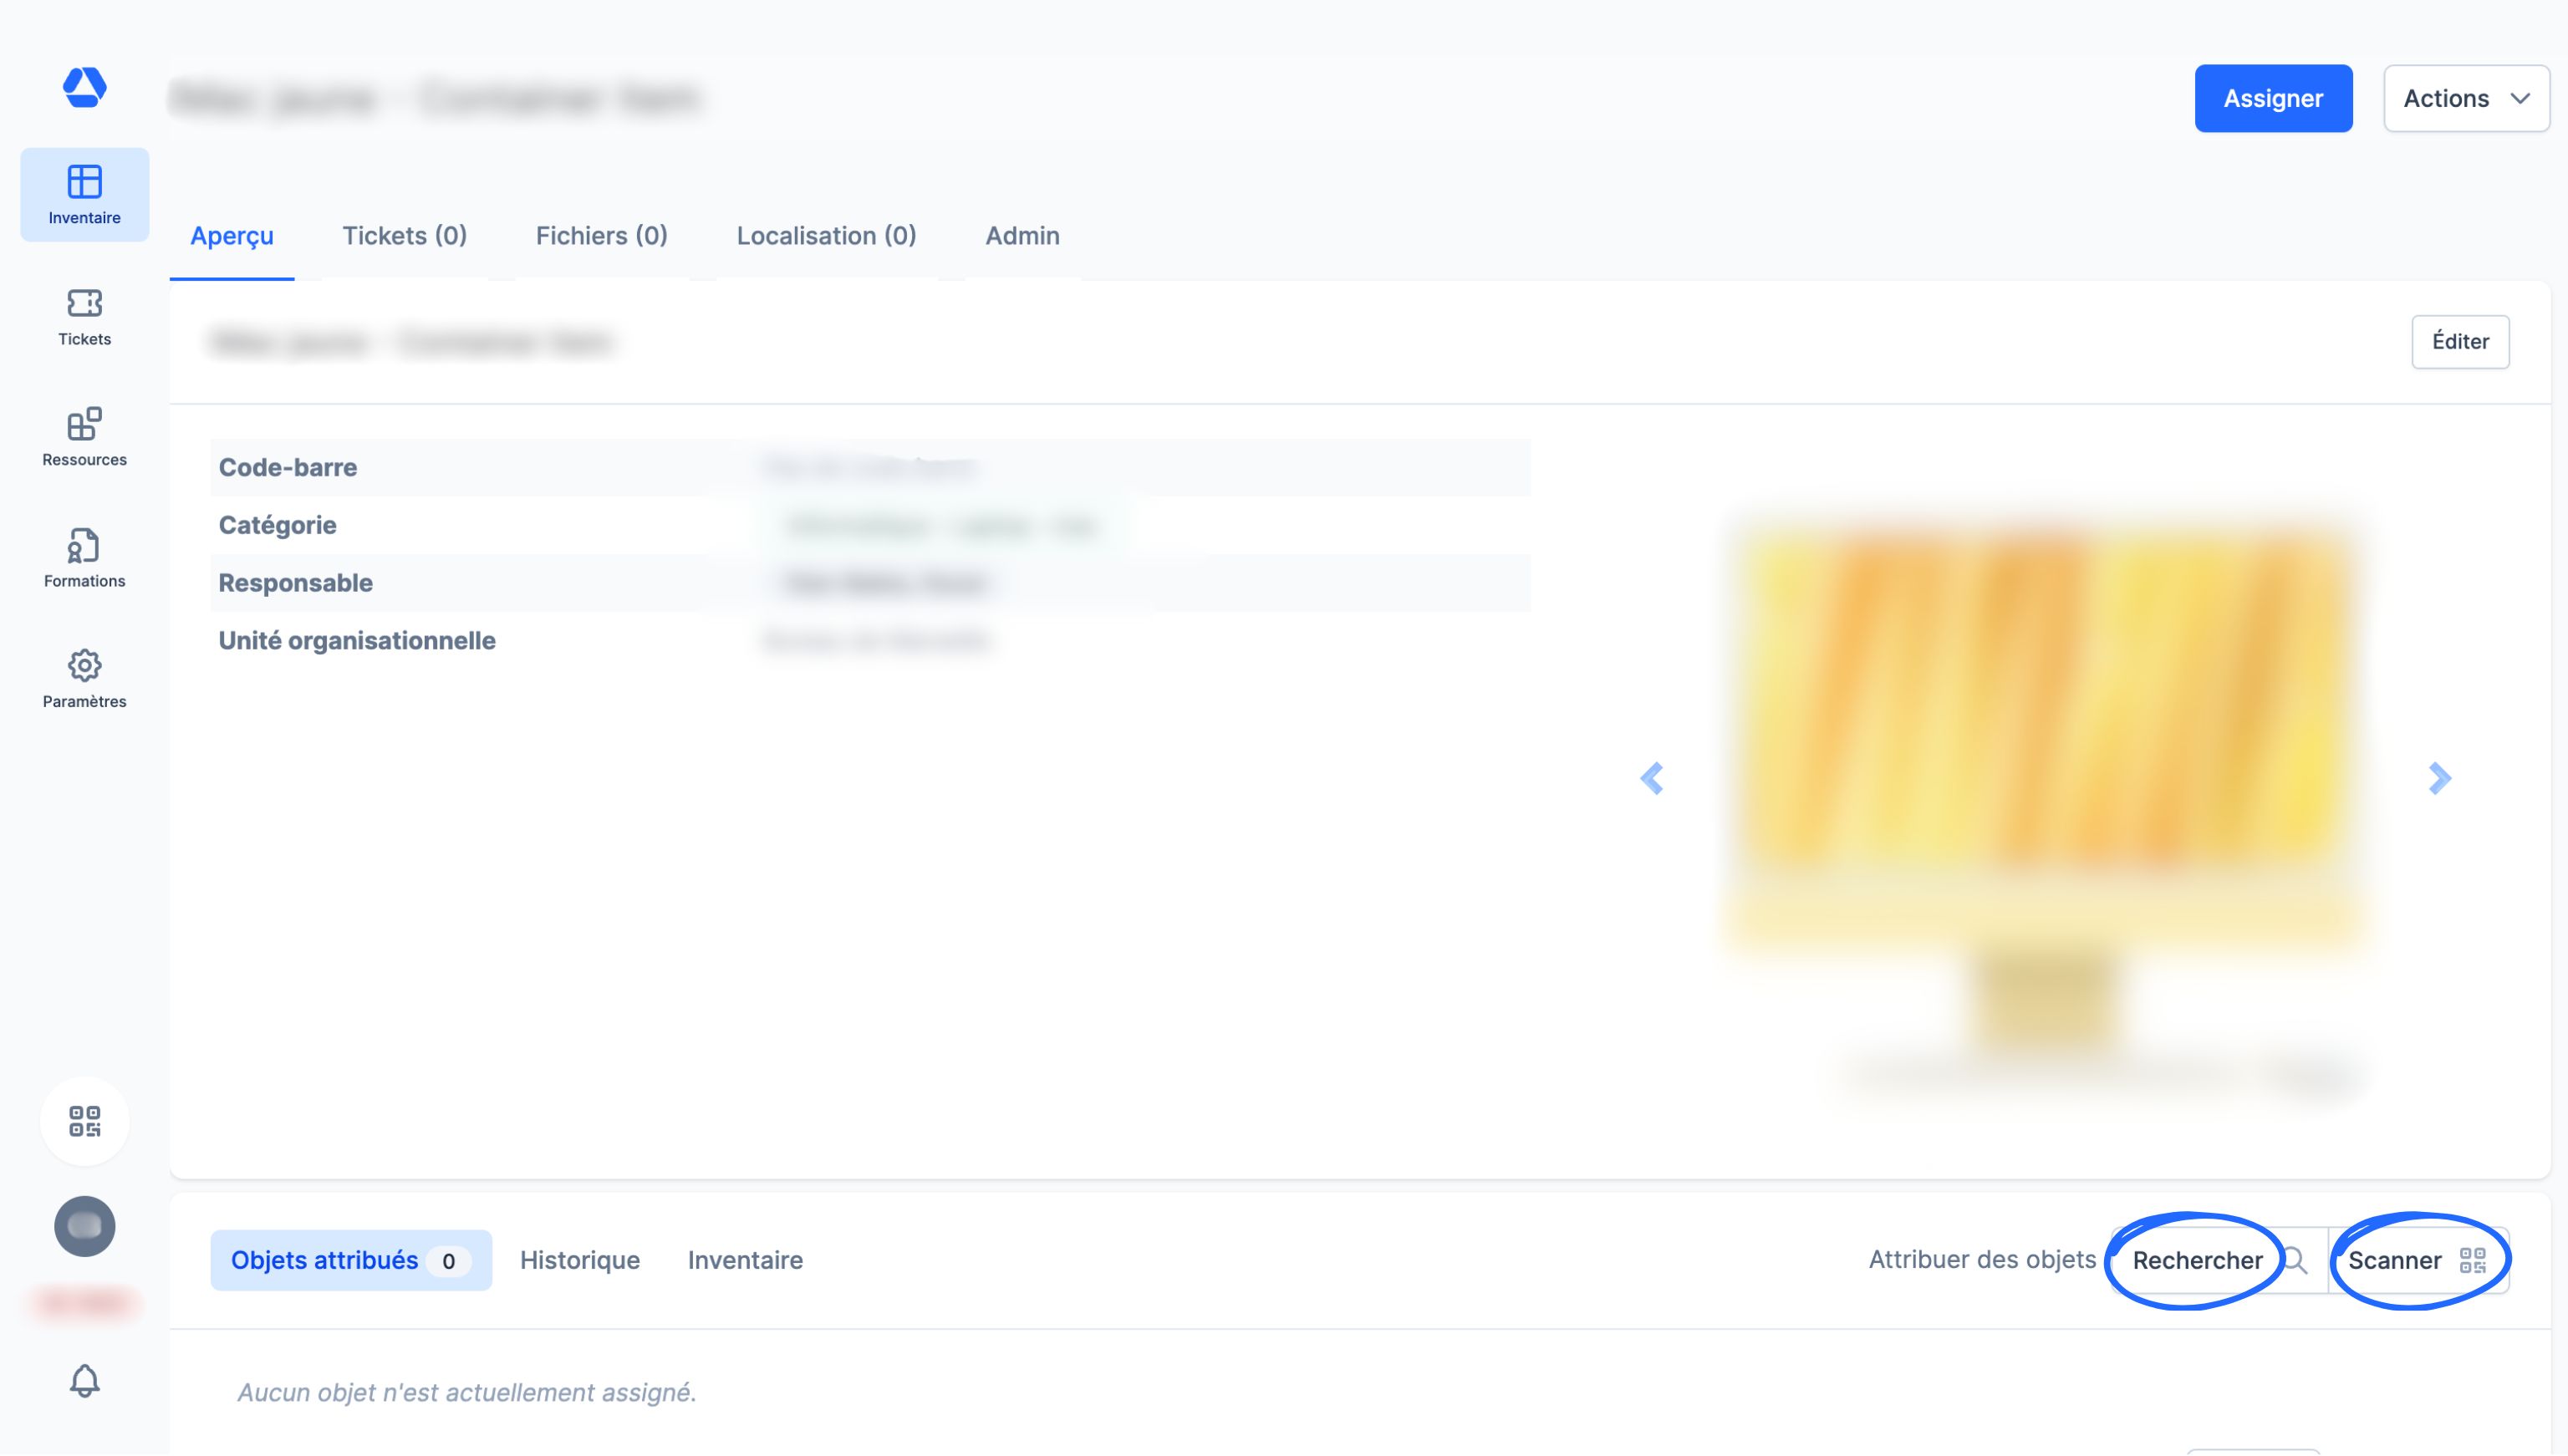
- Pour transformer un objet en objet conteneur, rendez-vous sur la fiche d'identité de cet objet, puis cliquez sur le bouton "Attribuer des objets". Pour assigner des objets à cet objet conteneur, vous aurez deux possibilités :
- Cliquez sur "Rechercher" pour choisir un objet dans une liste déroulante
- Cliquez sur "Scanner" pour trouver l’objet en scannant son code-barre/QR code
💡 Les objets conteneurs sont des objets spéciaux auxquels sont attribués d’autres objets.
Par exemple : une valise, un véhicule de fonction ou une armoire à outils peuvent être des objets conteneurs.
- Assigner depuis un emplacement -
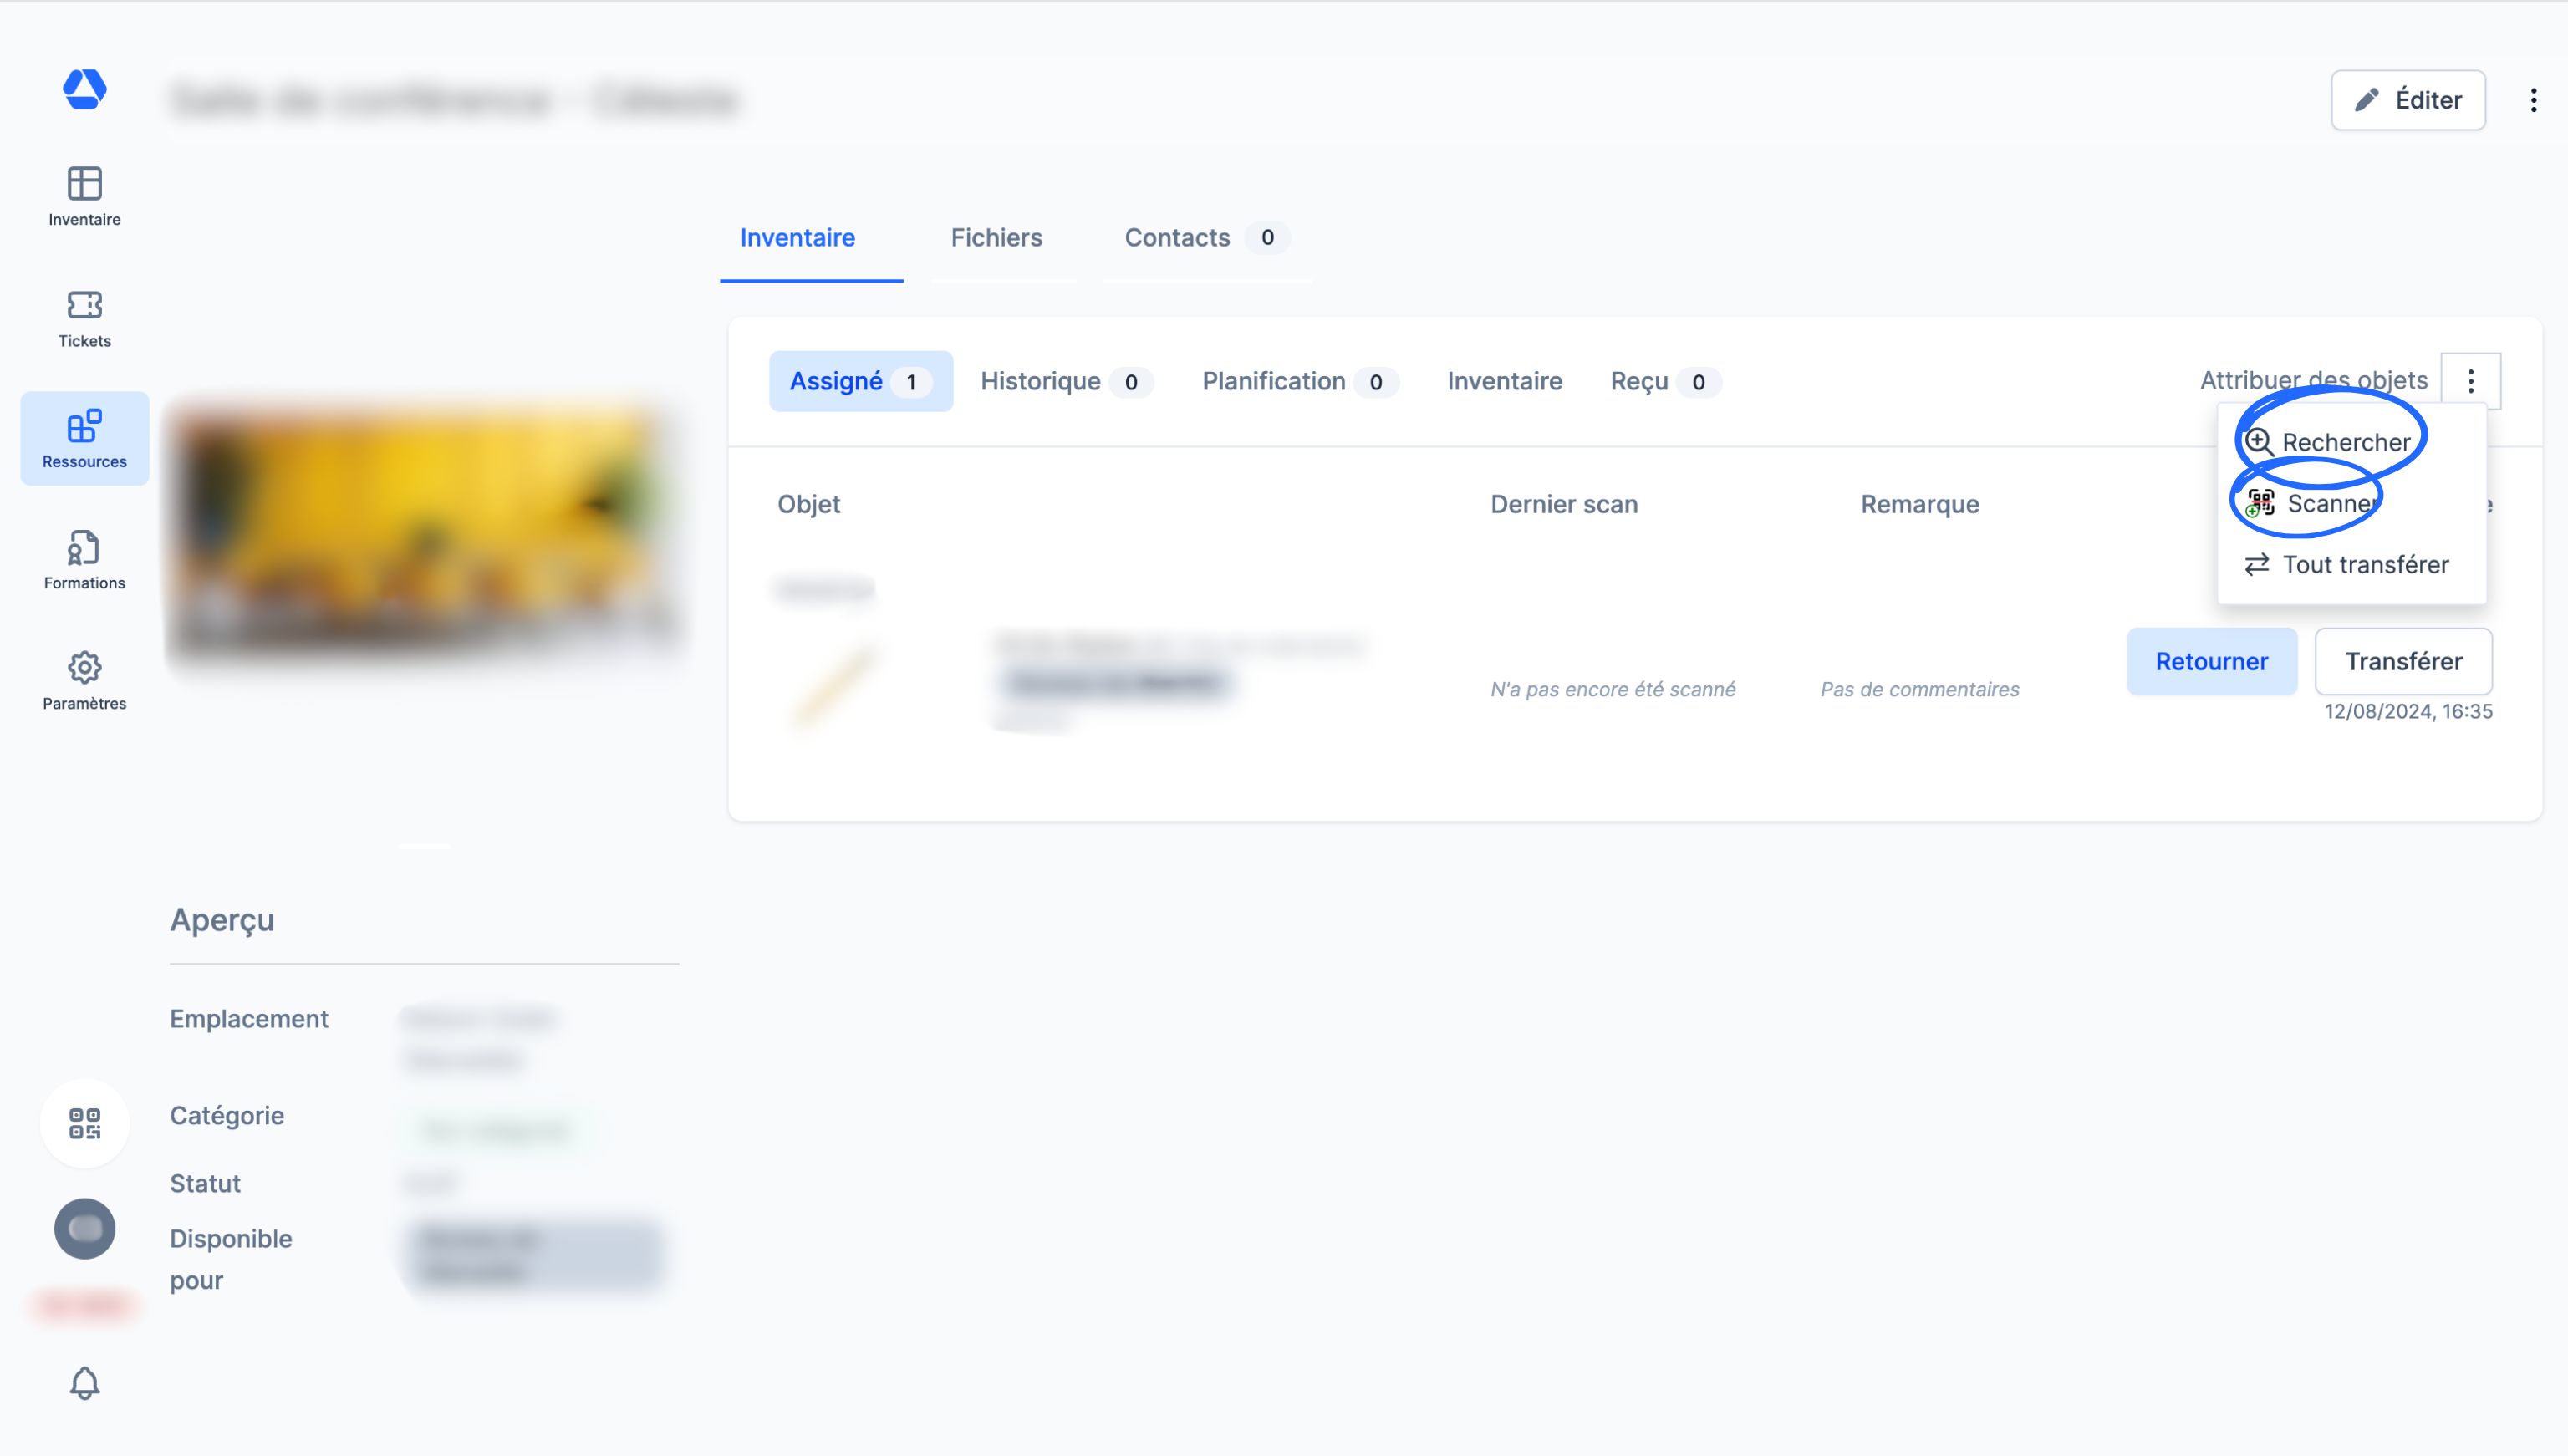
- Cliquez sur "Ressources", puis sur l'emplacement auquel vous souhaitez assigner un objet
- Dans l’onglet "Inventaire", cliquez sur l’icône à 3 points positionnée à côté du bouton "Attribuer des objets". Vous avez deux possibilités :
- Cliquez sur "Rechercher" pour choisir un objet dans une liste déroulante
- Cliquez sur "Scanner" pour trouver l’objet en scannant son code-barre/QR code
- Assigner depuis le profil d'une personne -
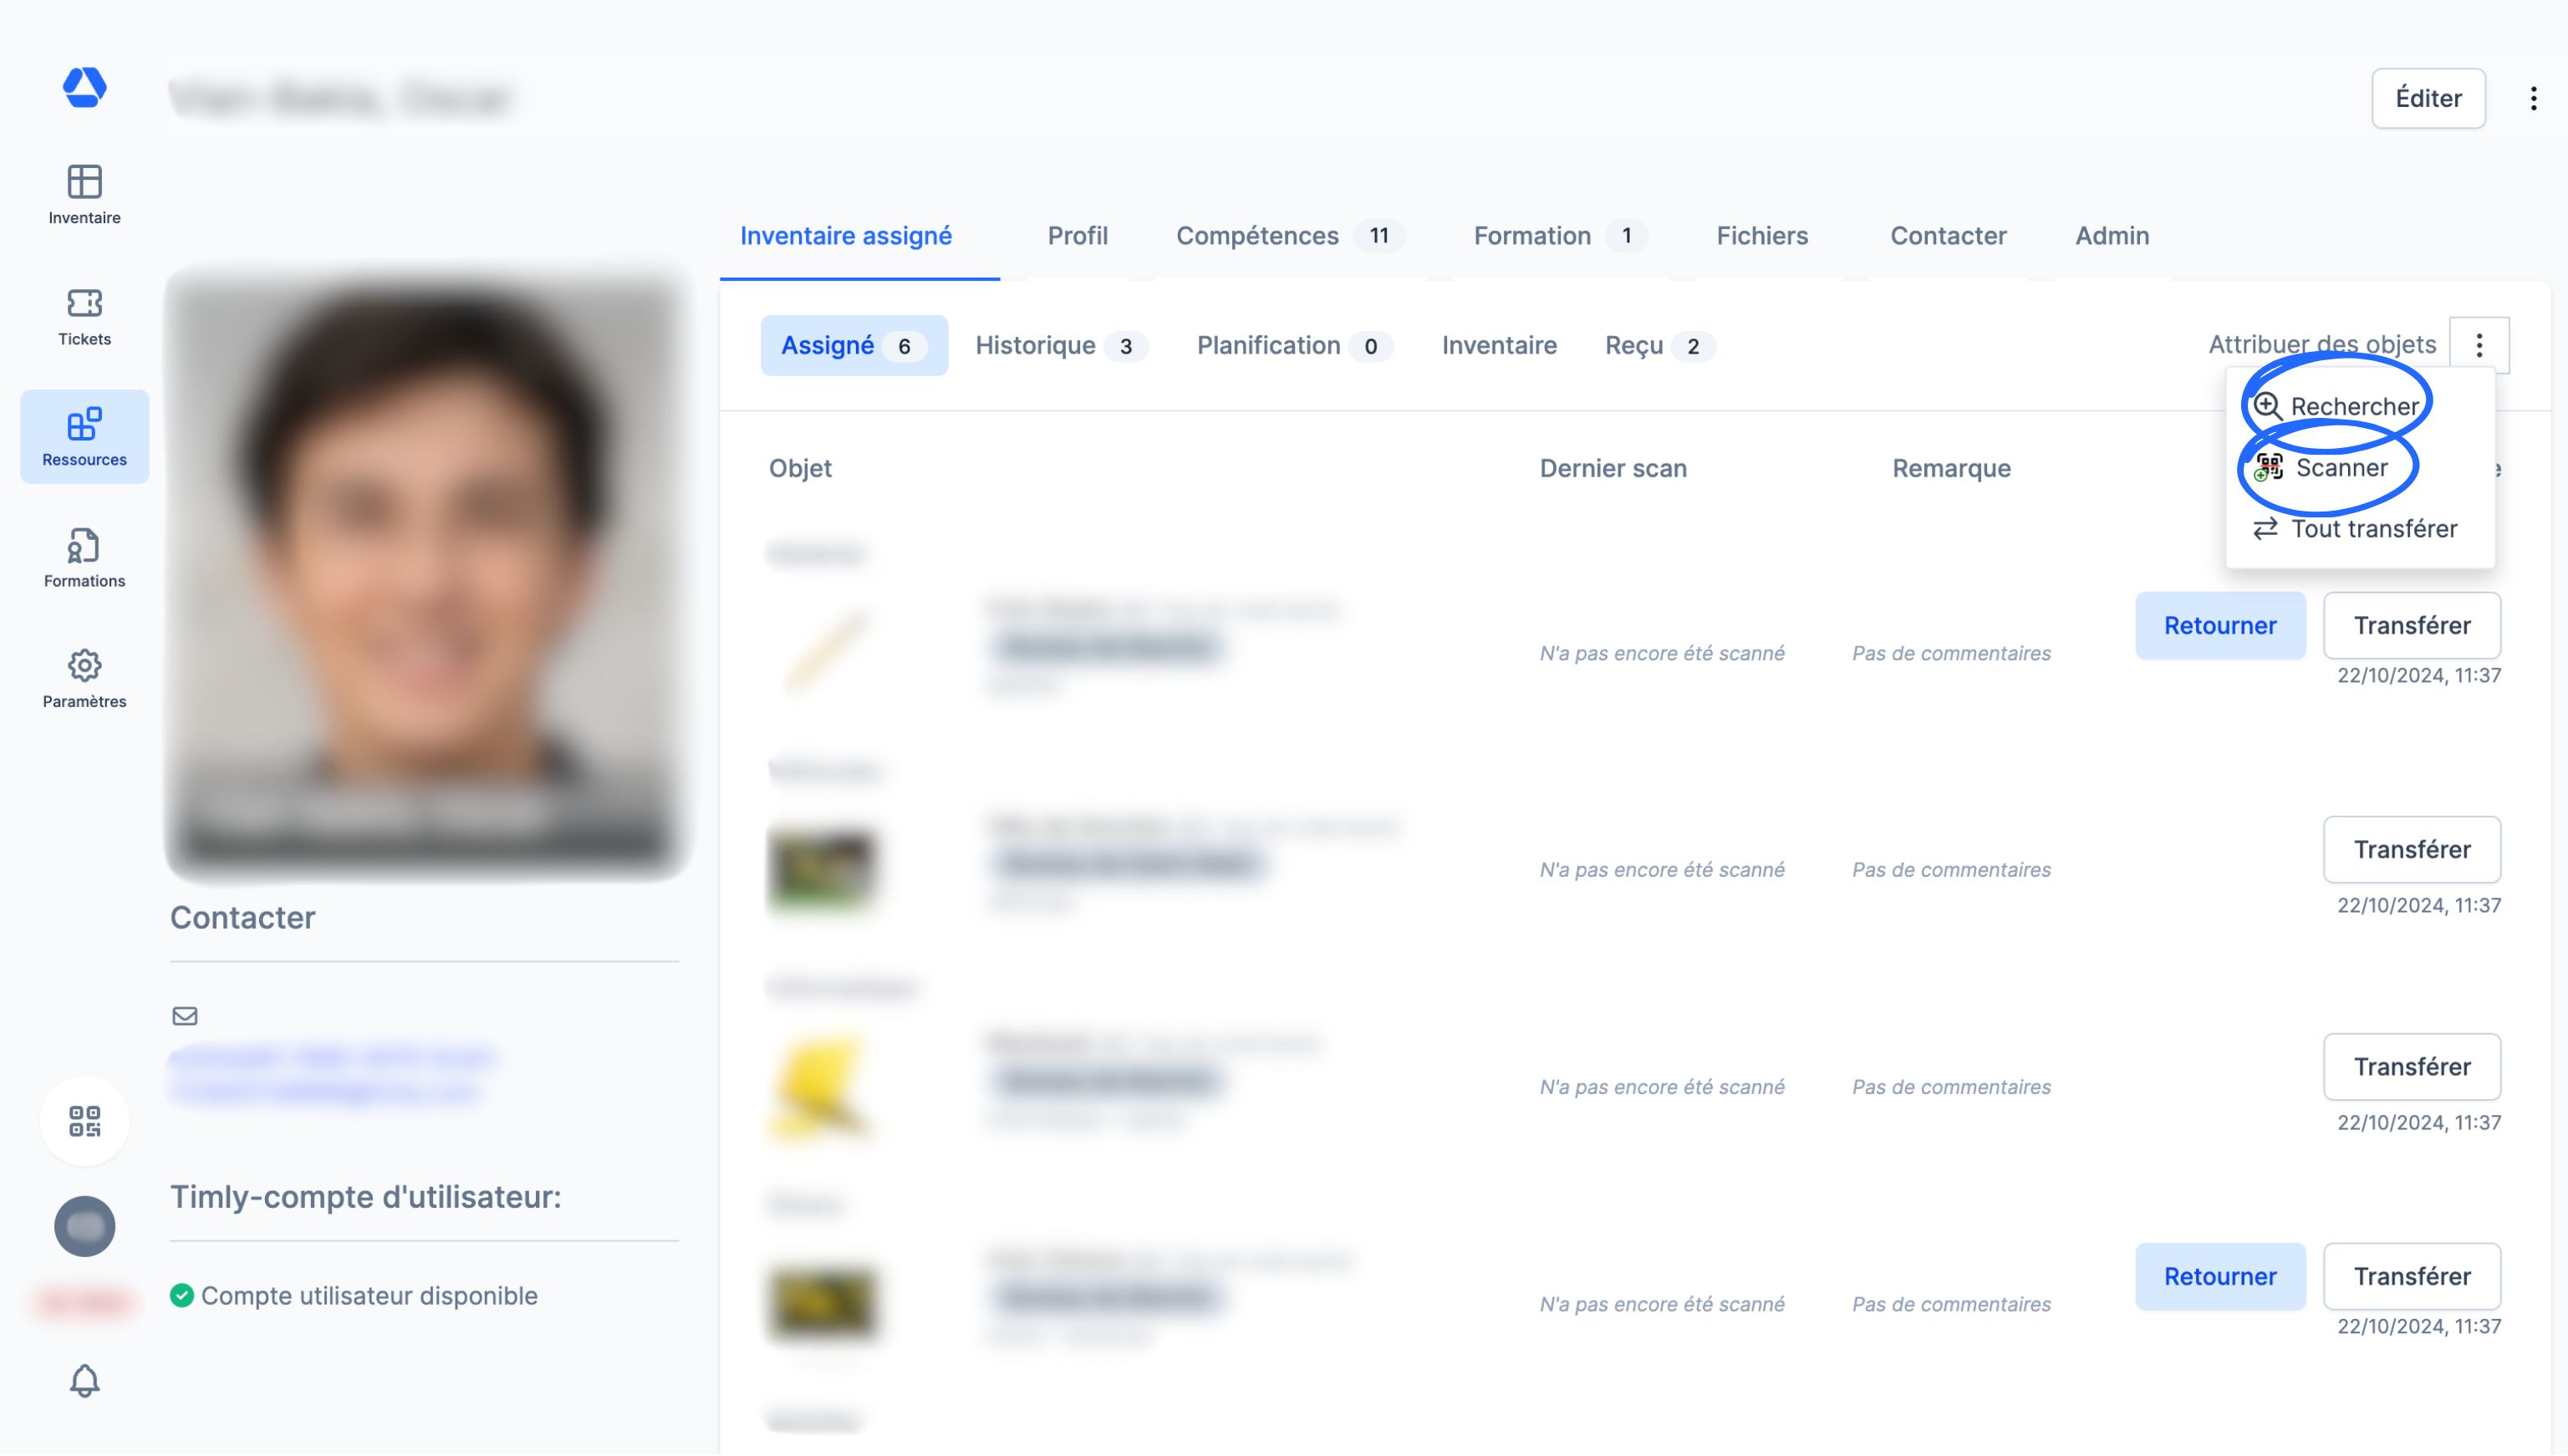
- Cliquez sur "Ressources", puis sur le profil de la personne à laquelle vous souhaitez assigner un objet
- Dans l’onglet "Inventaire", cliquez sur l’icône à 3 points positionnée à côté du bouton "Attribuer des objets". Vous avez deux possibilités :
- Cliquez sur "Rechercher" pour choisir un objet dans une liste déroulante
- Cliquez sur "Scanner" pour trouver l’objet en scannant son code-barre/QR code
- Assigner depuis le scanner de codes-barres
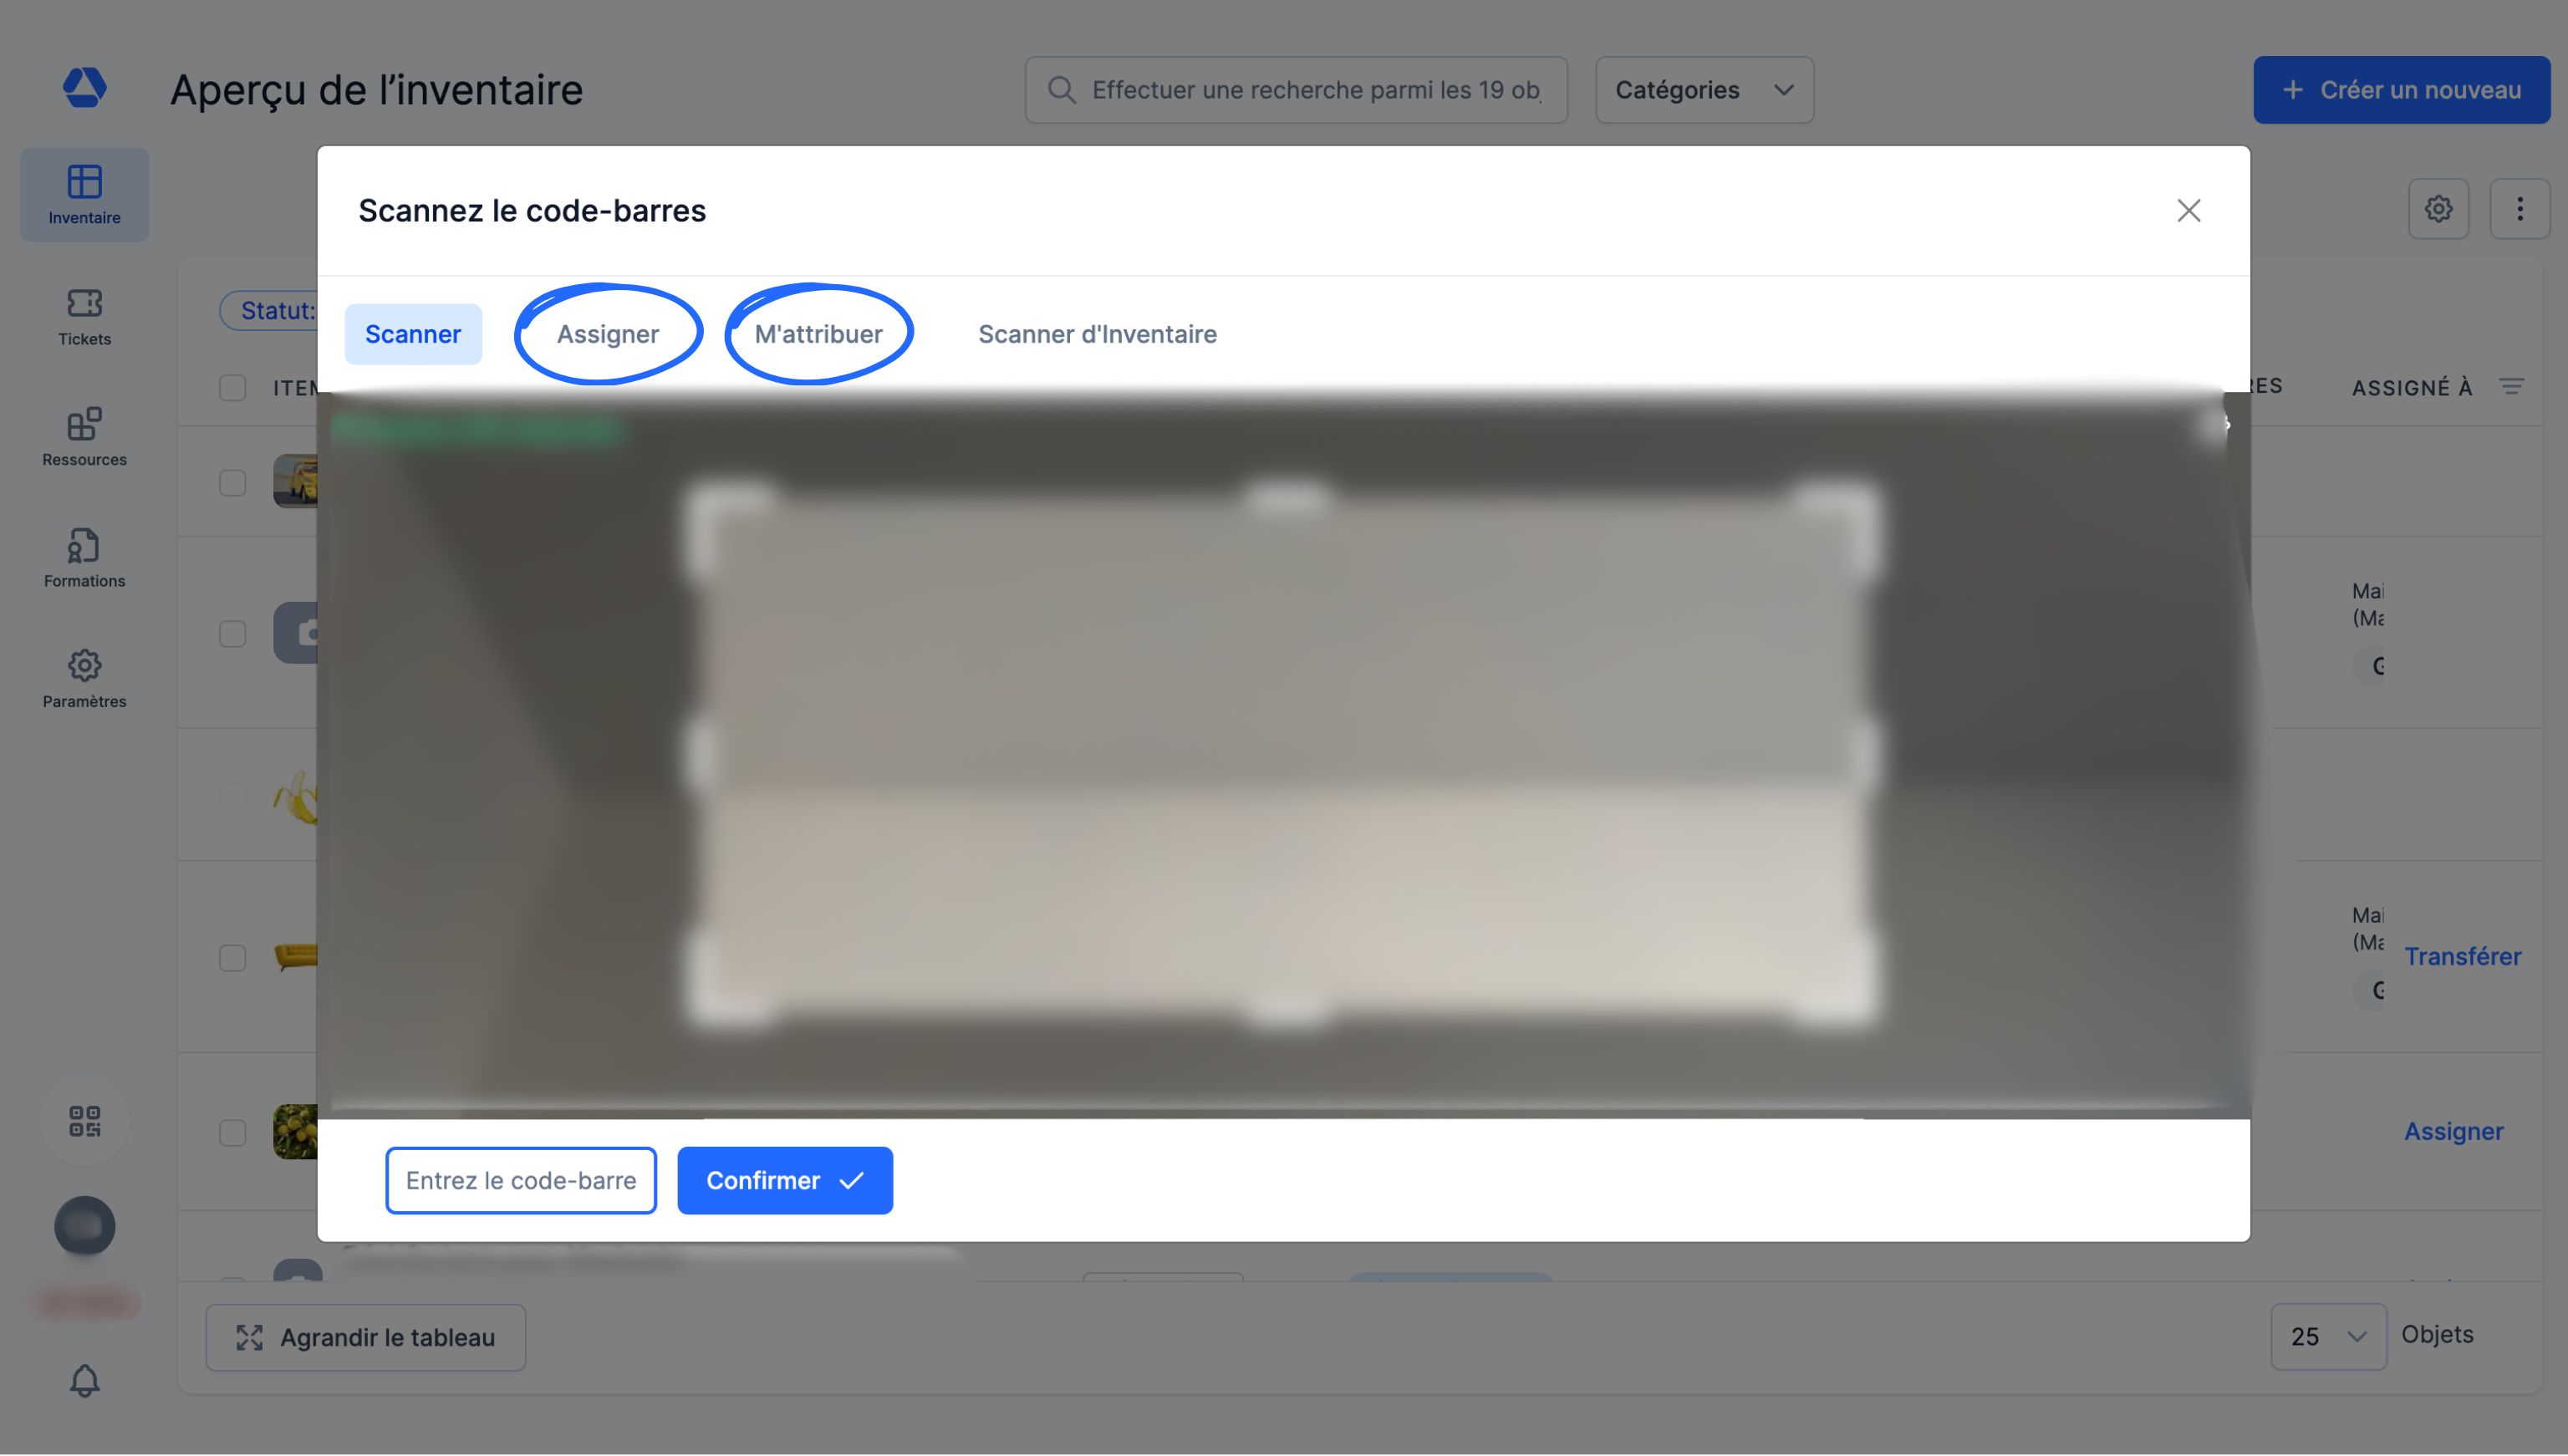
- Cliquez sur le scanner de codes-barres. Deux options s'offrent à vous :
- Cliquez sur "M'attribuer", puis scannez le code-barre/QR code de l’objet ou des objets que vous souhaitez vous assigner
- Cliquez sur "Assigner", scannez le code-barre/QR code de la personne ou l'emplacement, puis scannez le code-barre/QR code de l’objet ou des objets que vous souhaitez assigner
💡 Cette fonctionnalité permet d’attribuer des objets en masse, sans avoir à cliquer. Par exemple, vous pouvez imprimer le code-barre/QR code du profil de vos employés et de vos emplacements sur un badge individuel. Il vous suffira de scanner ce badge puis le code-barre de vos objets pour les assigner en masse, en quelques secondes. Si vous souhaitez attribuer vos objets à une même personne, il vous suffit de scanner son code-barre/QR code une seule fois.
📖 Glossaire
Emplacement : Dans Timly, un emplacement est un espace numérique qui permet d’organiser, de catégoriser et de suivre les objets. Chaque objet peut être attribué à un lieu spécifique (entreprise, entrepôt, chantier, etc.). Il est possible d’y créer des sous-catégories, d’effectuer des prises inventaires localisées et de suivre les mouvements d’objets. Exemples : « Entreprise n°1 », « Entrepôt », « Projet XYZ ».
Fiche d'identité : Dans Timly, chaque objet dispose d’une fiche d’identité qui compile toutes les données pertinentes à sa gestion dans une interface simplifiée et complète :
- les attributions en cours et passées, ainsi que les attributions planifiées
- les documents associés (certificats, manuels, contrats, etc.)
- l’historique des actions (mouvements, modifications - visible uniquement par les administrateurs)
- les contacts liés à l’objet
- les informations générales (nom, catégorie, code-barres, photo, caractéristiques techniques)
- la localisation
- les tickets en cours
- la planification de l’objet
- les remarques et notes internes
- les données d’usage
Inventaire : L’inventaire désigne l’ensemble des objets suivis et gérés dans Timly.
Objet : Un objet désigne toute ressource, matérielle ou immatérielle, suivie et gérée dans Timly. Il peut s’agir d’équipements informatiques, d’outils, de véhicules, de fournitures, de matériel médical, de logiciels ou de tout autre bien nécessitant un suivi.
Personne : Individu enregistré dans Timly, qu’il soit utilisateur ou non, employé ou non. Chaque personne peut se voir attribuer des objets. Les administrateurs peuvent structurer les profils en définissant des types personnalisés (ex. : salarié, intérimaire, freelance...).
📖 Retrouvez toutes les définitions dans le Glossaire Timly.
✅ Les fonctionnalités nécessaires
Module d'inventaire.
🔗 Ressources supplémentaires
- Centre d'aide : Le nouveau flux d'assignement
📩 Vous souhaitez en savoir plus ? Réservez une démonstration en ligne (gratuite) de l'un de nos experts en gestion d'inventaire. Si vous avez des questions, n'hésitez pas à nous contacter à [email protected].