F.1 - How to configure SSO
SSO (Single Sign-On) is an optional feature available for all three Timly packages: ESSENTIAL+, PROFESSIONAL, and ENTERPRISE.
- To configure Single Sign-On (SSO), contact your Account Manager to activate the functionality on your Timly account.
- Note that access to SSO settings is limited to users with an administrator role.
If you:
✅ Are a Timly administrator
✅ Have had your Account Manager activate the SSO feature for your account
Here are the steps to configure it:
🛜 Timly-App
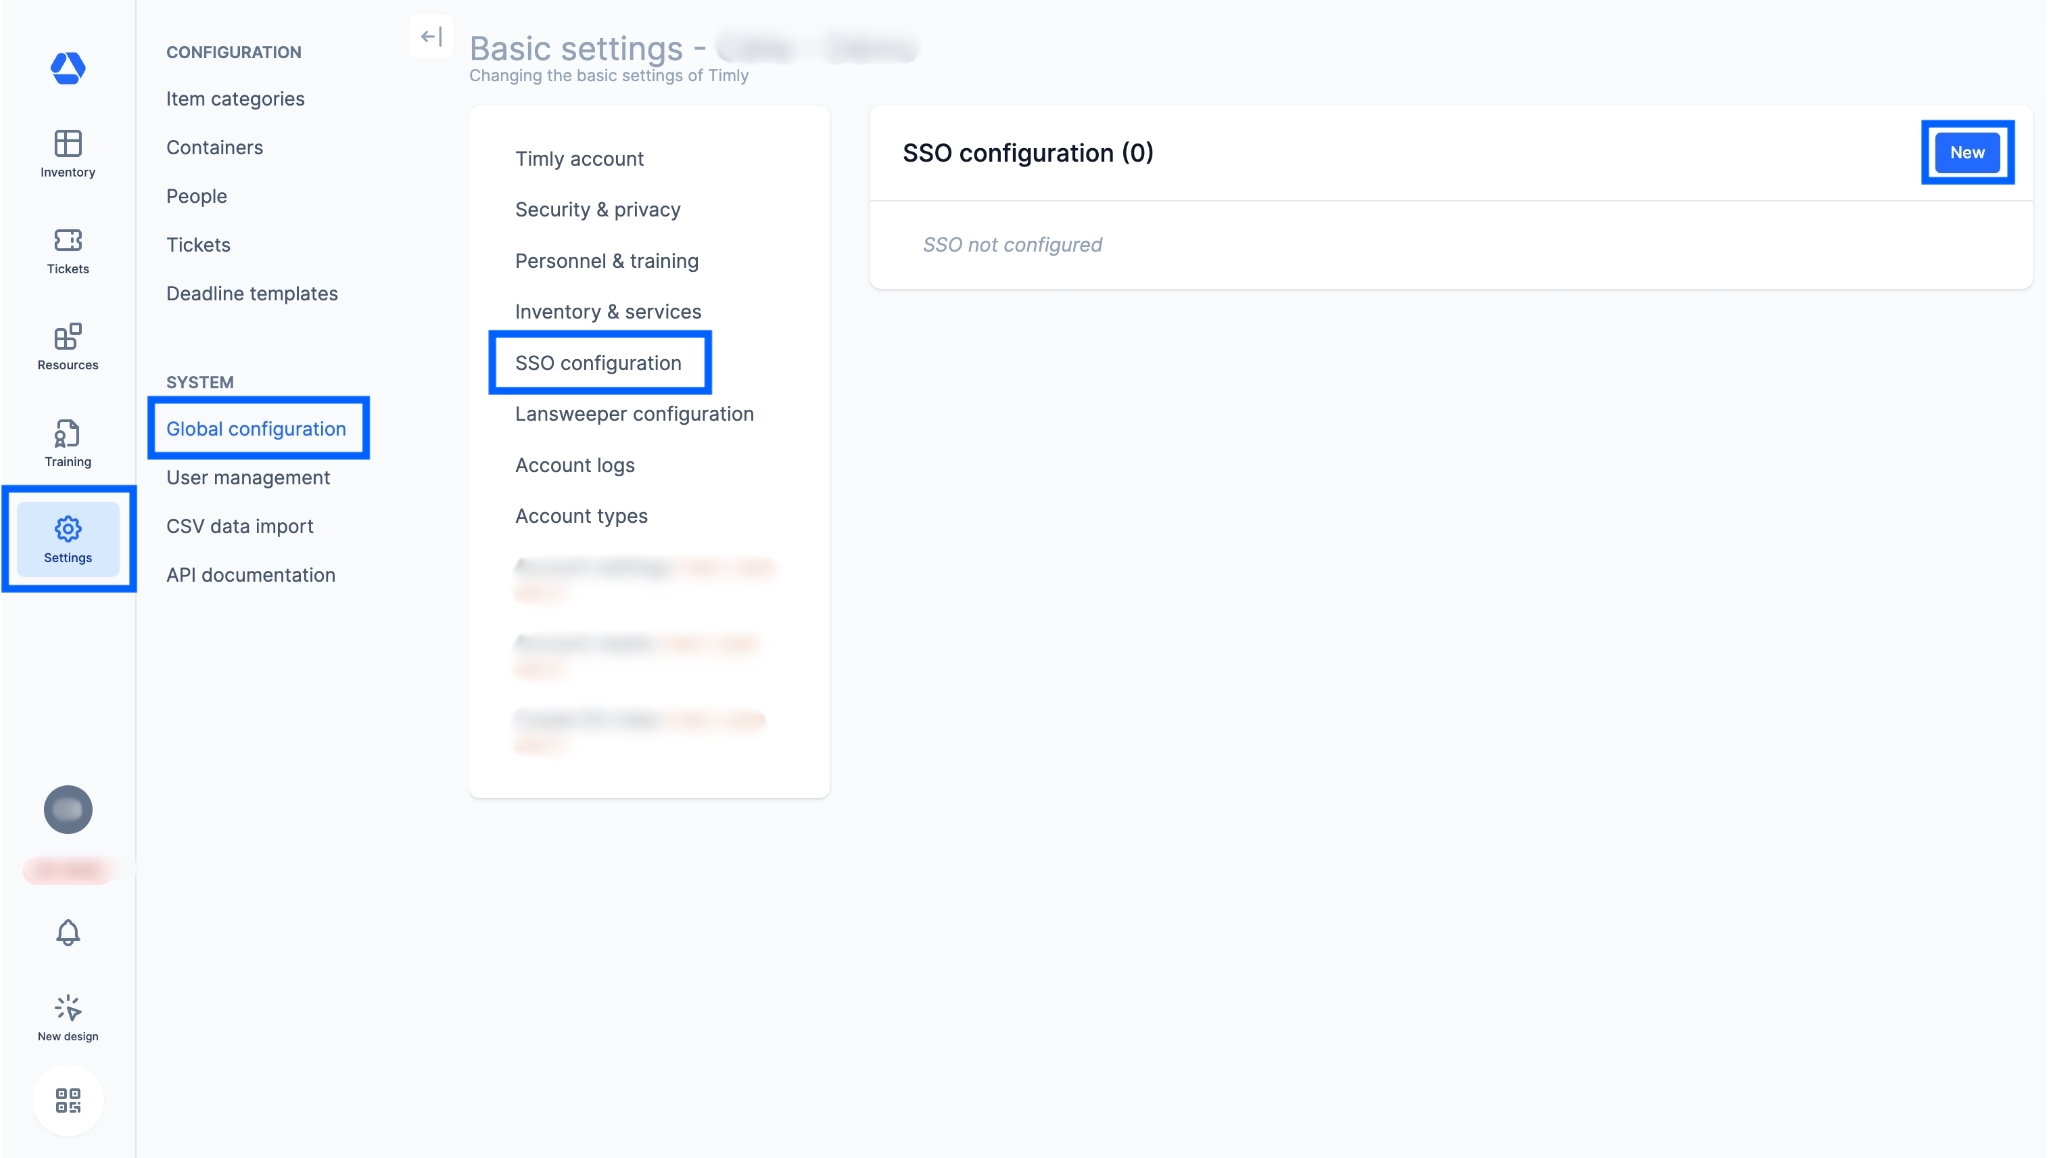
- Log in to Timly.
- Click on "Settings," then "Global configuration," and finally "SSO configuration".
- To create a new SSO connection, click on "New".
Step 1
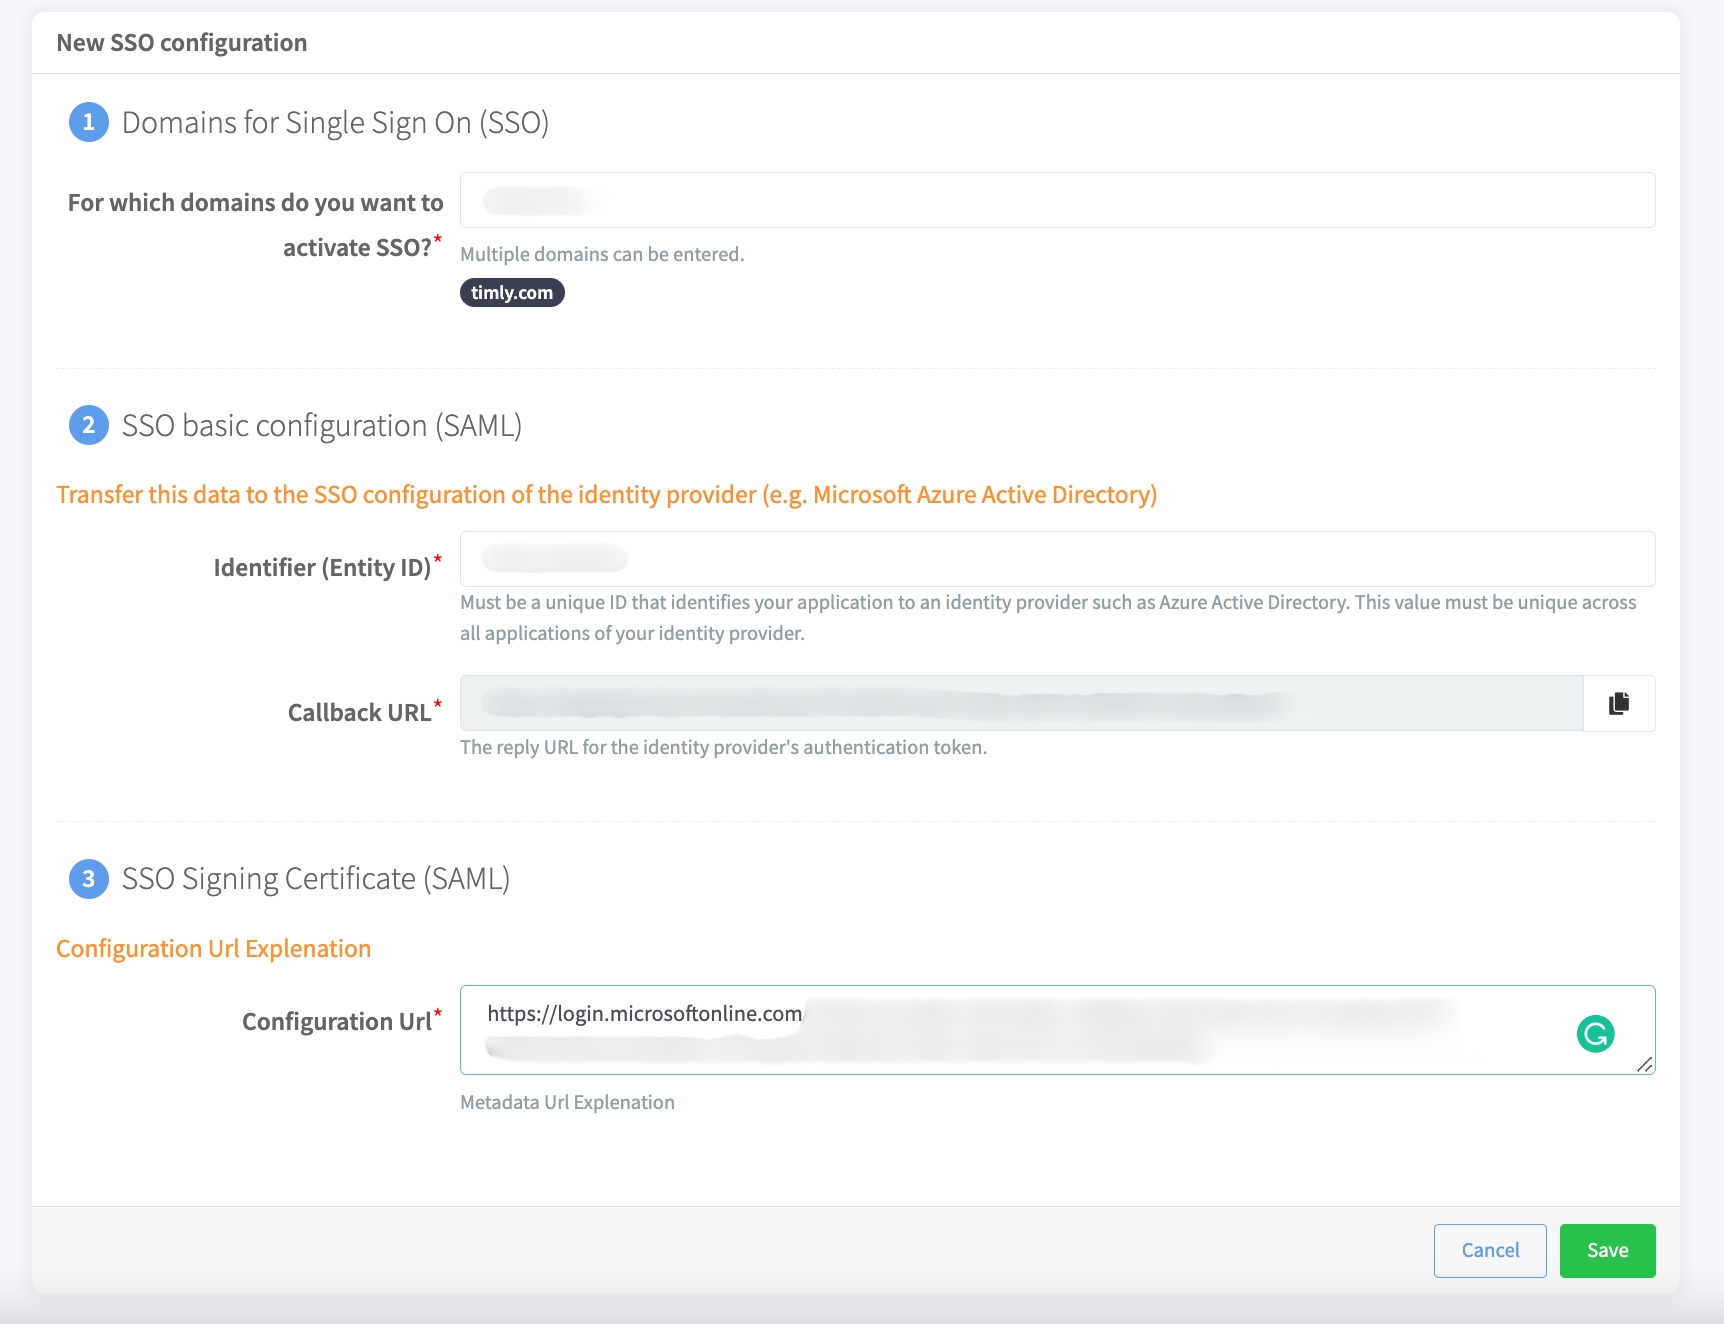
- Add the domain(s).
💡 Separate the domain names with a ";" (semicolon) or a " " (space)
Step 2
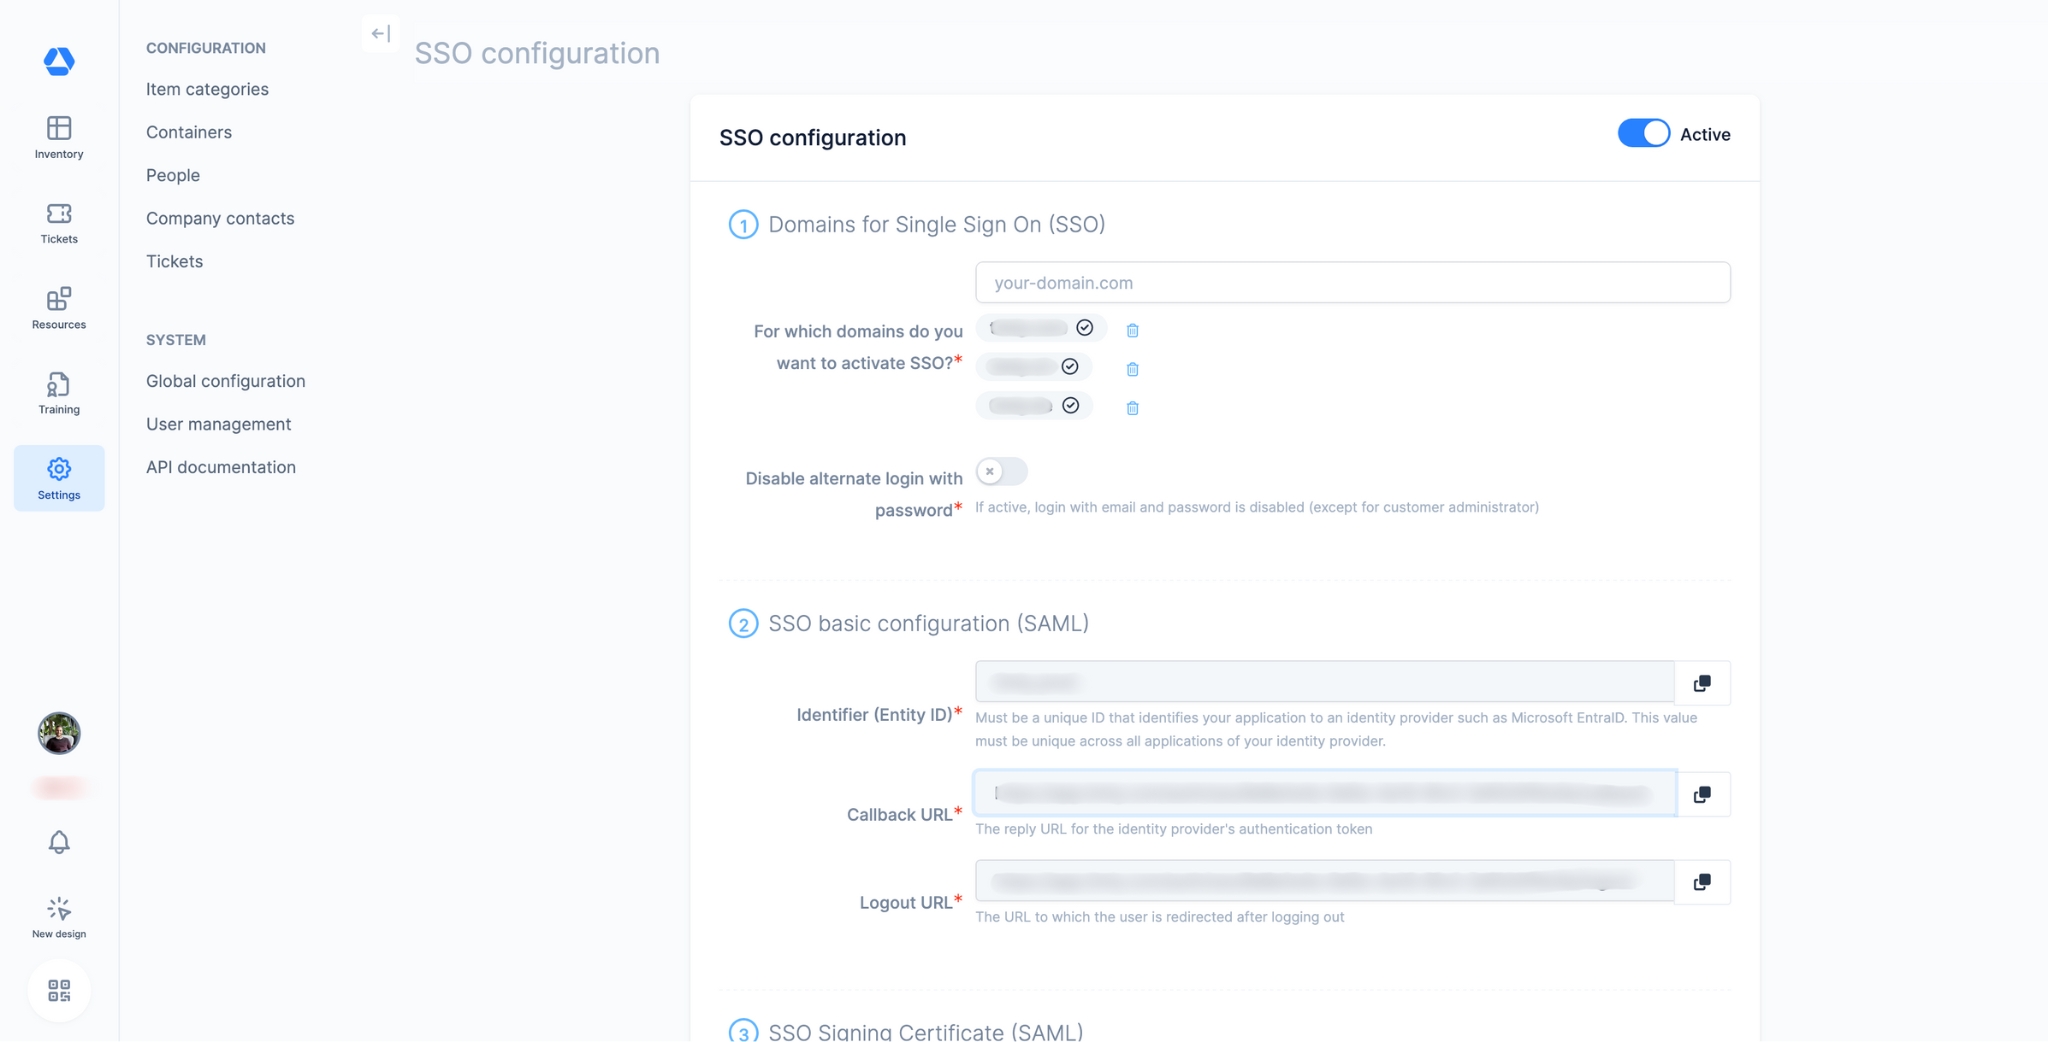
- The fields are pre-filled. Please copy these values to Microsoft Entra ID.
💡 Keep this page open, as these values will be needed again in step 11
Step 3
- Click on "Save".
🛜 Microsoft Entra ID
You must have administrator access to Microsoft Entra ID and be logged in to start the setup.
Step 4
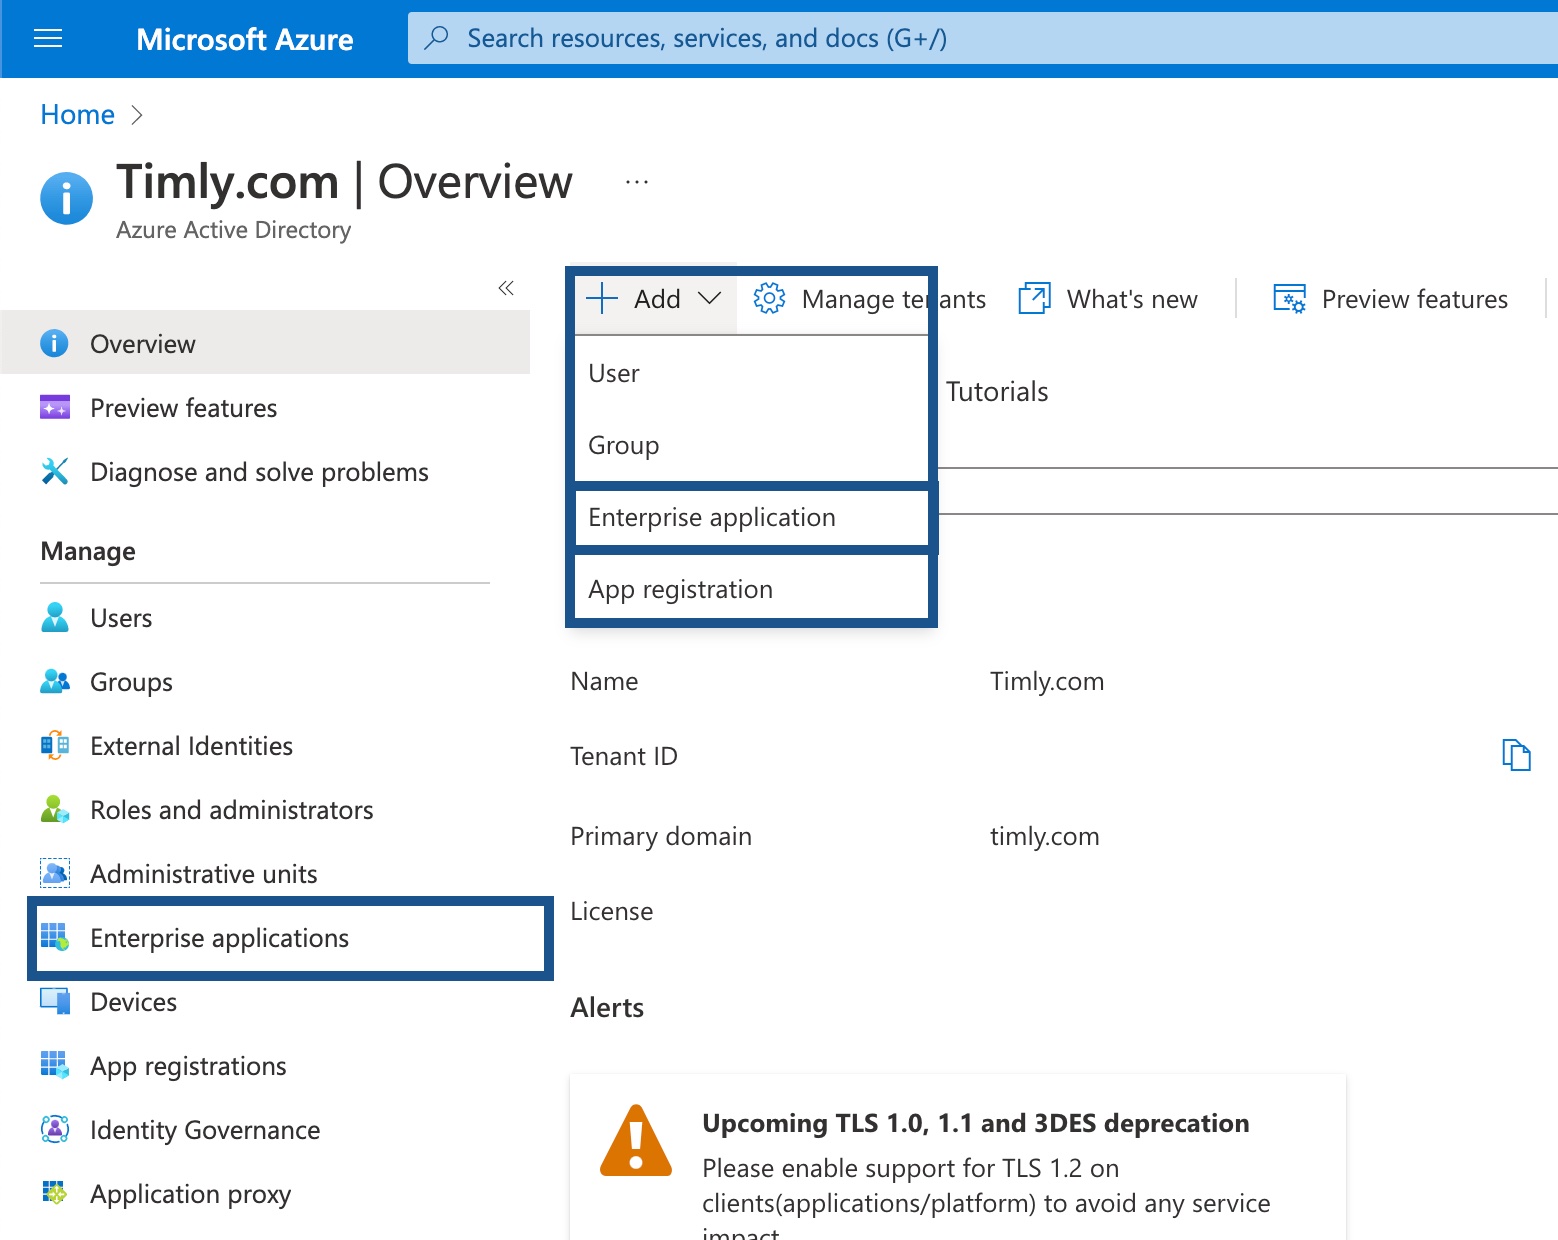
- Click on "Enterprise application" (🇩🇪: "Unternehmensanwedung"; 🇫🇷: "Application d’entreprise").
- Click on the "+" icon.
Step 5
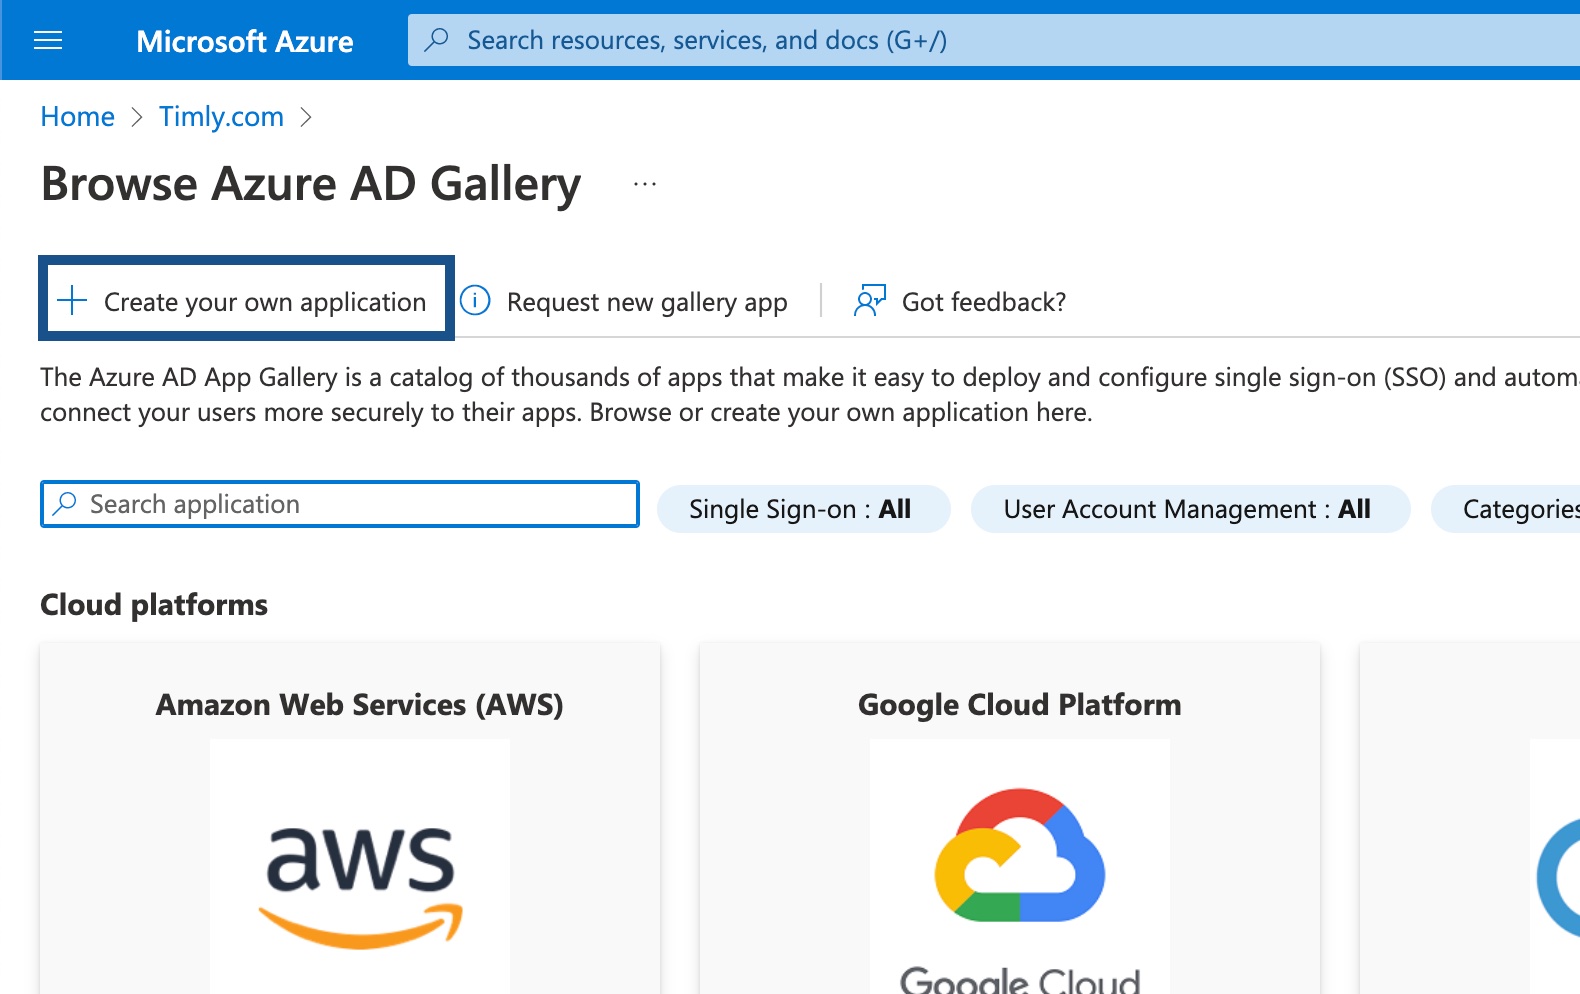
- Click on "Create your own application" (🇩🇪: "Eigene Anwendung erstellen"; 🇫🇷: "Créer votre propre application").
Step 6
- App name: Timly
- Select: "Integrate any other application you don't find in the gallery (Non-gallery)"
- Click on "Create"
Step 7
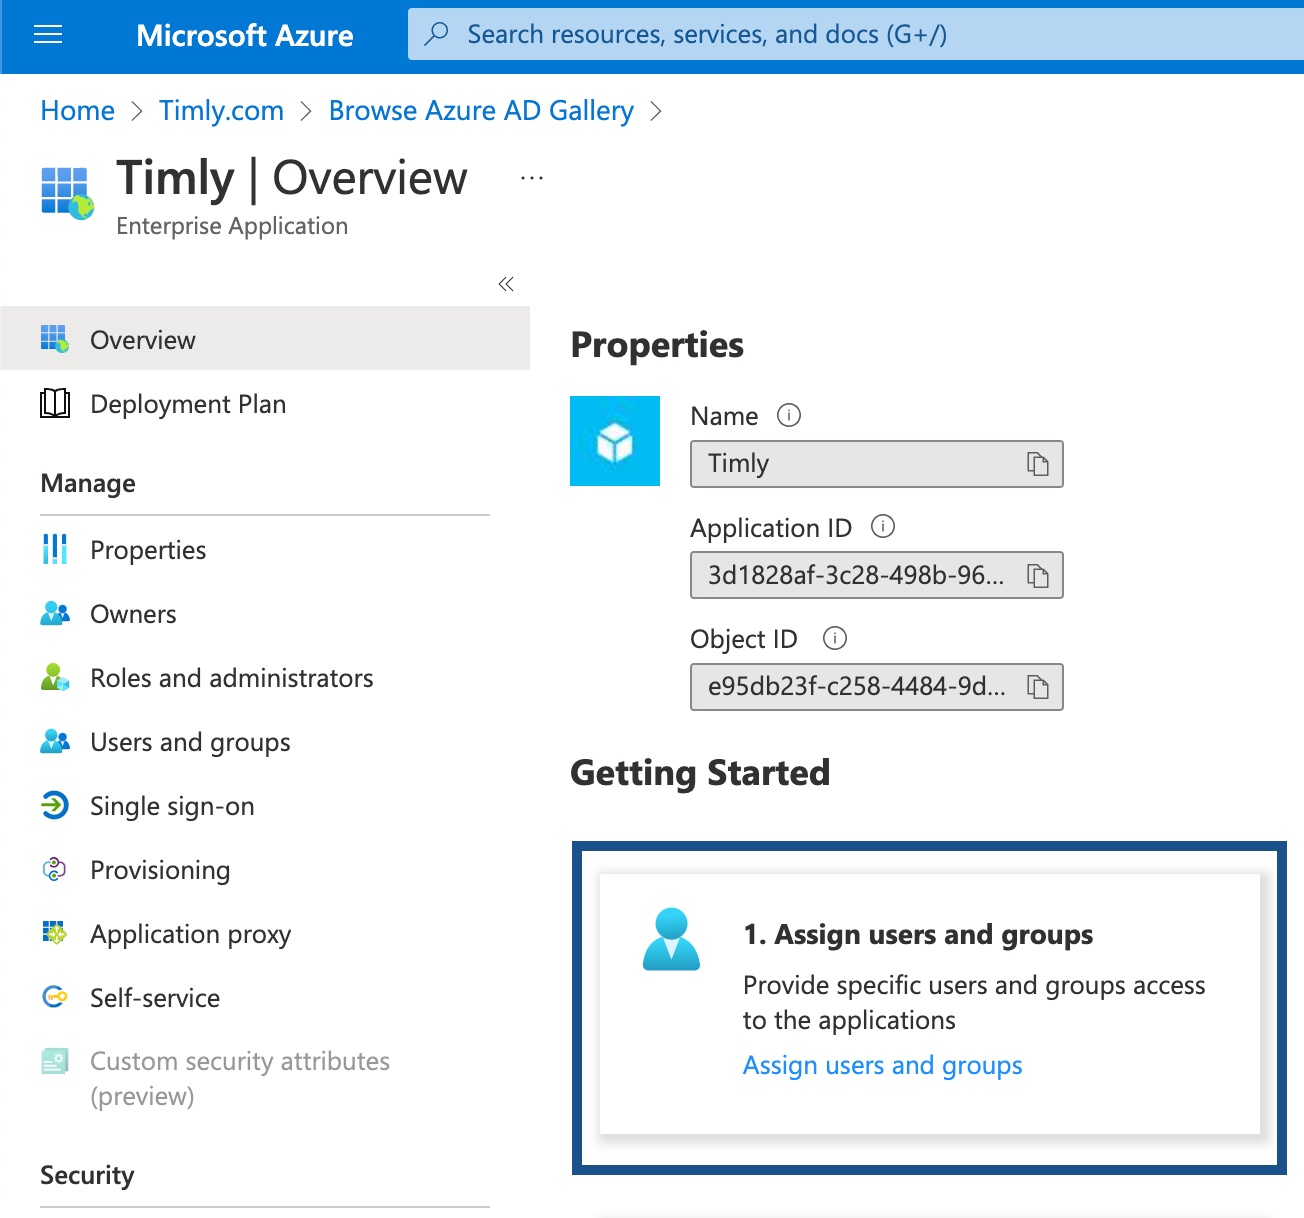
- Click on "Assign users and groups" (🇩🇪: "Benutzer und Gruppen zuweisen"; 🇫🇷: "Attribuer des utilisateurs et des groupes").
Step 8
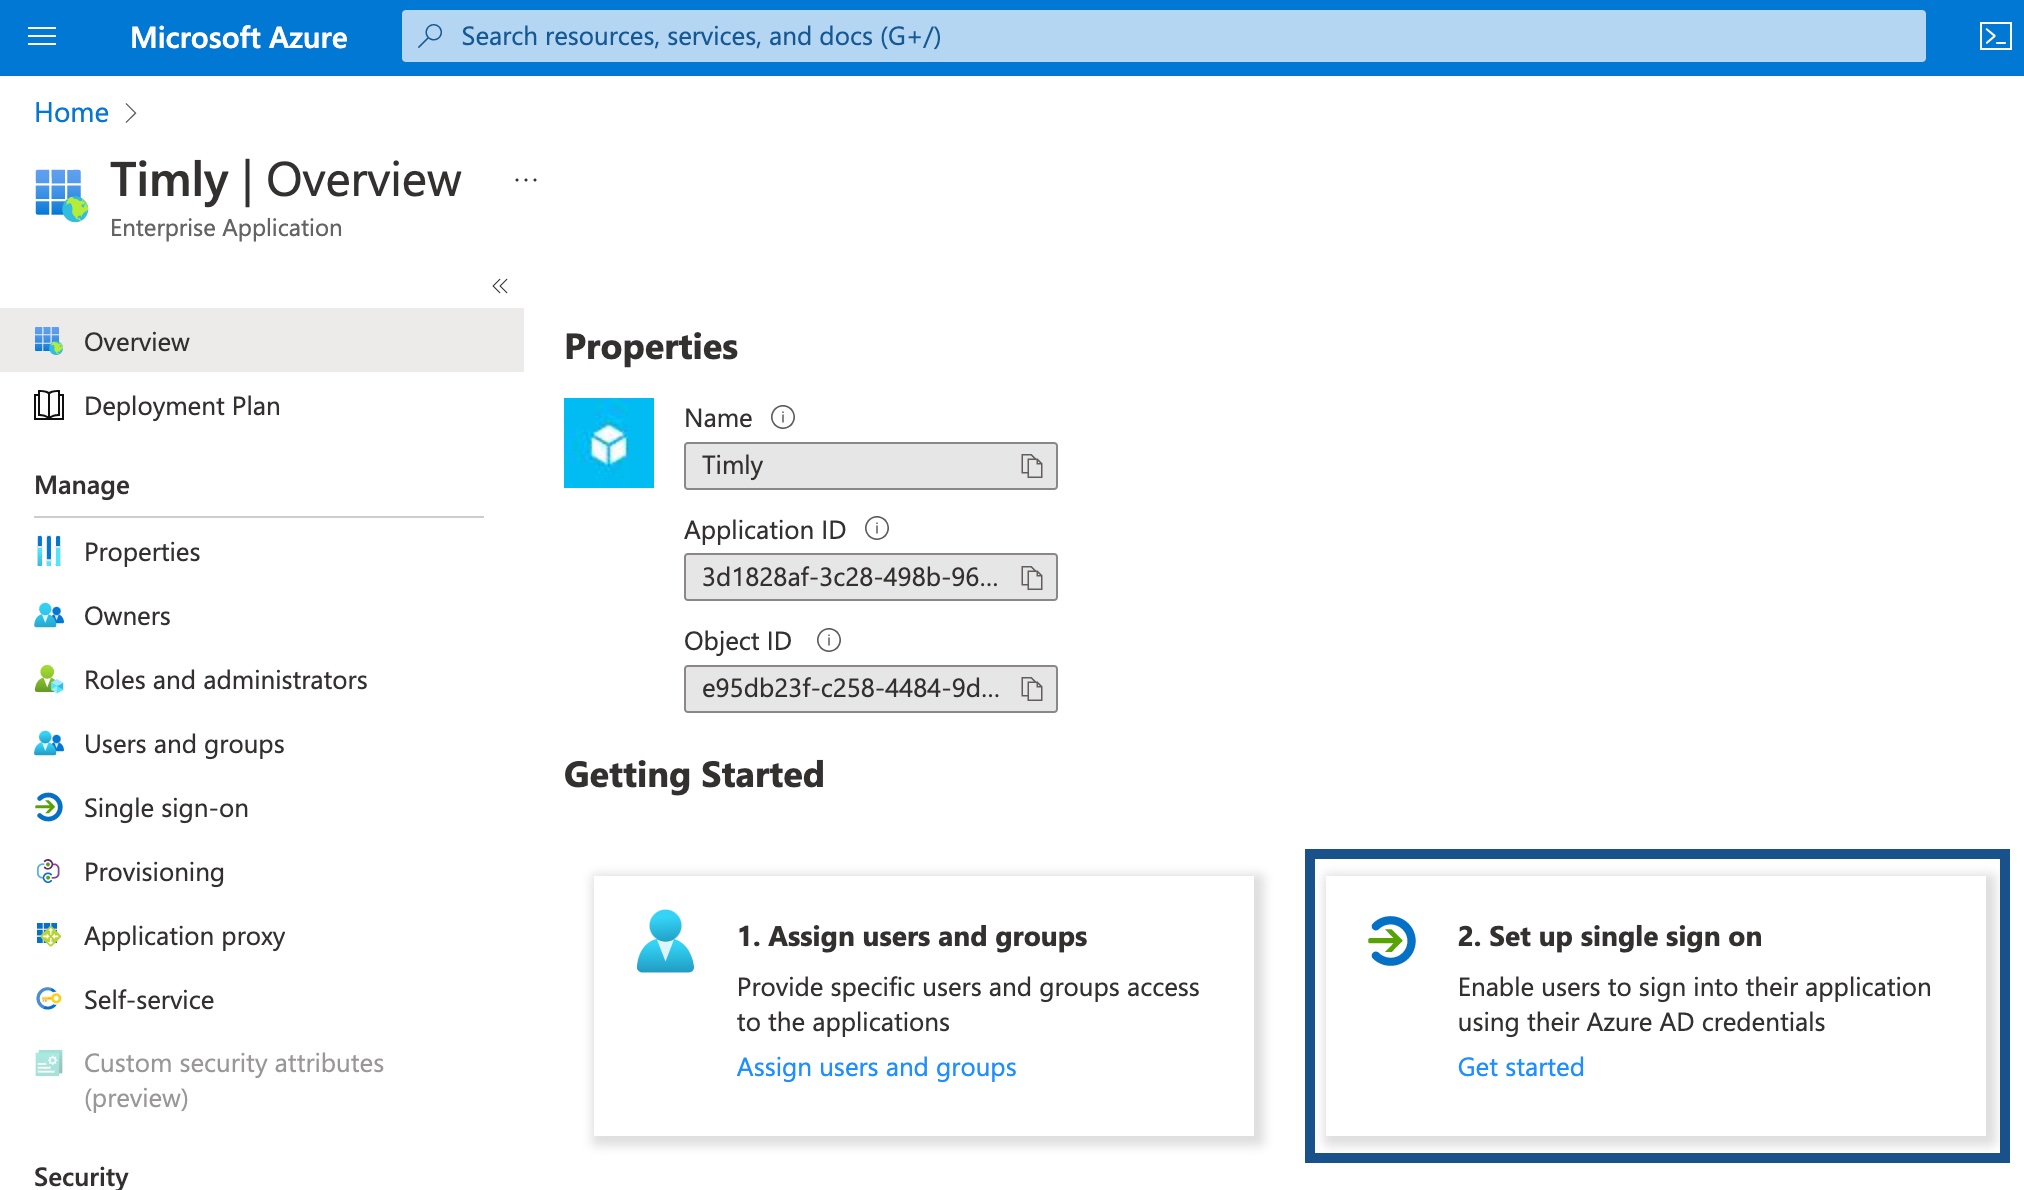
- Click on "Set up single sign on" (🇩🇪: "SSO einrichten"; 🇫🇷: "Configurer l’authentification unique").
Step 9
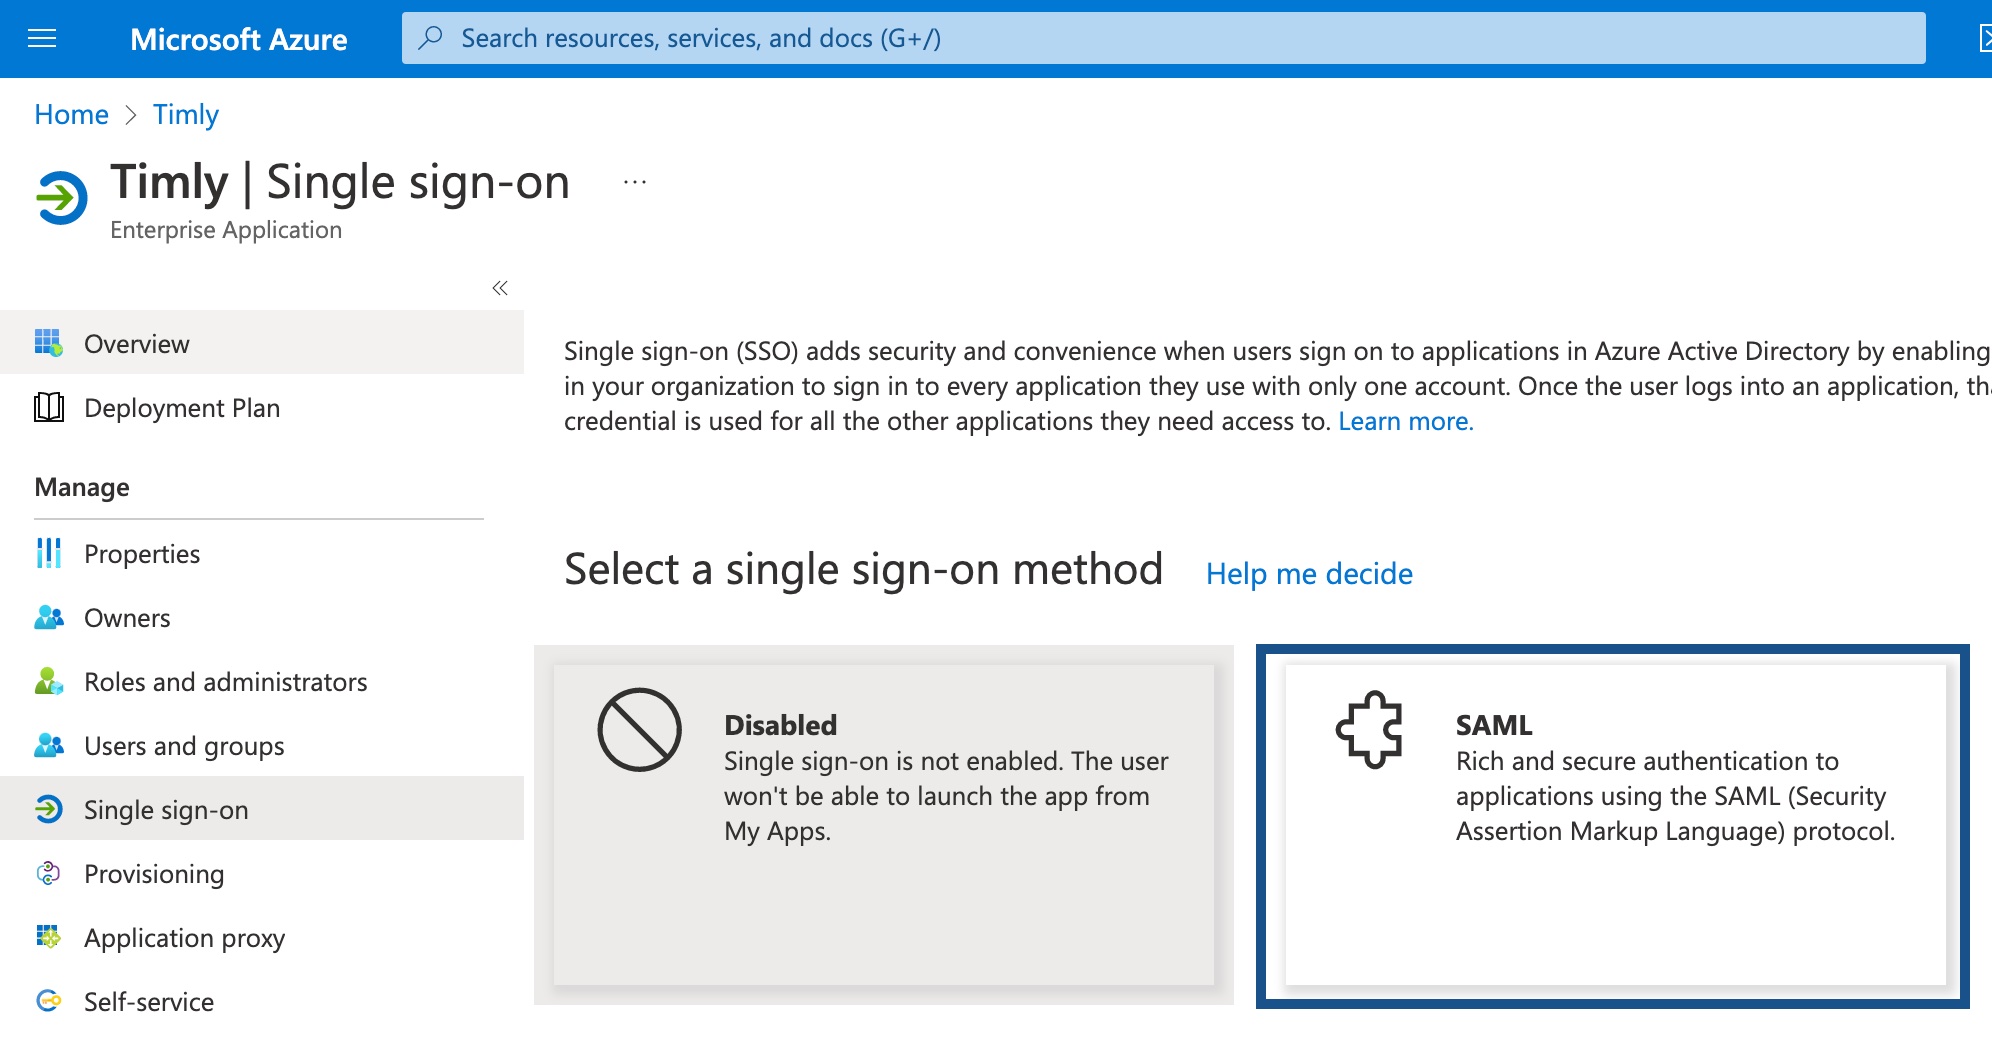
- Click on "SAML".
Step 10
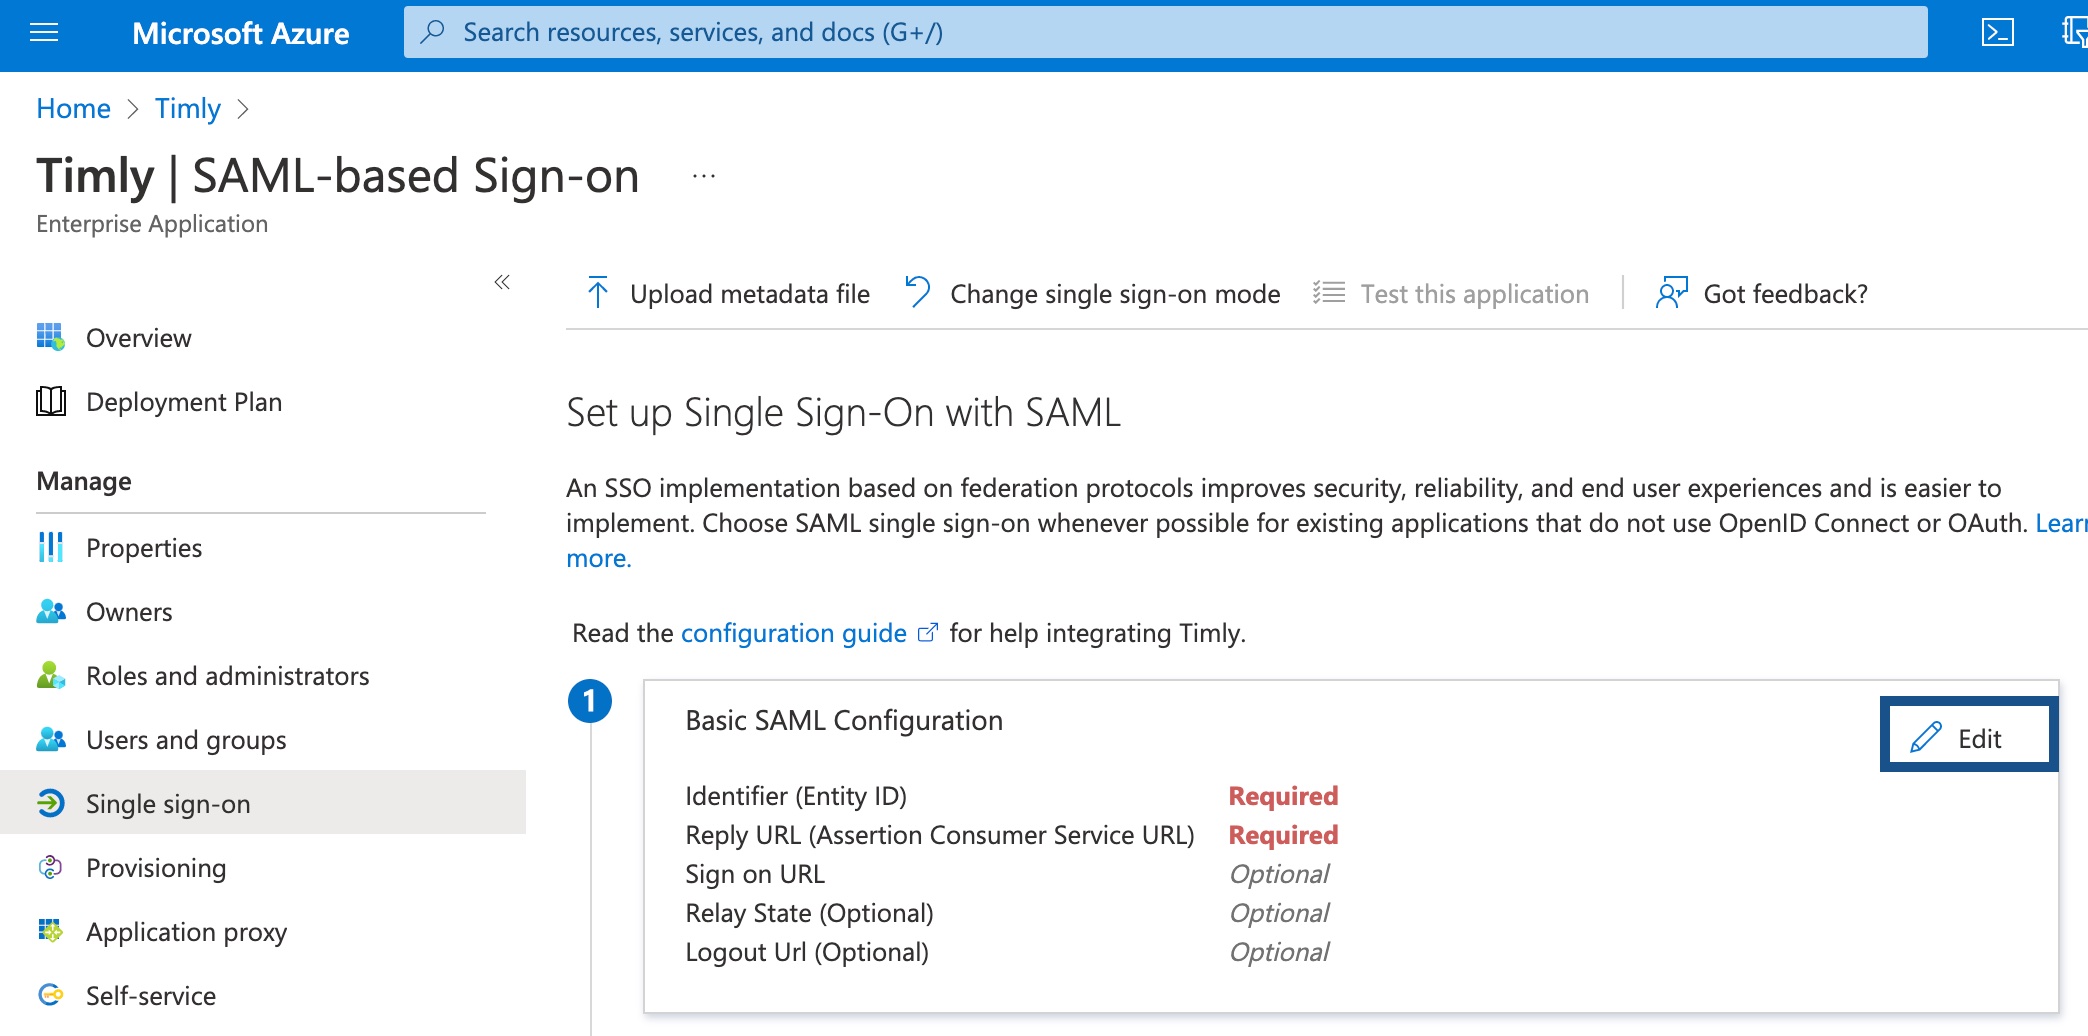
- Click on "Edit".
Step 11
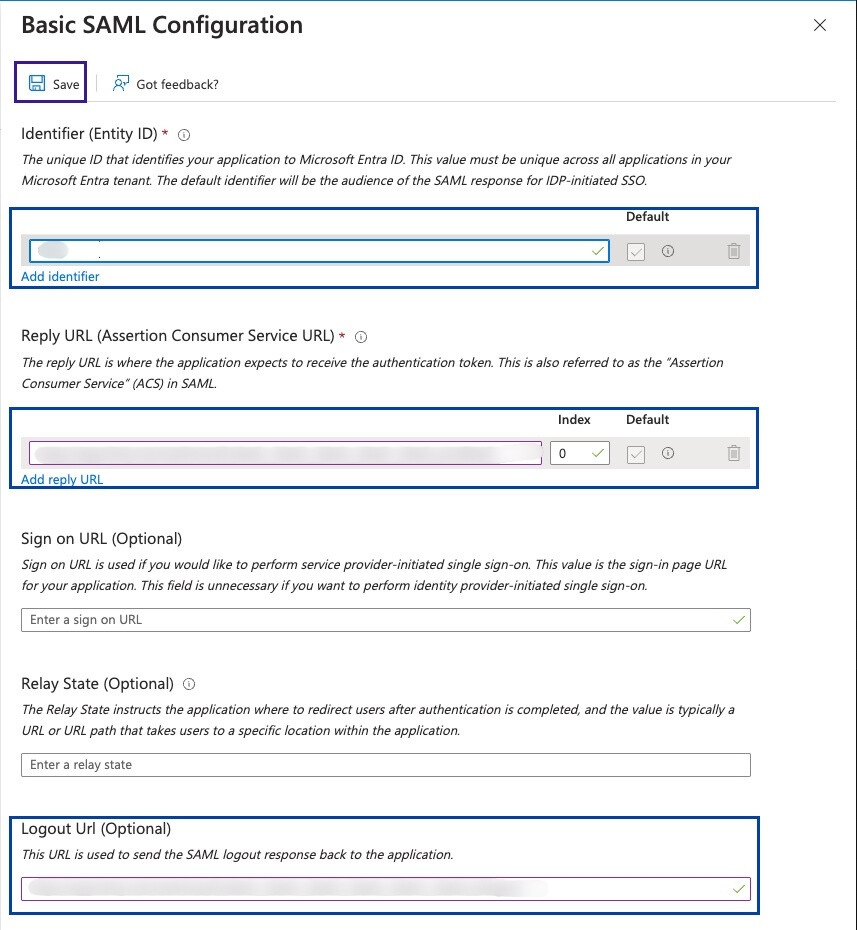
- Complete the fields:
- Identifier (Entity ID)*: Paste the identifier copied from Timly (see Step 2)
* (🇩🇪: Bezeichner (Entität-ID); 🇫🇷 "Identificateur (ID d’entité)")
- Reply URL (Assertion Consumer Service URL)* : Paste the URL copied from Timly (see Step 2)
* (🇩🇪: "Antwort-URL (Assertionsverbraucherdienst-URL)"; 🇫🇷: "URL de réponse (URL Assertion Consumer Service)")
- Logout URL*: Paste the URL copied from Timly (see Step 2)
- Identifier (Entity ID)*: Paste the identifier copied from Timly (see Step 2)
- Click on "Save".
Step 12
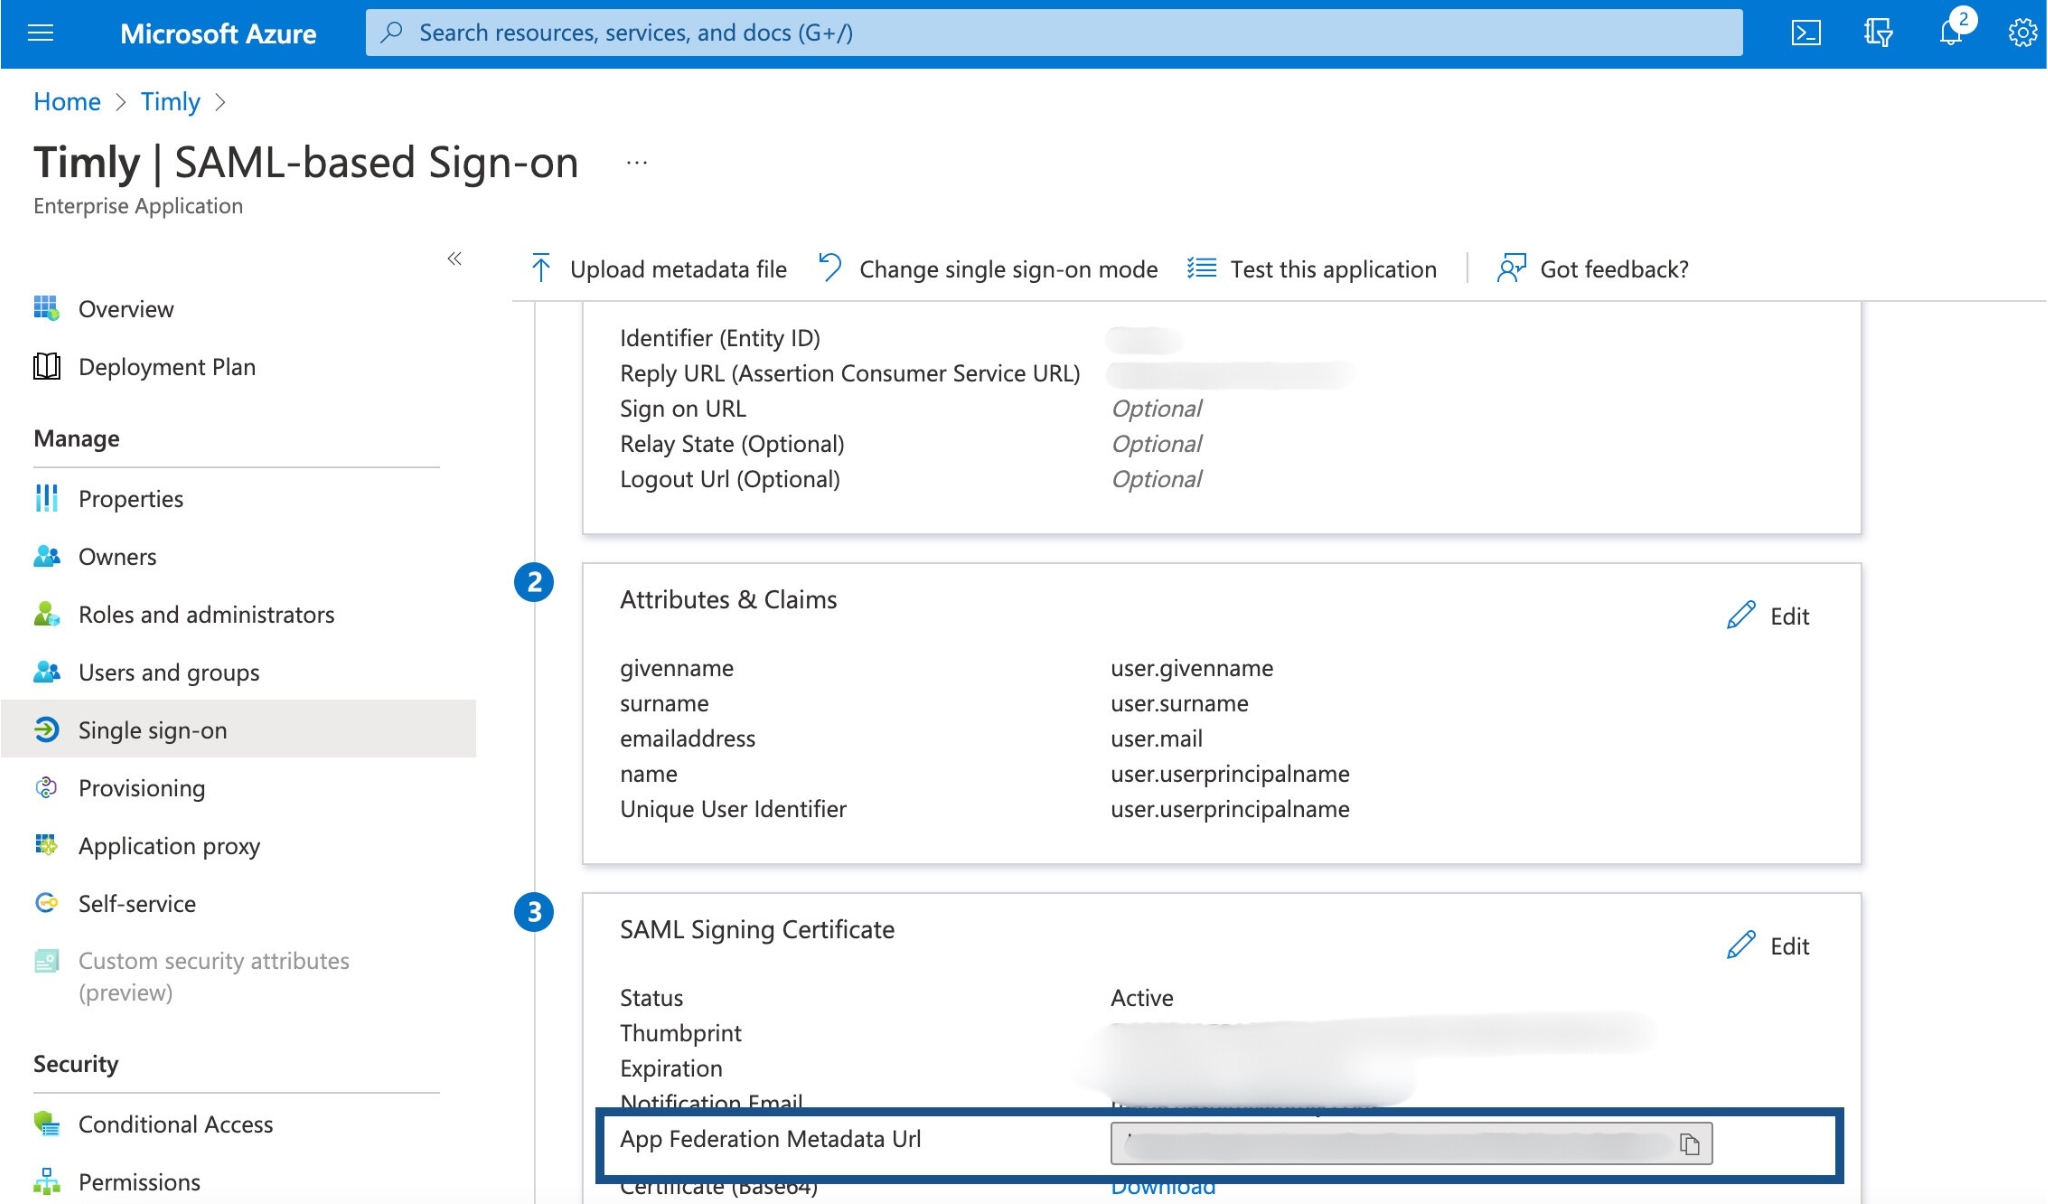
- Copy the "App Federation Metadata Url" (🇩🇪: "App-Verbundmetadaten-URL"; 🇫🇷: "URL des métadonnées de fédération d'application")
🛜 Timly-App
Return to the SSO settings in the Timly app.
- Add the URL copied from Microsoft Entra ID and click on "Save".
✅ Your Single Sign-On (SSO) access has been successfully implemented.
📚 Ressources supplémentaires
- Centre d'aide : F.2 - How to configure user provisioning
- Centre d'aide: F.3 - How to configure person provisioning
📩 Vous souhaitez en savoir plus sur notre fonctionnalité de Single Sign On ? Réservez une démonstration en ligne (gratuite) de l'un de nos experts en gestion d'inventaire. Si vous avez des questions, n'hésitez pas à nous contacter à [email protected].

