F.2 - How to configure user provisioning
🛜 Timly-App
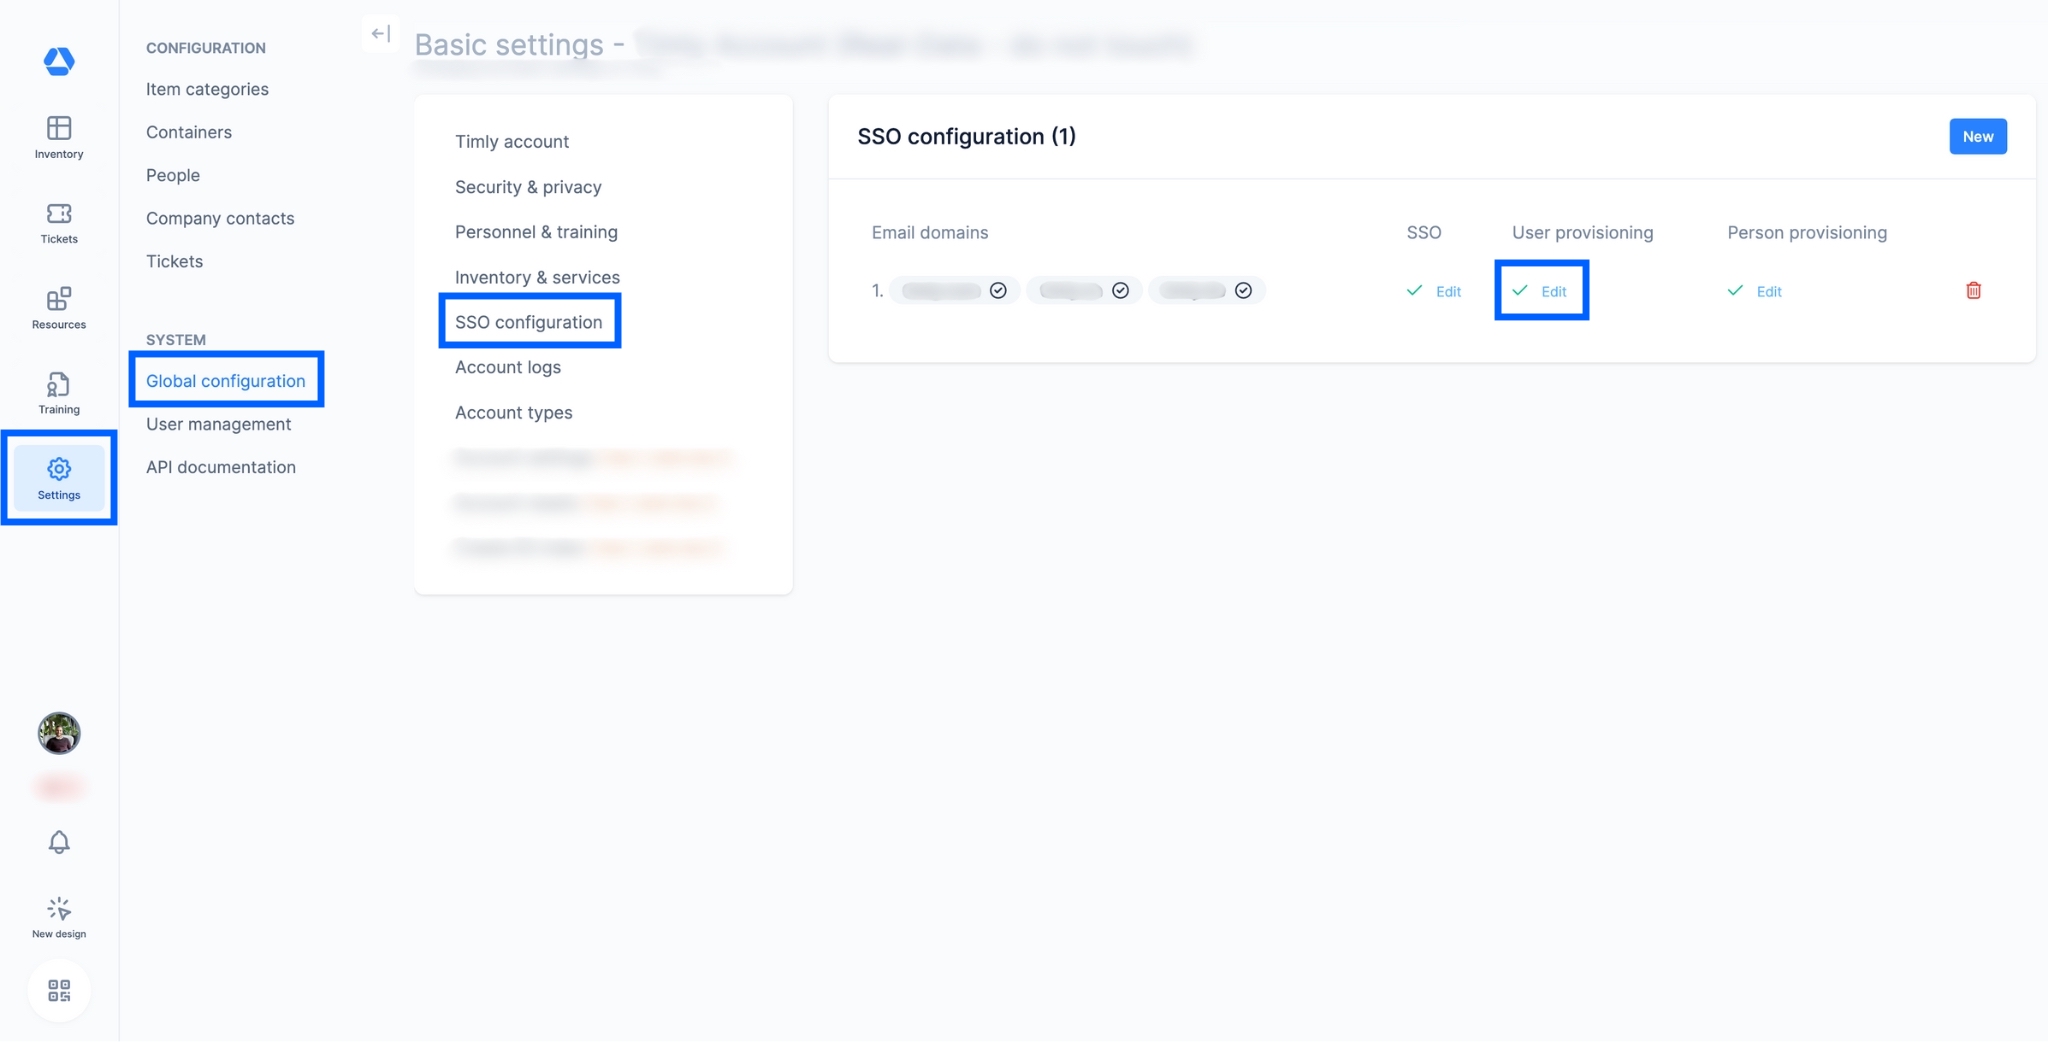
- Log in to Timly.
- Click on "Settings," then "Global configuration," and finally "SSO configuration".
- To set up user provisioning, click on "Edit" below "User provisioning".
Step 1
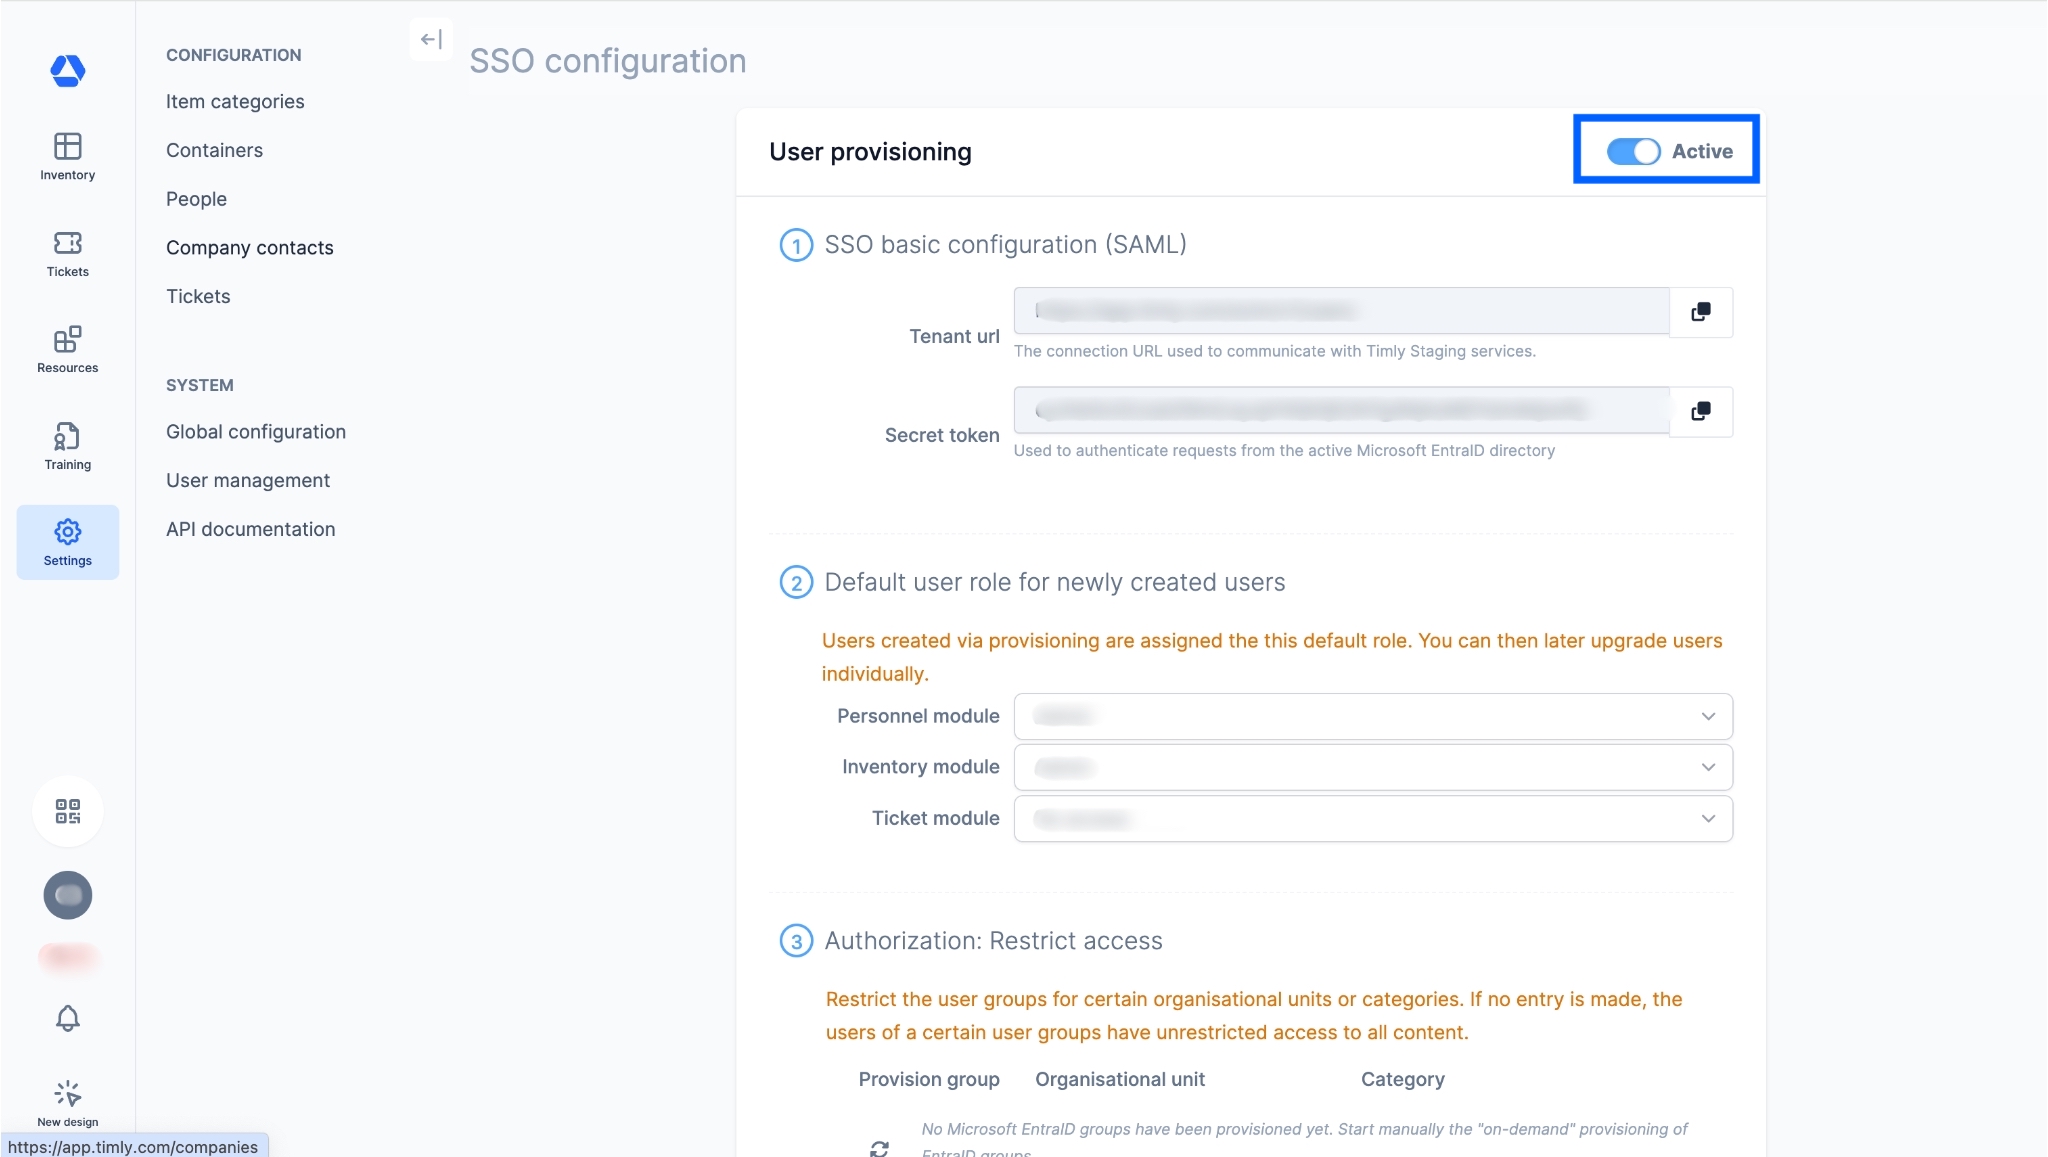
- Activate the user provisioning.
Step 2
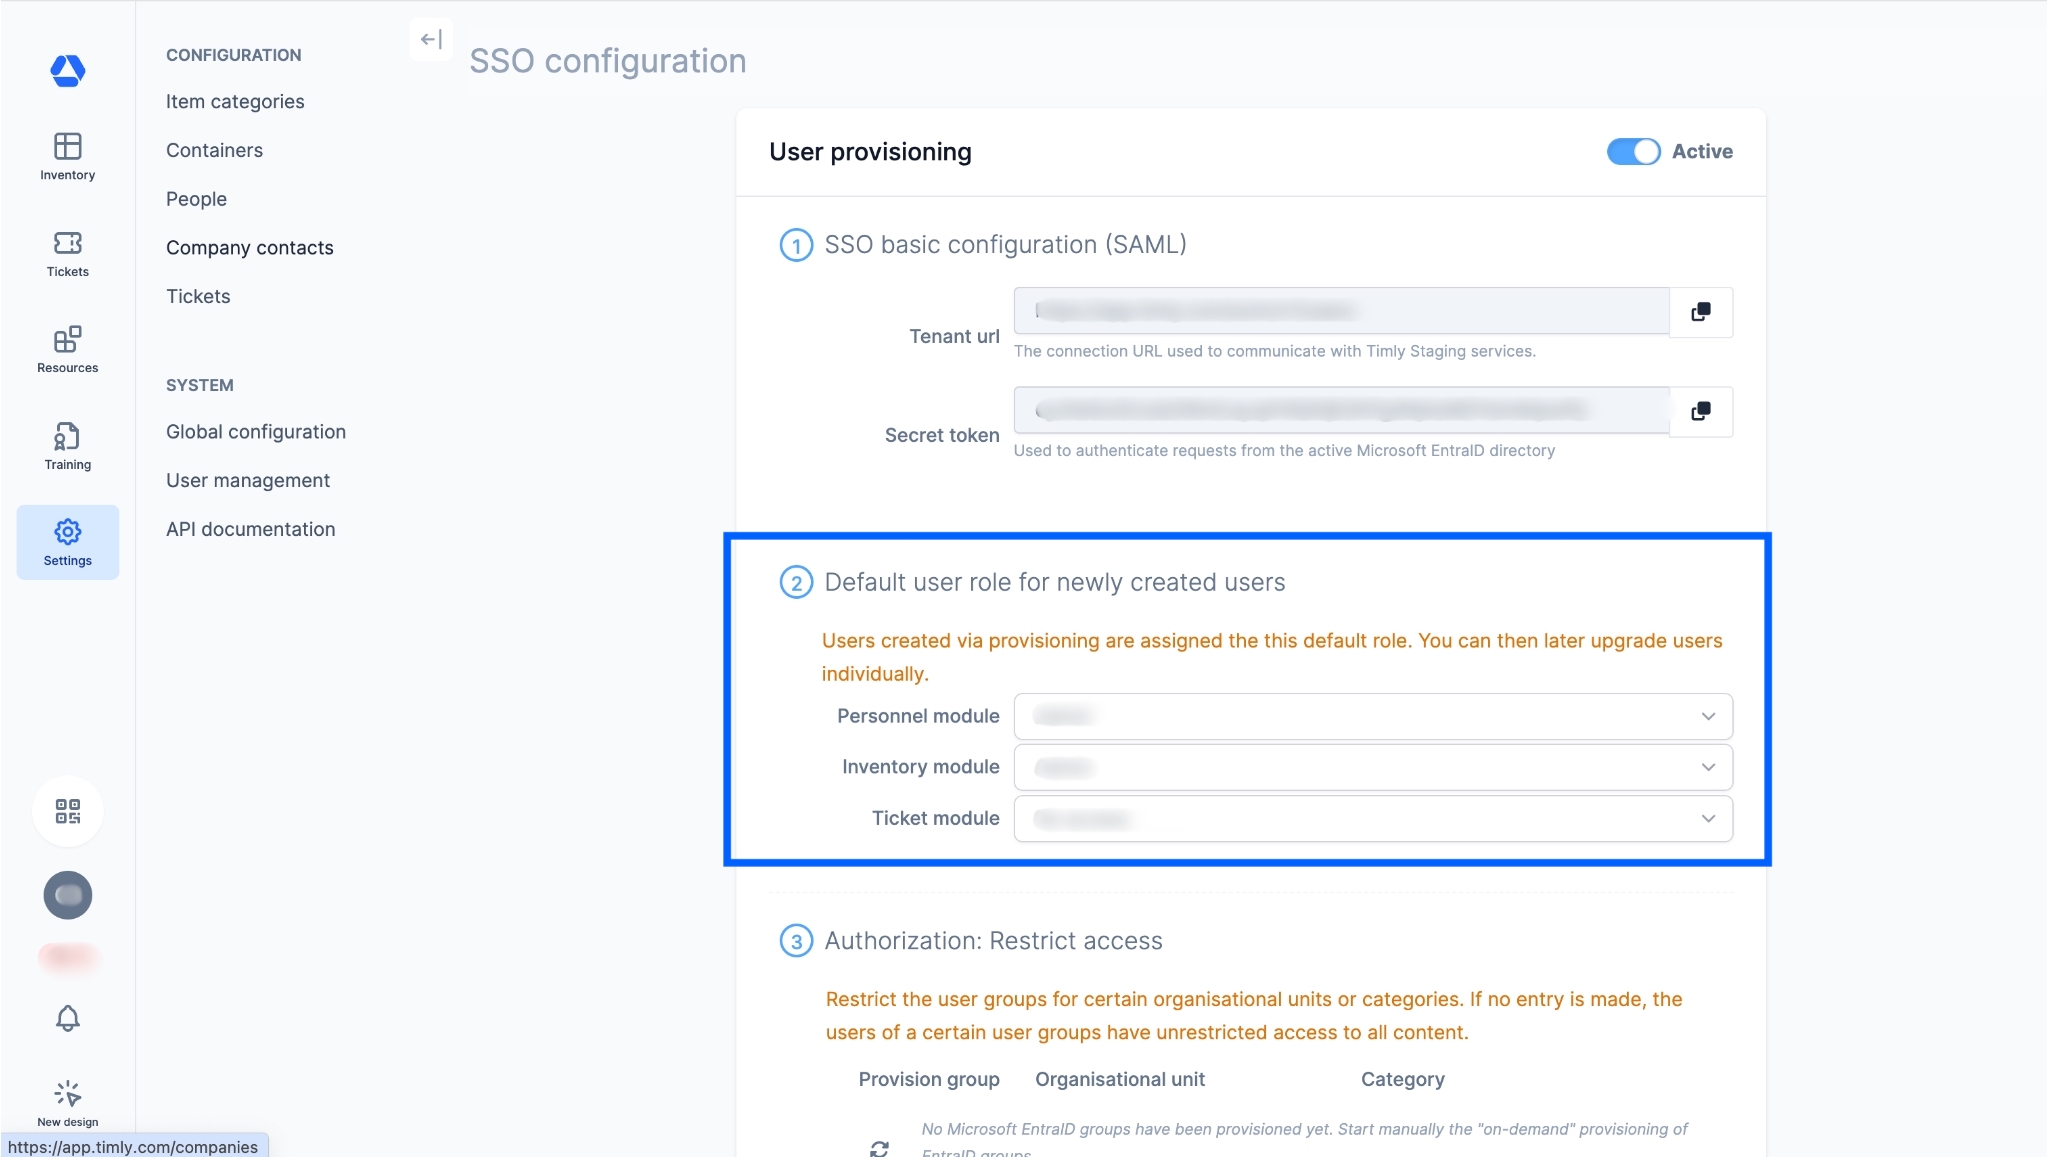
- Set the minimum default for new users for each module you have activated. New users will automatically receive this role upon creation. Assign the “lowest” role a user might typically have. If you need to upgrade them to a higher role, you can manually do so in the app after successful provisioning.
Step 3
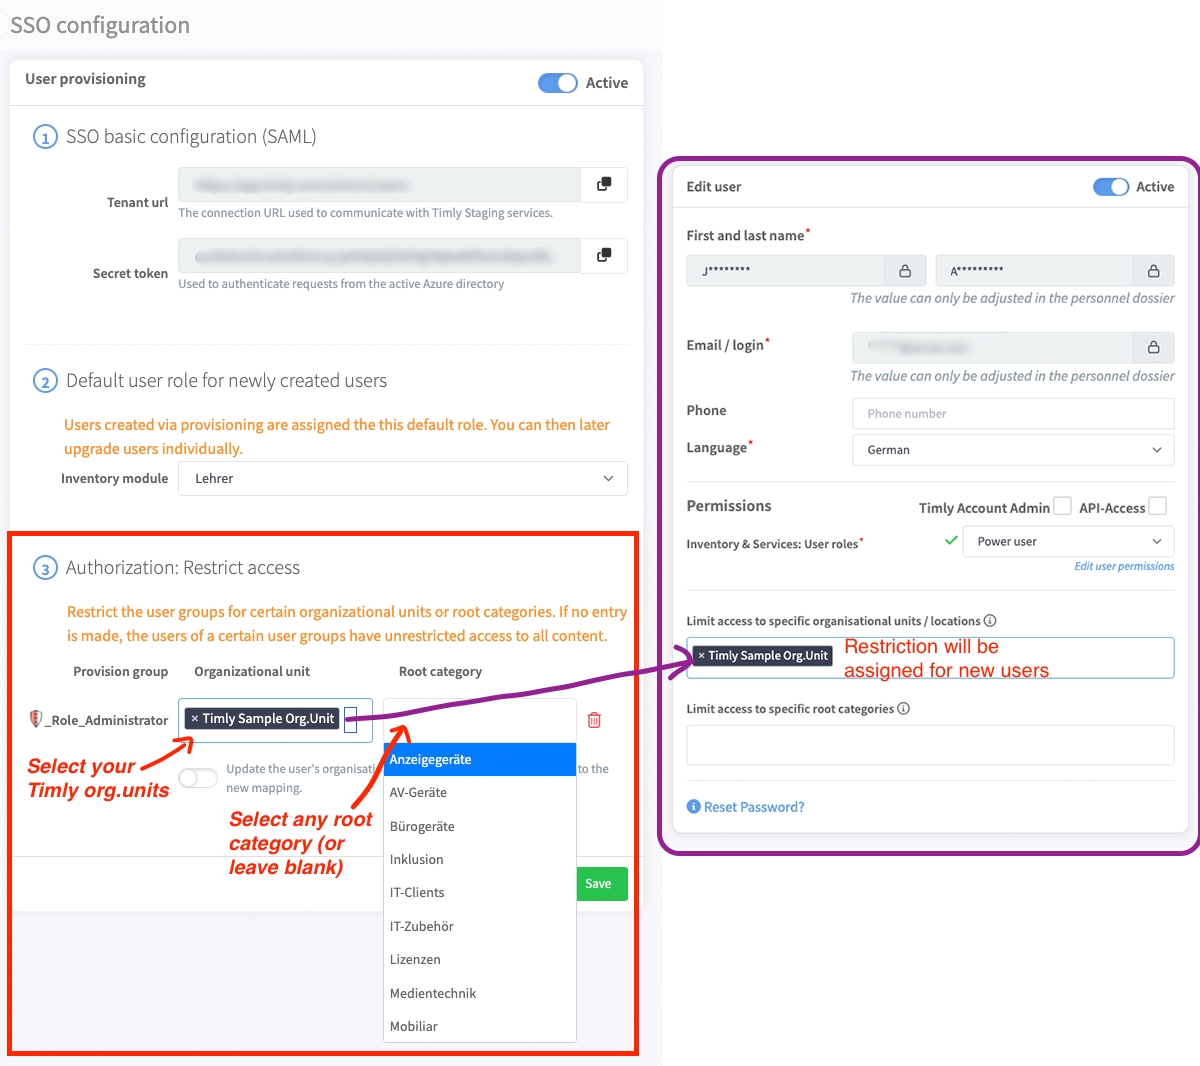
- Restrict user access (if the advanced authorization system is active)
If you have assigned your users to groups, they will be synchronized with Timly. You can then restrict individual user groups to specific:- Organizational Units
- Root Categories (from Items)
These restrictions will be automatically applied upon user creation.
Step 4
- Click on "Save".
🛜 Microsoft Entra ID
Step 5

- Navigate to the "Enterprise applications" section (🇩🇪: "Unternehmensanwedung"; 🇫🇷: "Application d’entreprise").
Step 6
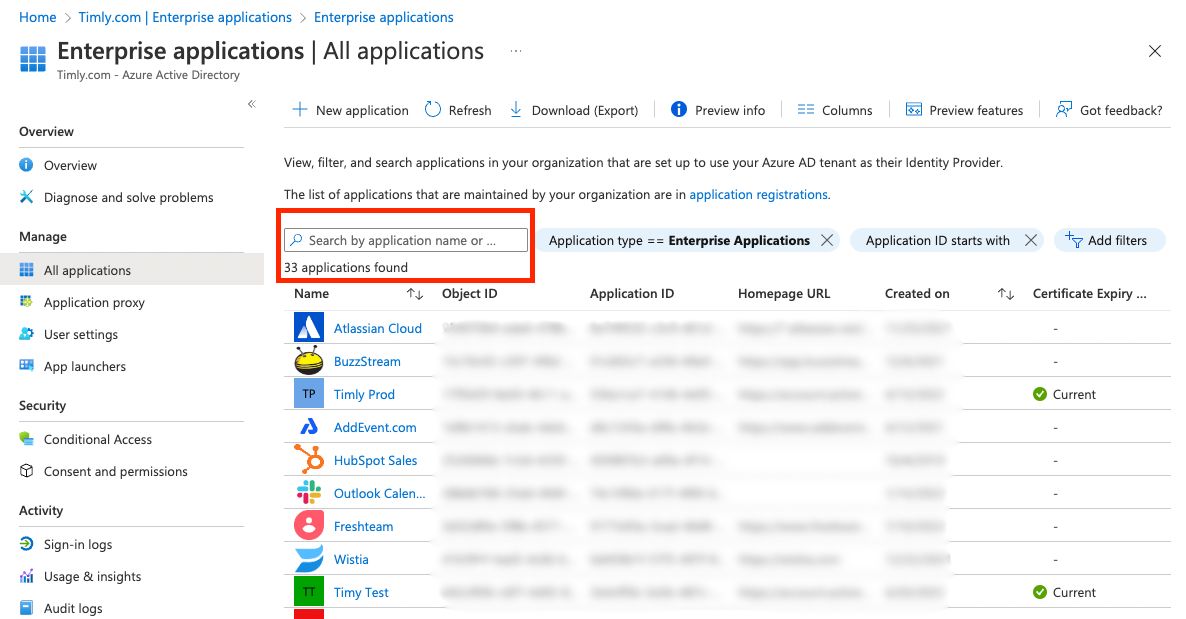
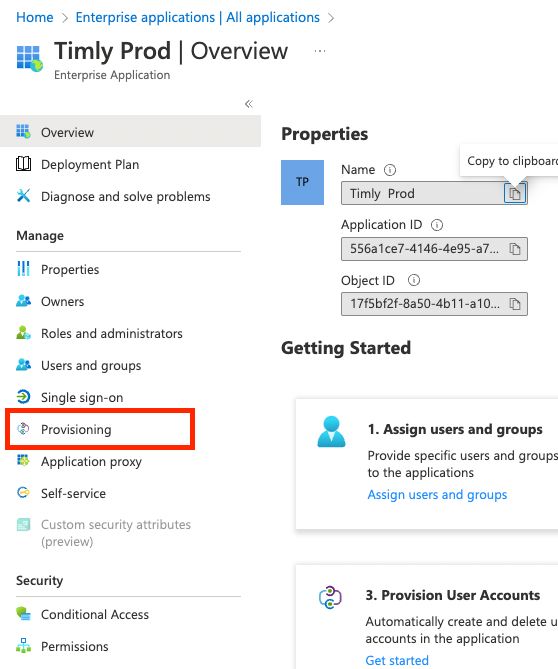
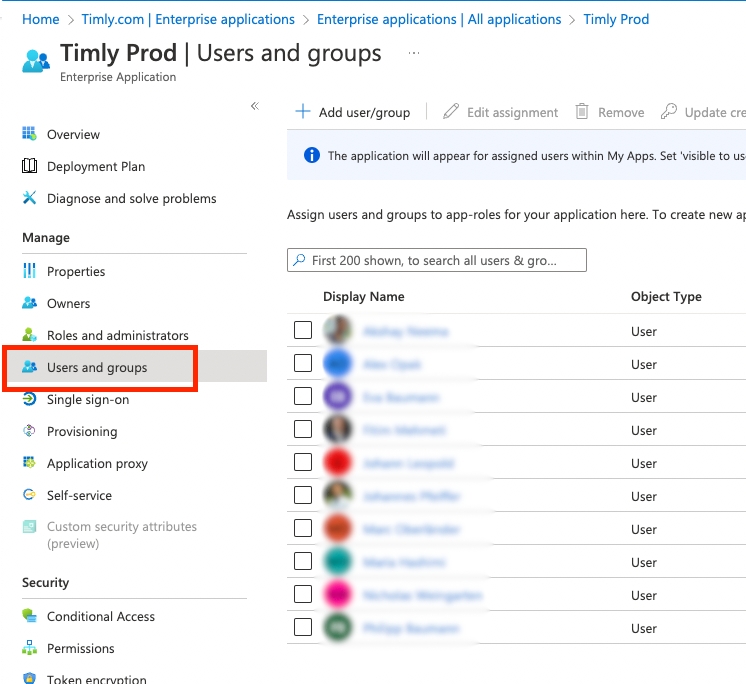
Navigate to the Timly Enterprise Application Registration.
- Search for the existing Timly Registration (the one where the SSO configuration is running – do NOT set up a new application).
- Once you have selected the Timly Enterprise App Registration, click on Provisioning.
Step 7
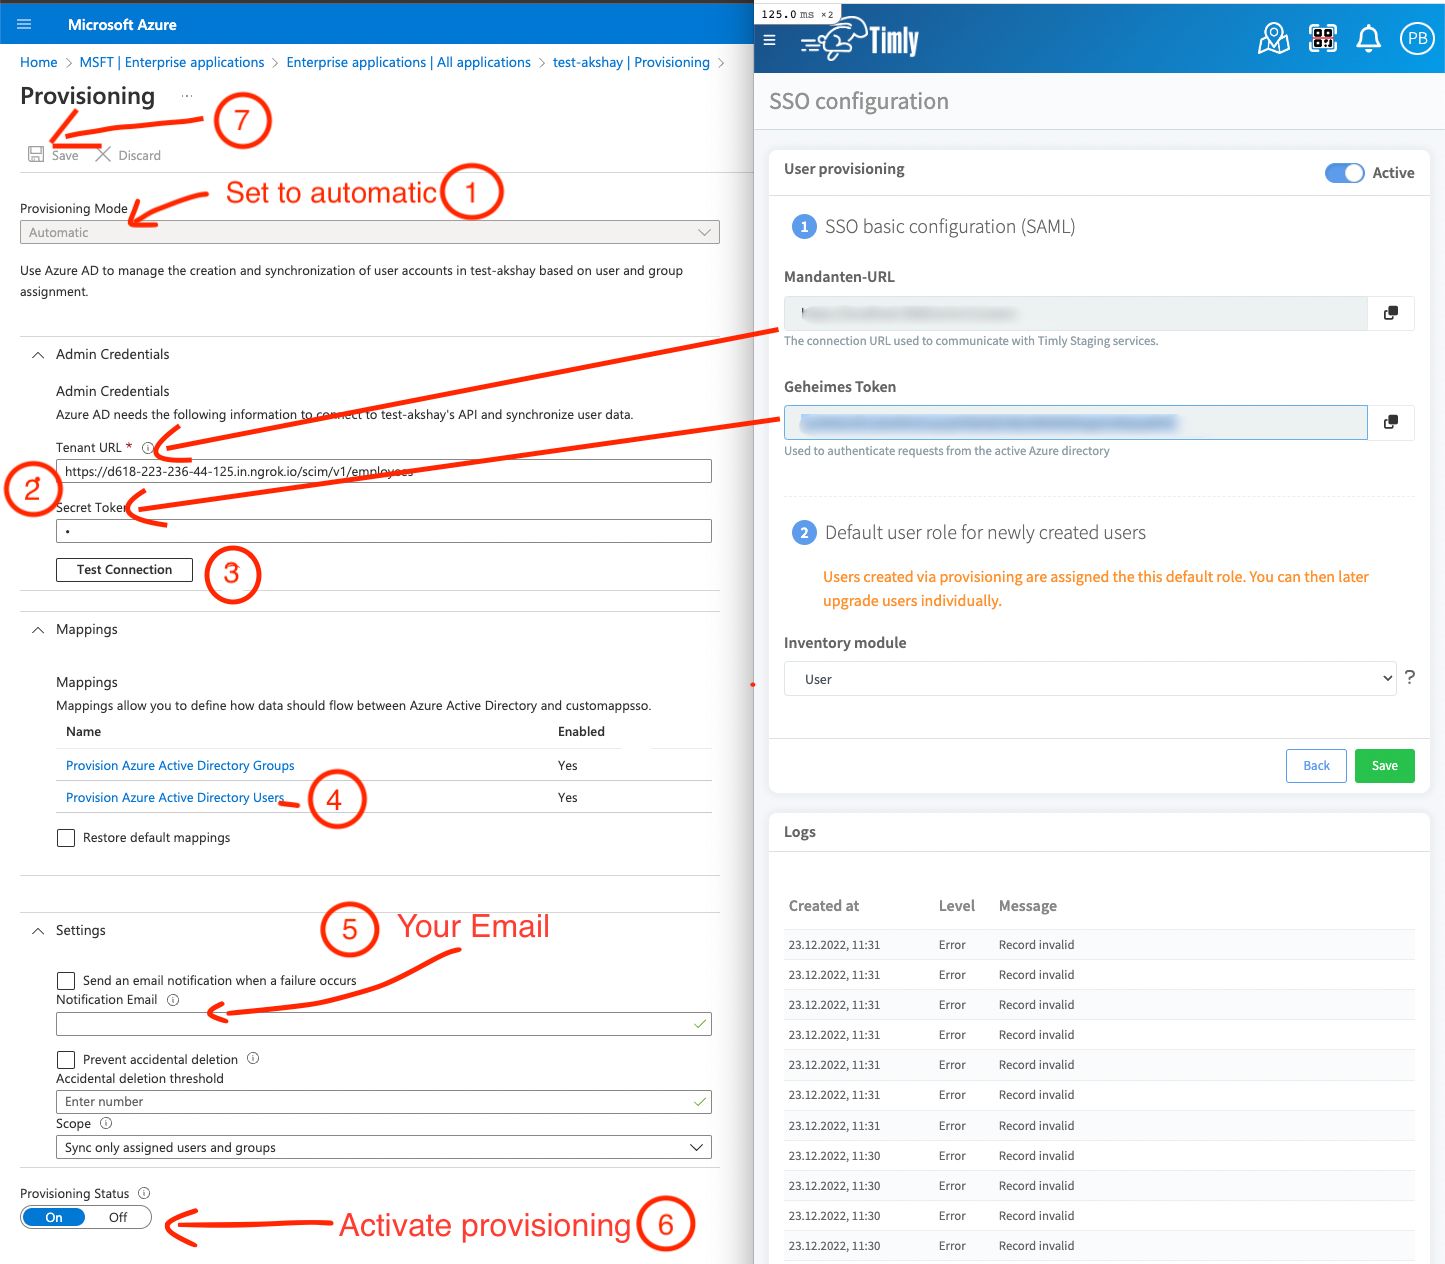
Configure Provisioning
- Set the provisioning method from manual to automatic.
- Enter the credentials from the Timly application into the corresponding fields.
- Test the connection to ensure everything is working.
- Mappings → See the next step.
- Add an admin email: You will receive emails in case of provisioning errors, ensuring everything runs smoothly.
- Activate provisioning.
- IMPORTANT! Do not forget to save.
Step 8
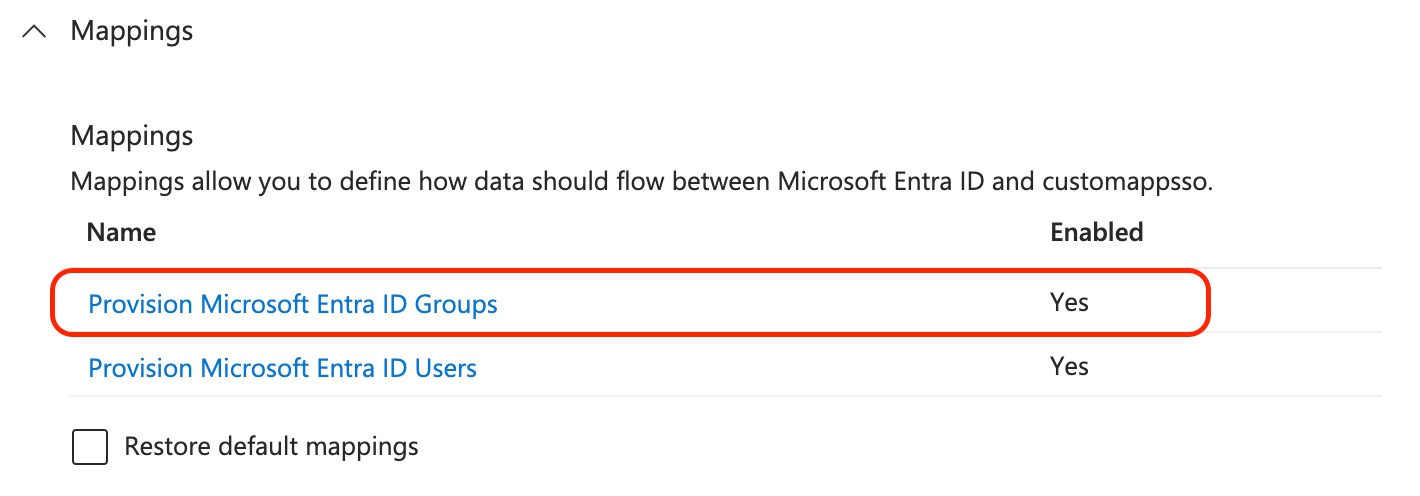
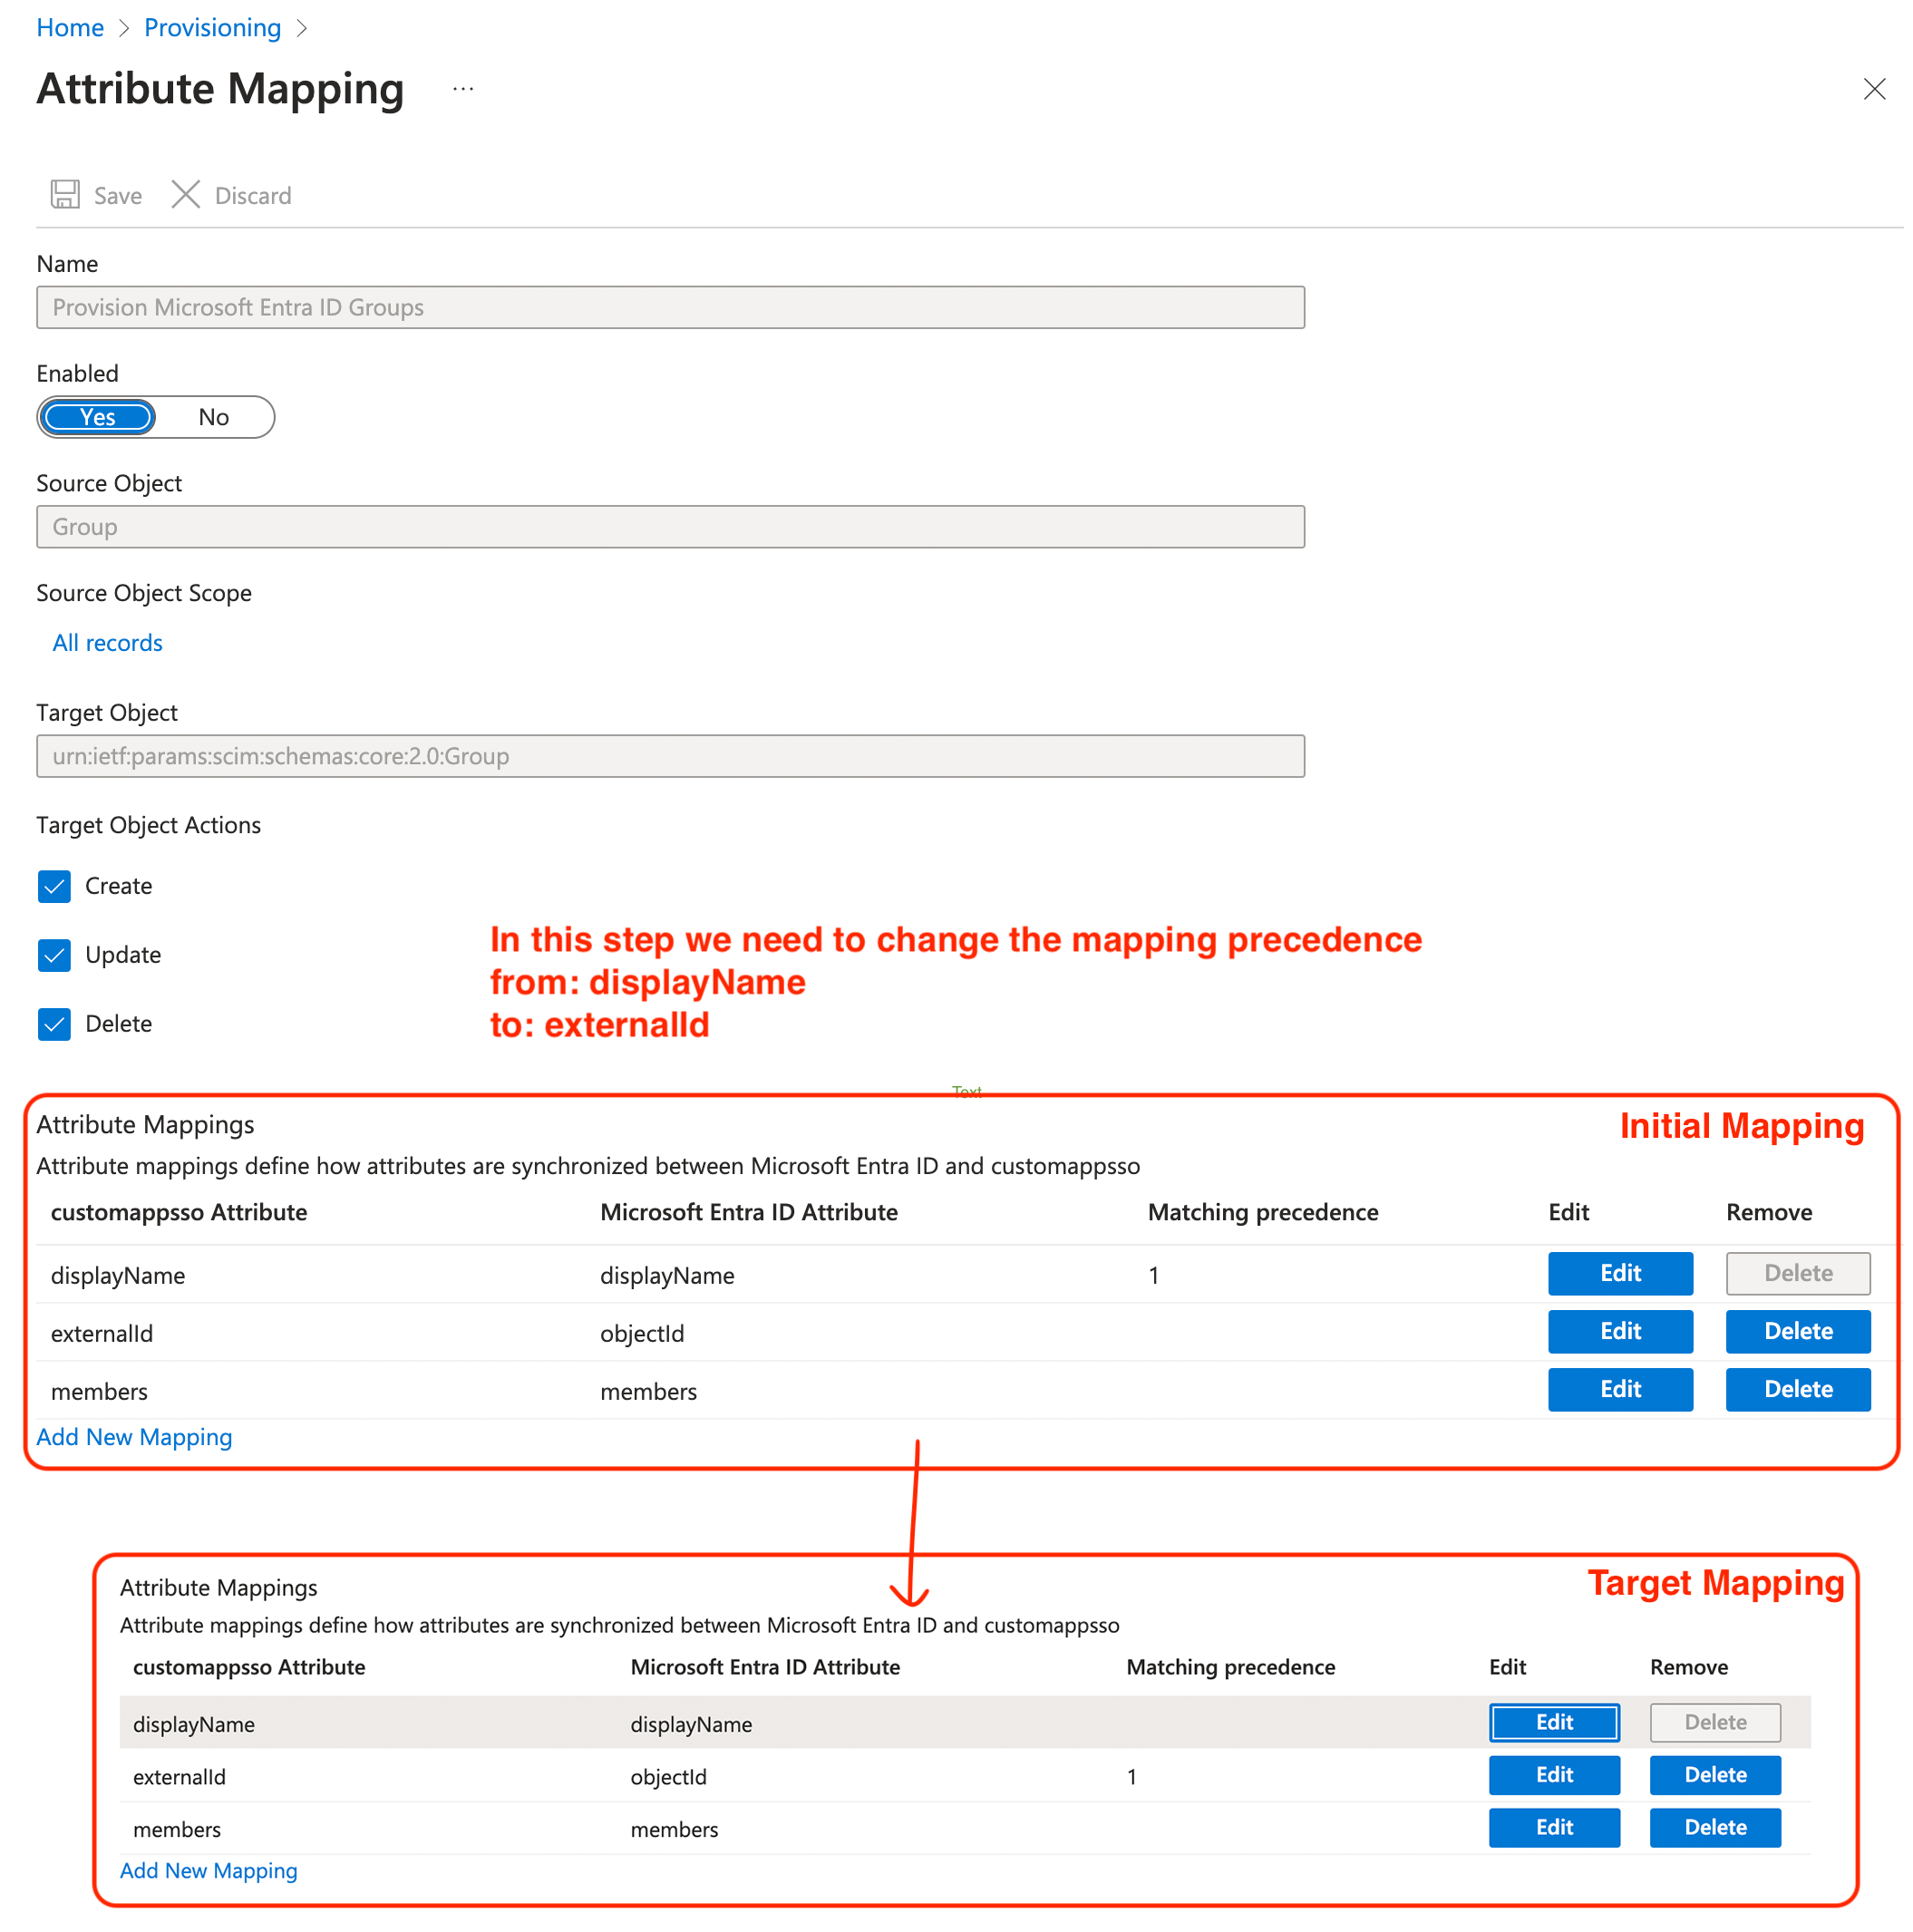
Set proper field mapping for AD User Provisioning (see previous step No. 7):
- Click on "Provision Microsoft Entra ID Groups Groups".
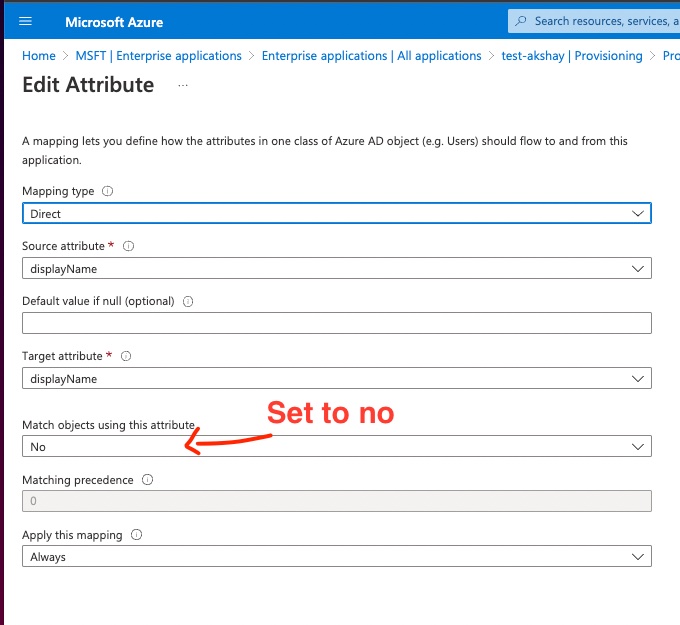
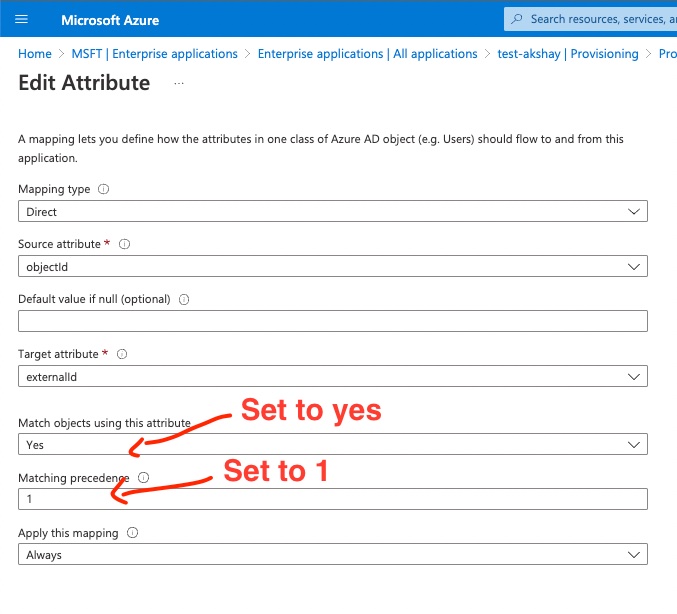
- In this step we need to change the mapping precedence from initially "displayName" to "externalID".
Step 9
Set proper field mapping for AD User Provisioning (see previous step No. 7):
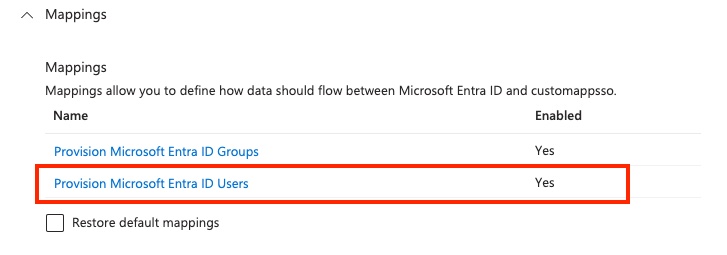
- Click on "Provision Microsoft Entra ID Users".
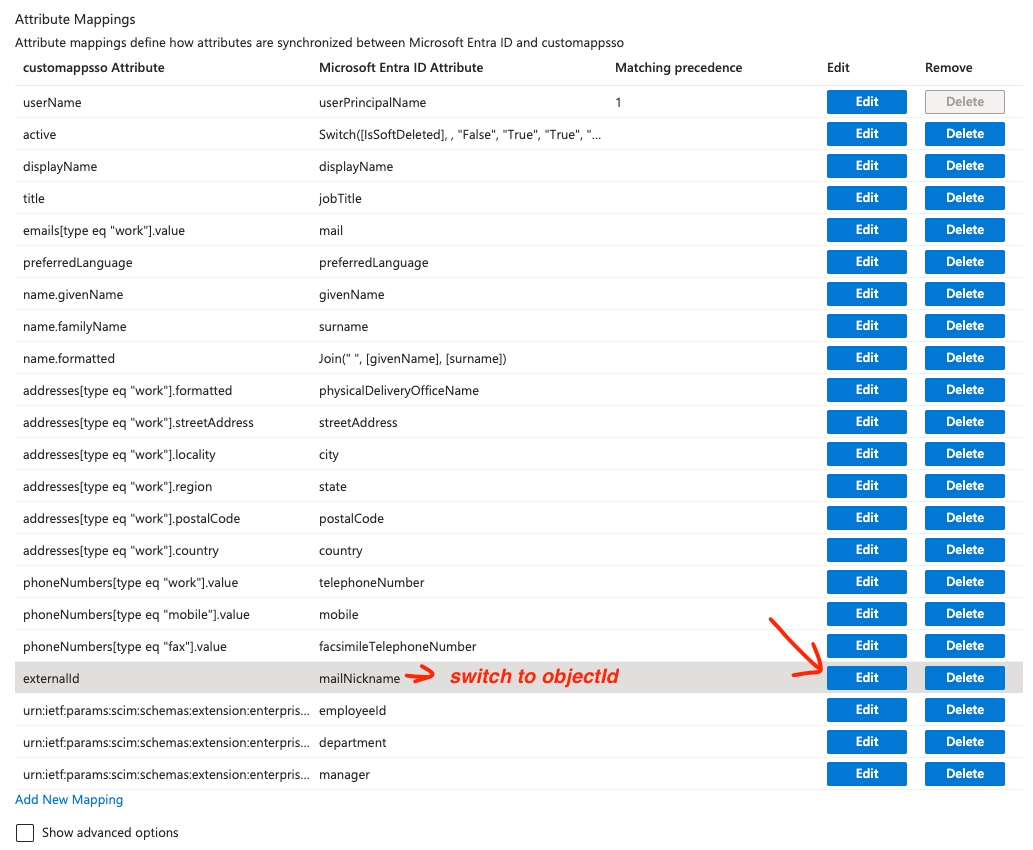
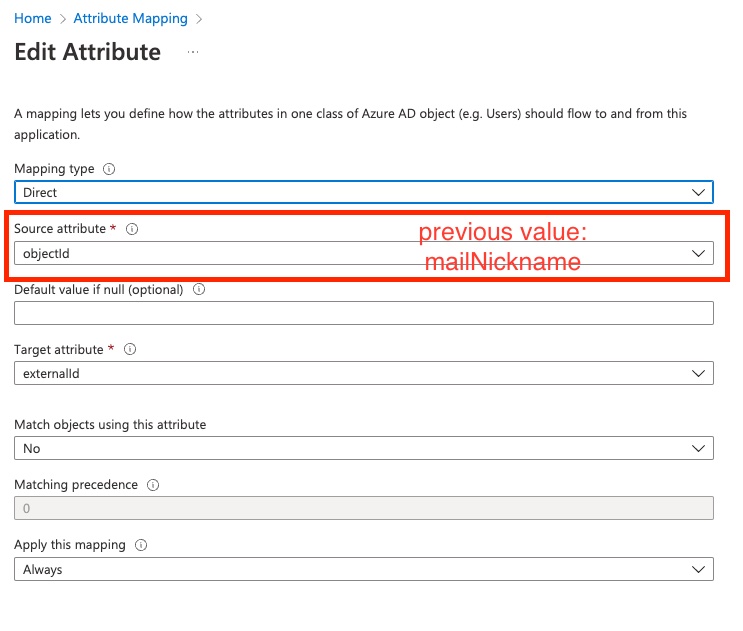
- Change "MailNickname" to "objectId".
- Change the department record "TargetAttribute" to "userType".
Step 10
Start Provisioning
- Click on "Start Provisioning".
- Click on "Provision on demand" to provision users (optional – just to test if it works).
📚 More Resources
- Help Center: F.1 - How to configure SSO
- Help Center: F.3 - How to configure person provisioning
📩 Interested in learning more about our SSO feature? Schedule a free and non-binding demo with one of our experts. For questions, feel free to contact us at [email protected].

