2024-10 | Structure Your Places with Subcategories
Create subcategories for your places, for a more precise and powerful structure

📲 What's New?
At Timly, empowering your inventory management is what we’re all about. To make things even easier, we’re excited to introduce subcategories—a powerful new feature that lets you create subcategories for your places.
A quick refresher: In Timly, places help you group and organize your assets. Whether it’s locations (“Building,” “Room”) or categories like “Purchase Requests,” places are fully customizable digital structures designed to fit your unique business needs.
With subcategories, you can now take your place system to the next level, creating an even more efficient and modular way to organize your assets within Timly.
🎯 Key Benefits
- Streamlined Overview: Easily decide which assets to display by filtering the subcategories shown in your places overview page.
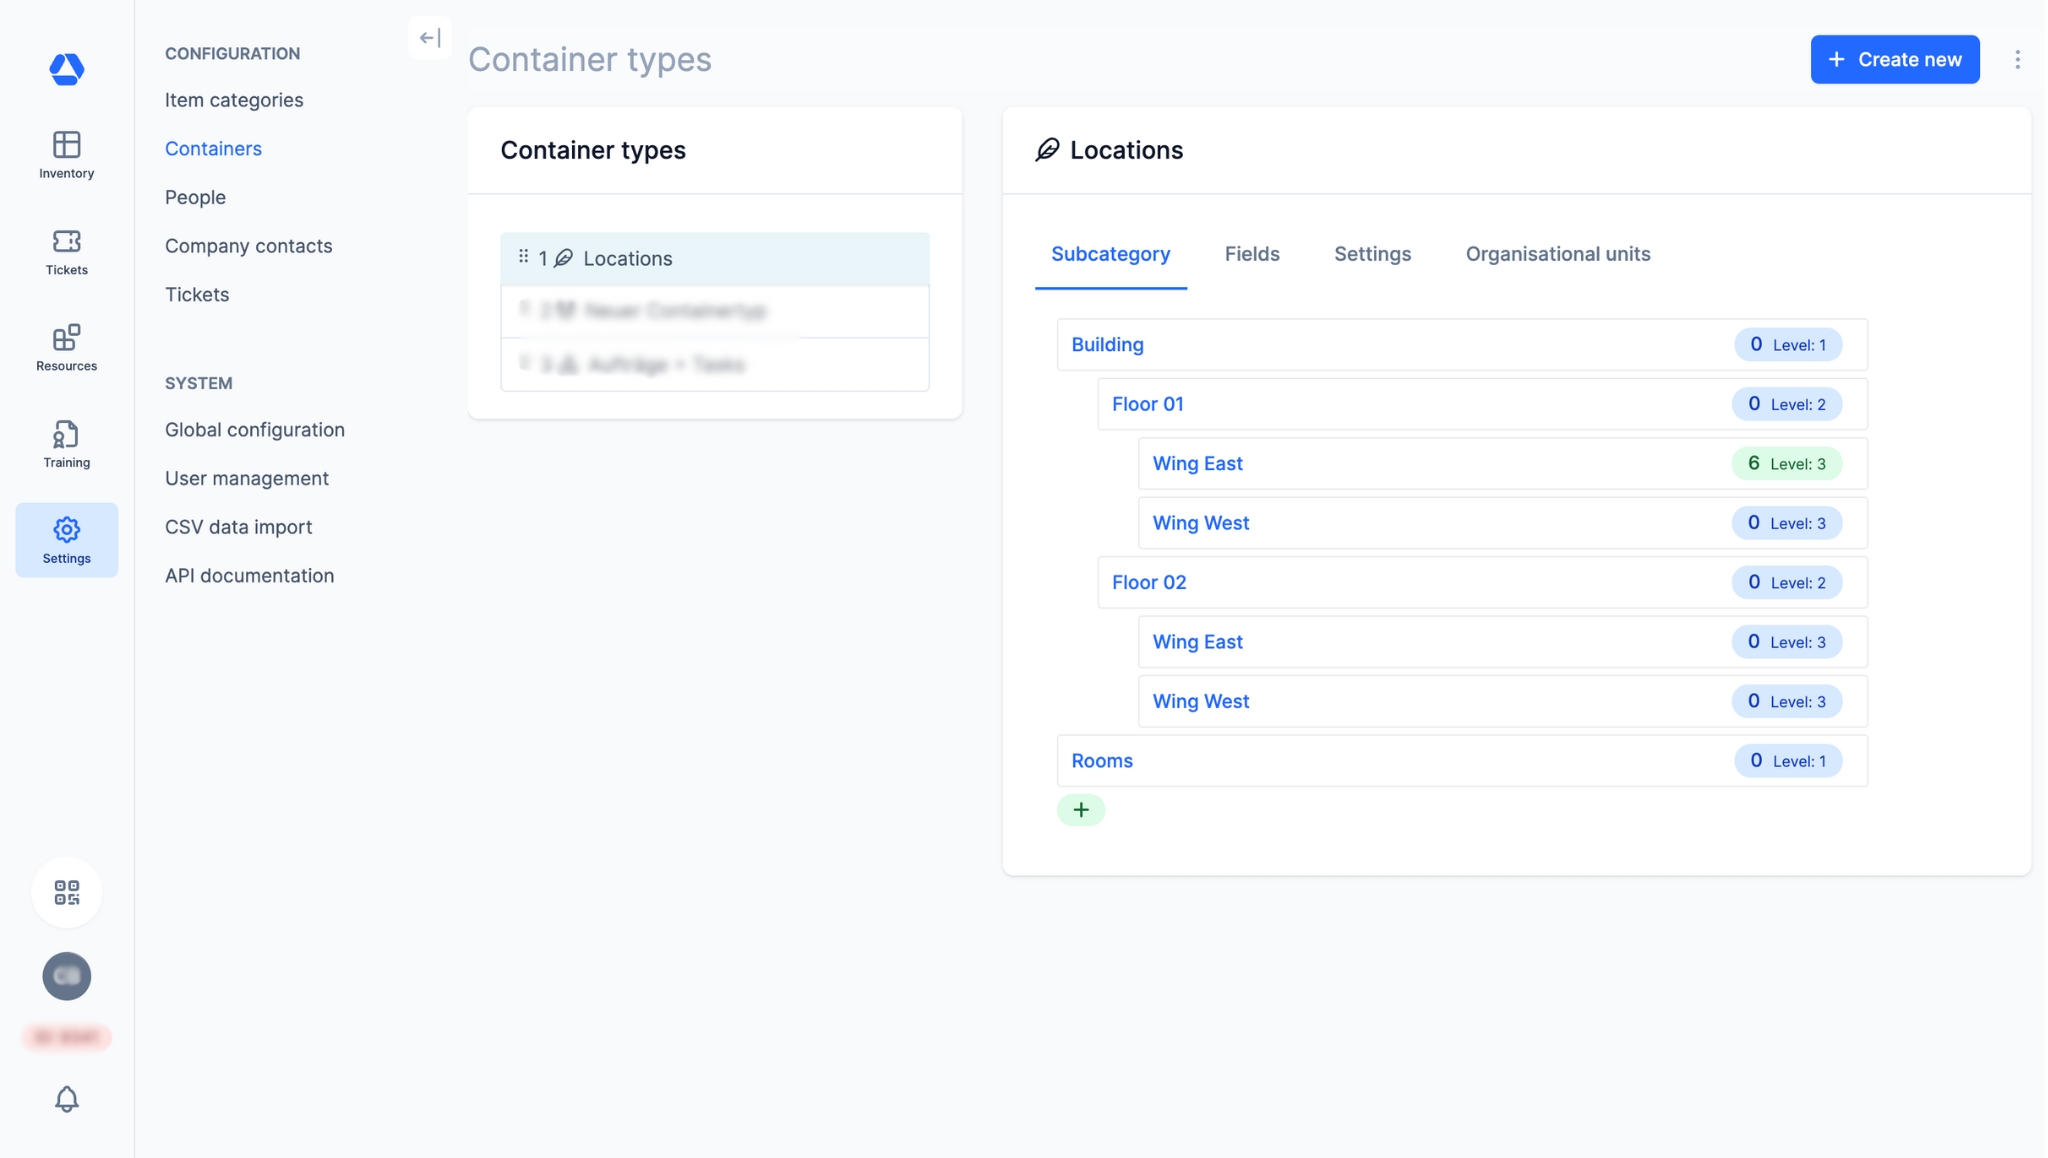
- Enhanced Structure: Visualize relationships between places using a clear tree structure, giving you better oversight at a glance.
- Customizable Structure: Adapt and adjust subcategories to meet your organization’s specific needs.
- Visual Clarity: Quickly pinpoint where assets are assigned, down to the exact subcategorie.
- Optimized Assignment: Improve your asset allocation with a more streamlined assignment process.
💡 Why Is This Important?
Subcategories give you the flexibility to build a structure tailored to your organization, no matter how complex or simple. Here’s why they make such a difference:
- Clarity for Complex Structures: Businesses with multiple places (e.g., several “Rooms” across different buildings) can now organize and differentiate them more effectively.
- Hierarchical Organization: Subcategories create a tree structure that adds layers of organization, making it easier to navigate and manage your assets.
- Efficiency at Scale: Spend less time sorting through assets and focus on what really matters.
💡 Need help setting up your structure? Our Account Managers are here to guide you every step of the way.
⚙️ How Does It Work?
- In the main menu on the left, click on "Settings", then "Places".
- Click on the place type to which you want to add a subcategory.
- Then click the "+" icon, and enter the name you want to assign to this subcategory.
- Choose the subcategory level that you want to assign this to and click "Create".
- Add as many subcategories levels as your structure requires.
📚 More Resources
- Help Center: Restrict Places to Specific Asset Locations
📩 Interested in learning more about our places solution? Schedule a free and non-binding demo with one of our experts. For questions, feel free to contact us at [email protected].
