
11.2025 | Deadlines Are Now Tickets
Deadlines Are Now Tickets
📲 What's New?
Deadlines are now tickets, featuring a redesigned interface and enhanced functionality. This guide will walk you through the changes step by step.
In this article, you will find:
- A “Before” tutorial, detailing the previous process for creating deadlines
- A “Now” tutorial, detailing the new process for creating tickets (the new “deadlines”)
- A demonstration video
- Key information
👉 Examples of tickets you can create:
- Calibration
- Expiration date
- Maintenance
- Services
📚 Tutorial: Creating a deadline with the previous flow
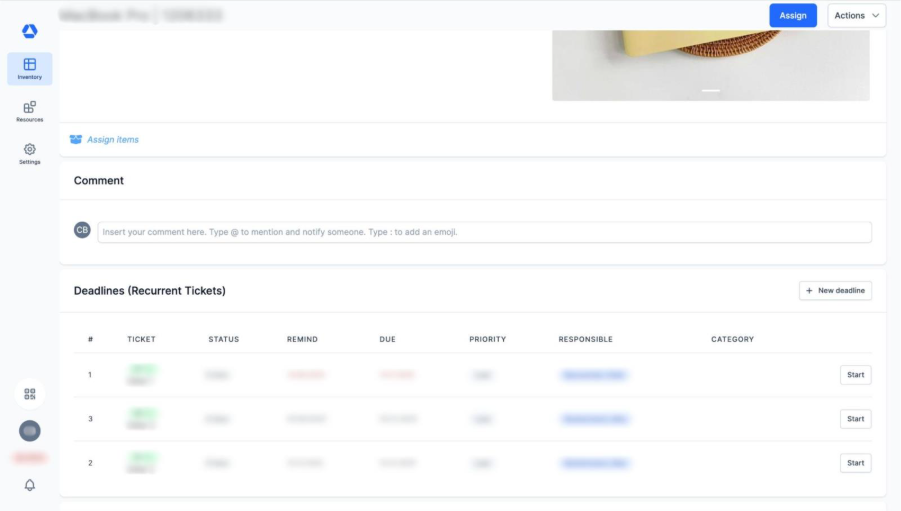
In the previous flow, there was one method to create a deadline. The steps were:
- Go to the item page of an item (either from the inventory overview or by scanning the item's QR code)
- Scroll down to the “Deadlines (Recurrent Tickets)” section
- Click the “New deadline” button
📚 Tutorial: Creating a ticket with the new flow
In the new flow, you now have two methods to create a ticket:
- From the item page
- From the tickets overview page
Method 1: Creating a ticket from the item page
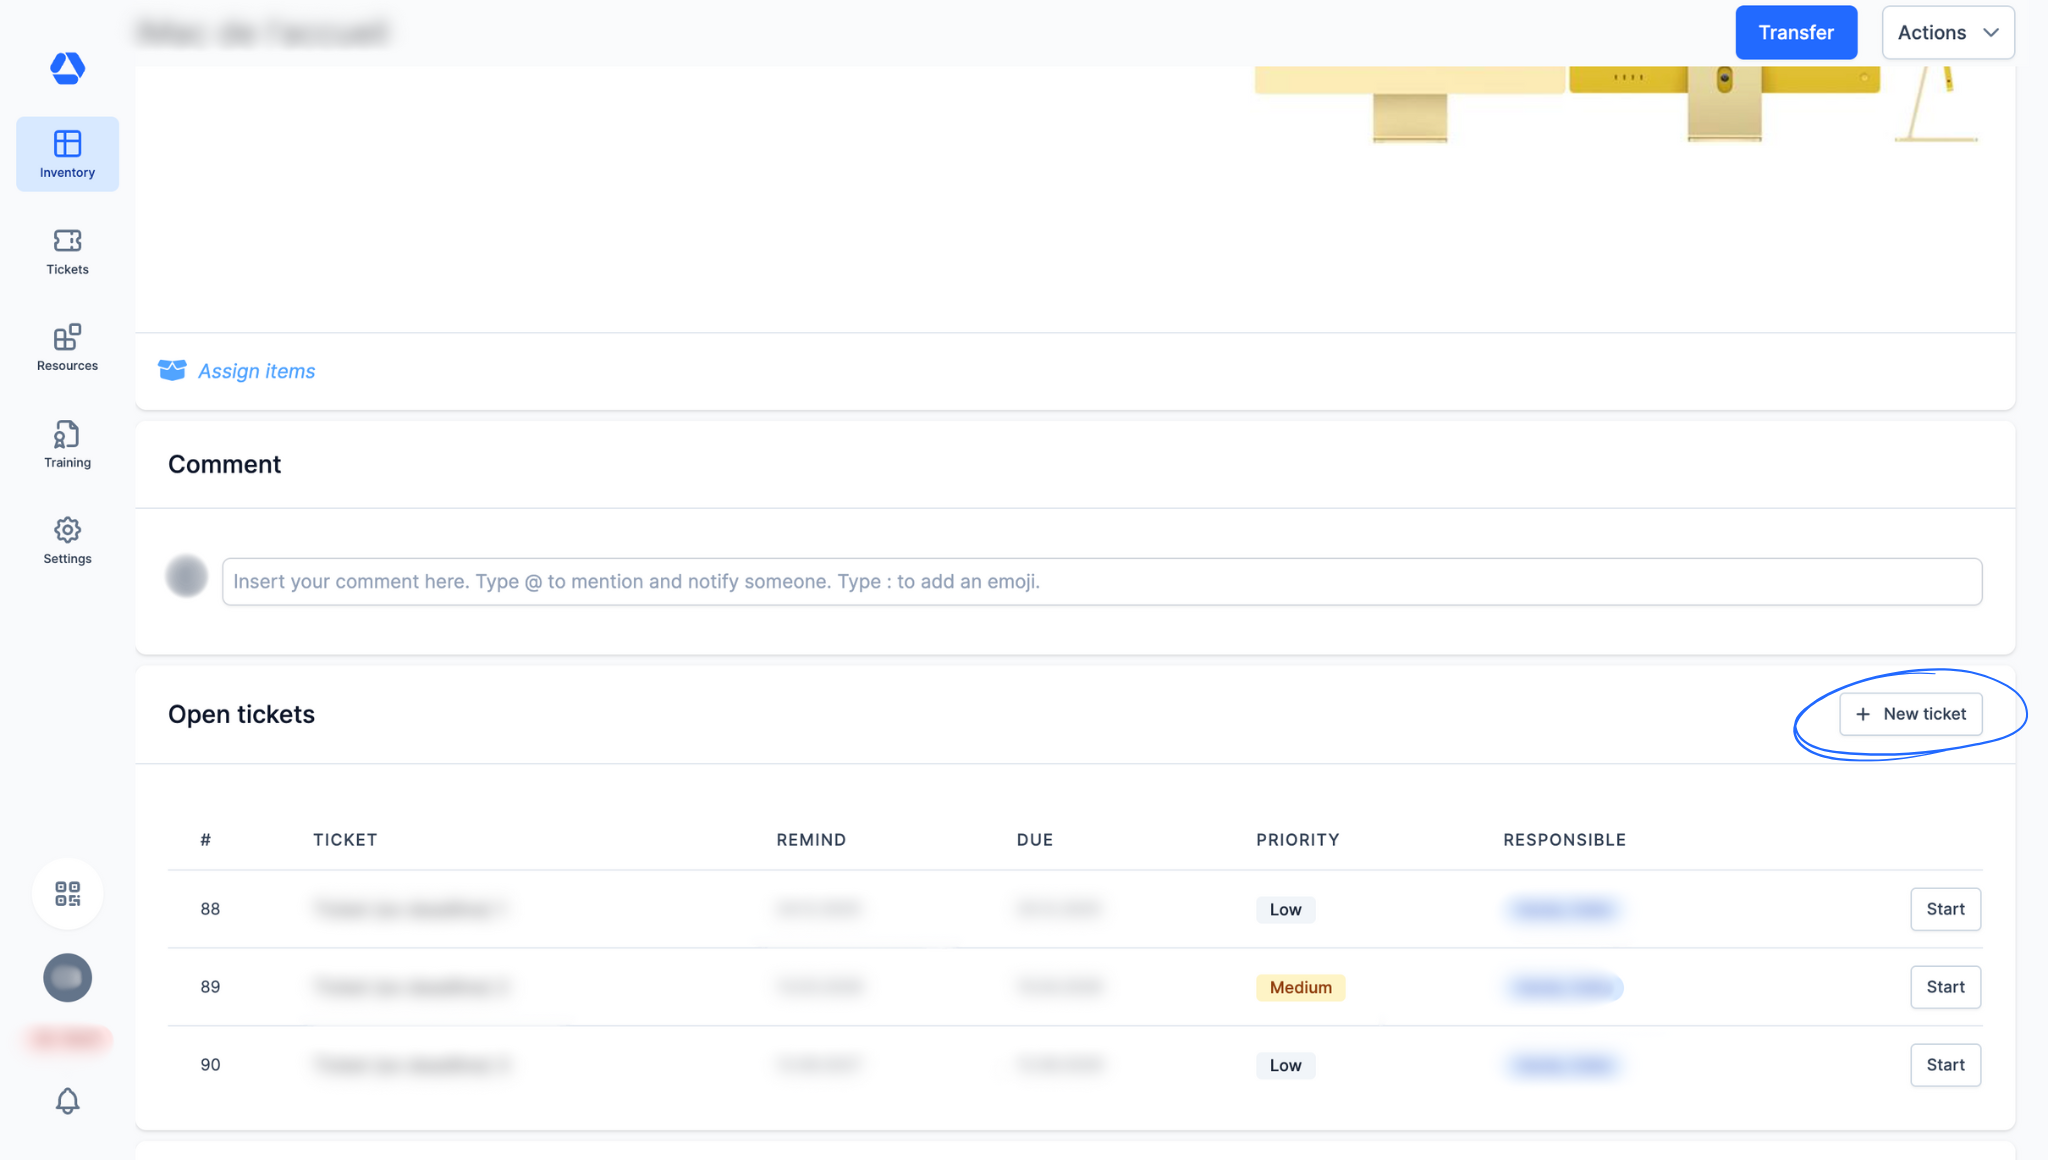
To create a ticket with the new flow, you now need to:
- Go to the item page of an item (either from the inventory overview or by scanning the item's QR code)
- Scroll down to the “Open tickets” section
- Click the “New ticket” button
- Fill in the fields:
- "Title"
- "Due Date"
- "Notification" (choose how many days, weeks, months, or years before the due date you want to receive a reminder)
- "Assigned to" (select one or more people responsible for this ticket; they will receive the due date reminder)
- "Priority" (set the priority level: “Low”, “Medium”, or “High”; you can later filter your tickets by priority in the tickets overview)
- "Instructions" (optional; use this field to add instructions, comments, etc.)
Method 2: Creating a ticket from the tickets overview
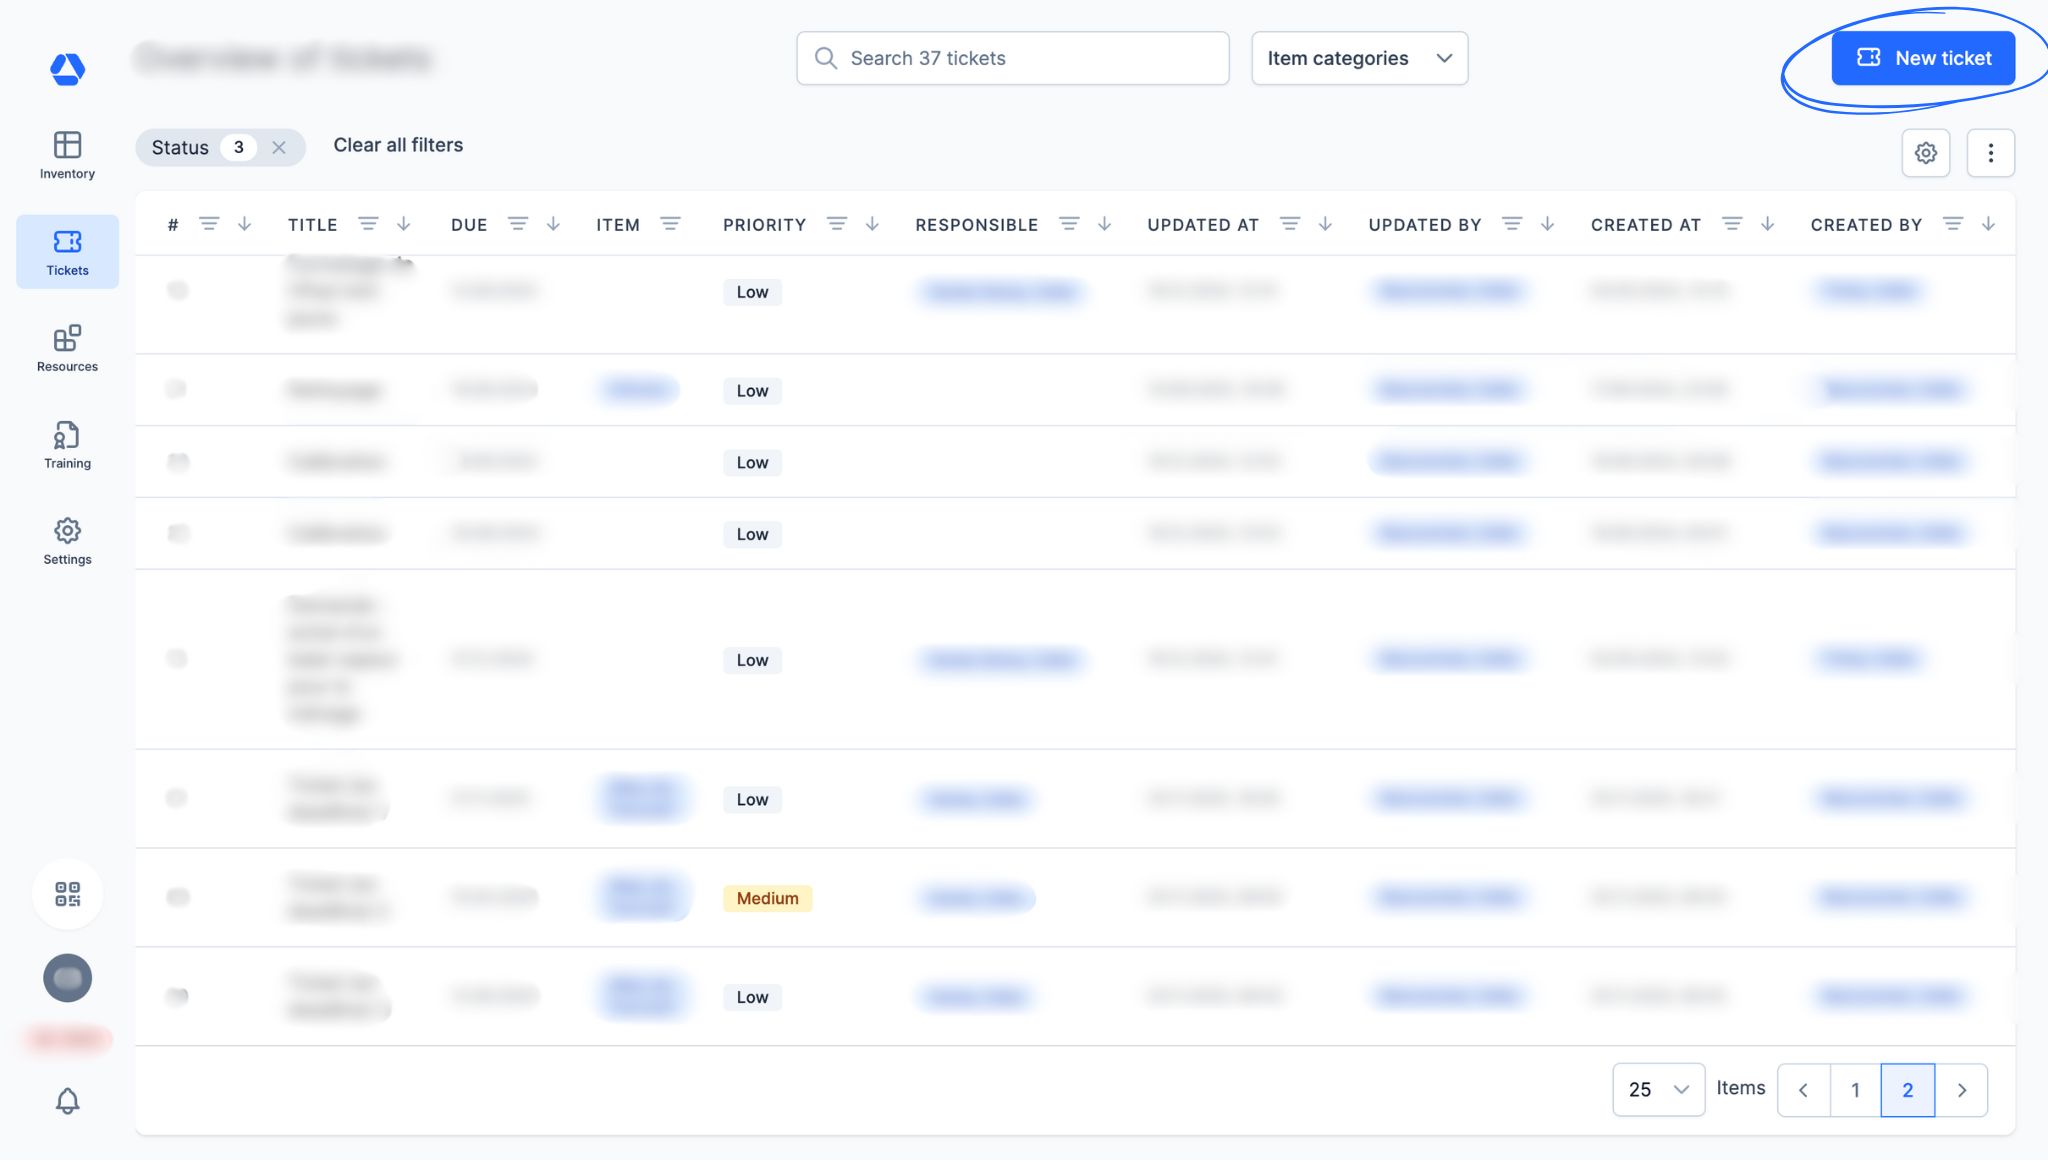
NEW: You can now create tickets from the tickets overview (replacing the previous deadlines overview). To do so:
- Click the “Tickets” menu icon, then “Open tickets” or “Tickets assigned to me”
- Click the “New ticket” button
- Add an item:
- Either by clicking the magnifying glass icon to search manually
- Or by clicking the QR code icon to find the item by scanning its QR code
- Fill in the fields:
- "Title"
- "Due Date"
- "Notification" (choose how many days, weeks, months, or years before the due date you want to receive a reminder)
- "Assigned to" (select one or more people responsible for this ticket; they will receive the due date reminder)
- "Priority" (set the priority level: “Low”, “Medium”, or “High”; you can later filter your tickets by priority in the tickets overview)
- "Instructions" (optional; use this field to add instructions, comments, etc.)
🔍 Focus: Editing a ticket
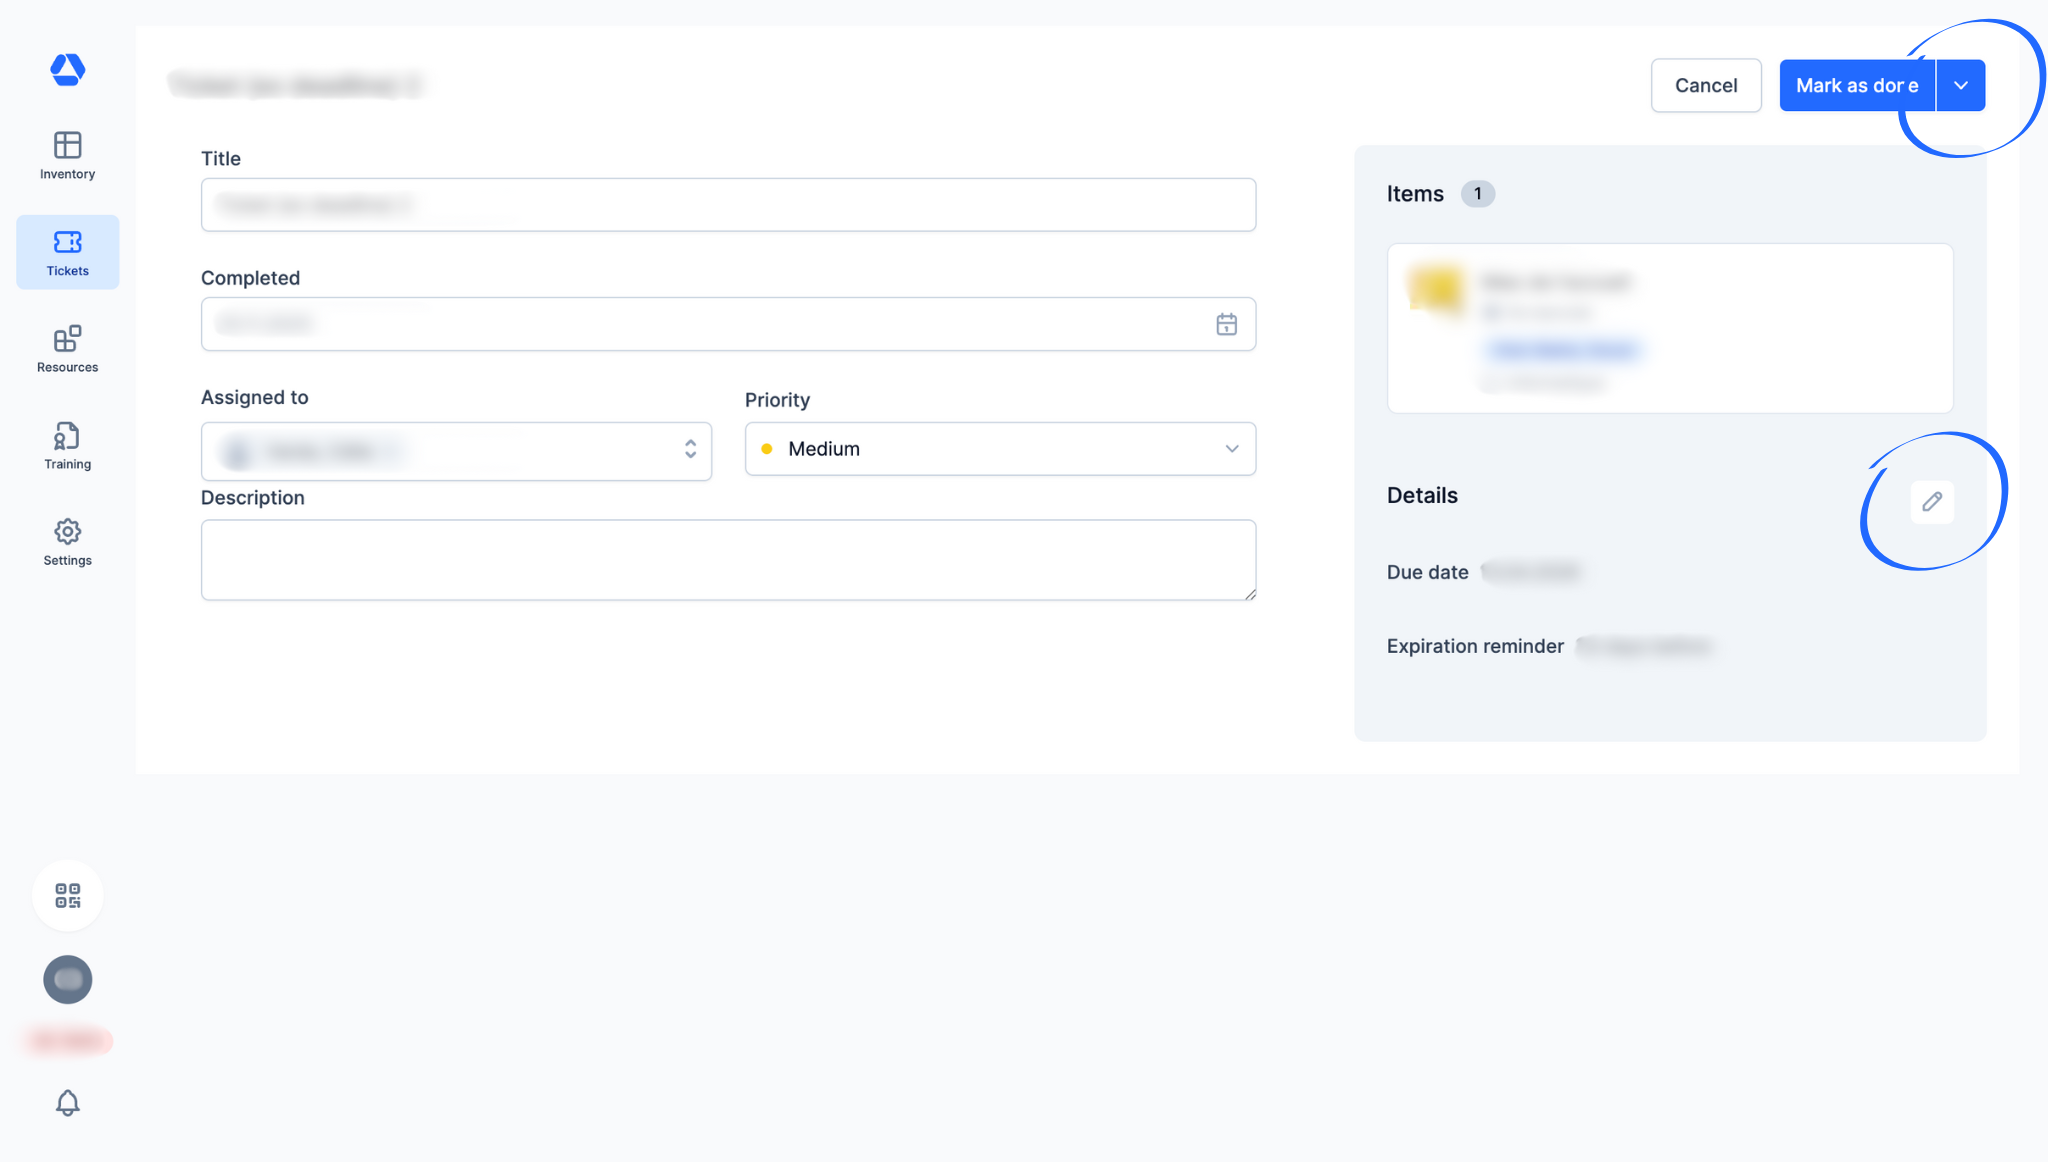
When editing a ticket, you have several options:
- Delete the ticket by clicking the arrow icon, then “Delete Ticket”
- Update the due date by clicking the pencil icon
- Update the priority by clicking the pencil icon
🔎 Focus: The tickets overview
This is the most significant change: The tickets overview, replacing the deadlines overview, provides a richer, more comprehensive view of all ongoing tickets.
- NEW: View all essential information directly in the tickets overview (title, priority, etc.)
- NEW: Sort a column in ascending or descending order by clicking the arrow icon
- NEW: Search and/or filter within a column by clicking the three-bar icon

🎥 Ticketing System Essential: Tour (VIDEO)
🎯 Key information
- The deadlines feature has been redesigned to provide a more unified and efficient experience.
- Deadlines are now tickets.
- In place of the previous deadlines feature, you now have the Ticketing System Essential.
You can now access your tickets through these three checkpoints:
- Overview of the ongoing tickets from the “Open tickets” section on the item page
- Overview of an item’s ongoing tickets from the “Tickets” tab on its item page
- Overview of all ongoing tickets in the tickets overview under the “Tickets” menu