
How Do I Create Blueprints and Twins?
How Do I Create Blueprints and Twins?
💡 What You Need to Know
Timly offers different item types to help you structure your inventory, each designed for a specific use case.
📘 This guide explains how to create blueprints and twins.
⚙️ The Steps
- Item Types -
- Item: a unique item (also called a normal item)
- Stock item: an item tracked by quantity
- Blueprint: a template for generating multiple items with shared characteristics
- Twin: an item created from a blueprint, which can be edited individually
- Container item: an item grouping several items for easier management
💡 Normal items, blueprints, and twins can be converted into container items.
- Blueprint and Twin: Details -
- Blueprint -
A blueprint is a template used to quickly create several identical items.
Example: If 100 identical computers are purchased, one blueprint is created. It serves as a basis to automatically generate 100 items.
- Twin
-
A twin is an item created from a blueprint. It inherits the blueprint’s data but can still be edited individually. Two main differences distinguish a twin from a normal item:
- Creation
- Normal item: created manually or via CSV import
- Twin: created directly from a blueprint
- Access
- Normal item: accessible from the inventory overview
- Twin: accessible in the "Twins" tab on the blueprint’s item page
- Step 1: Item Categories -
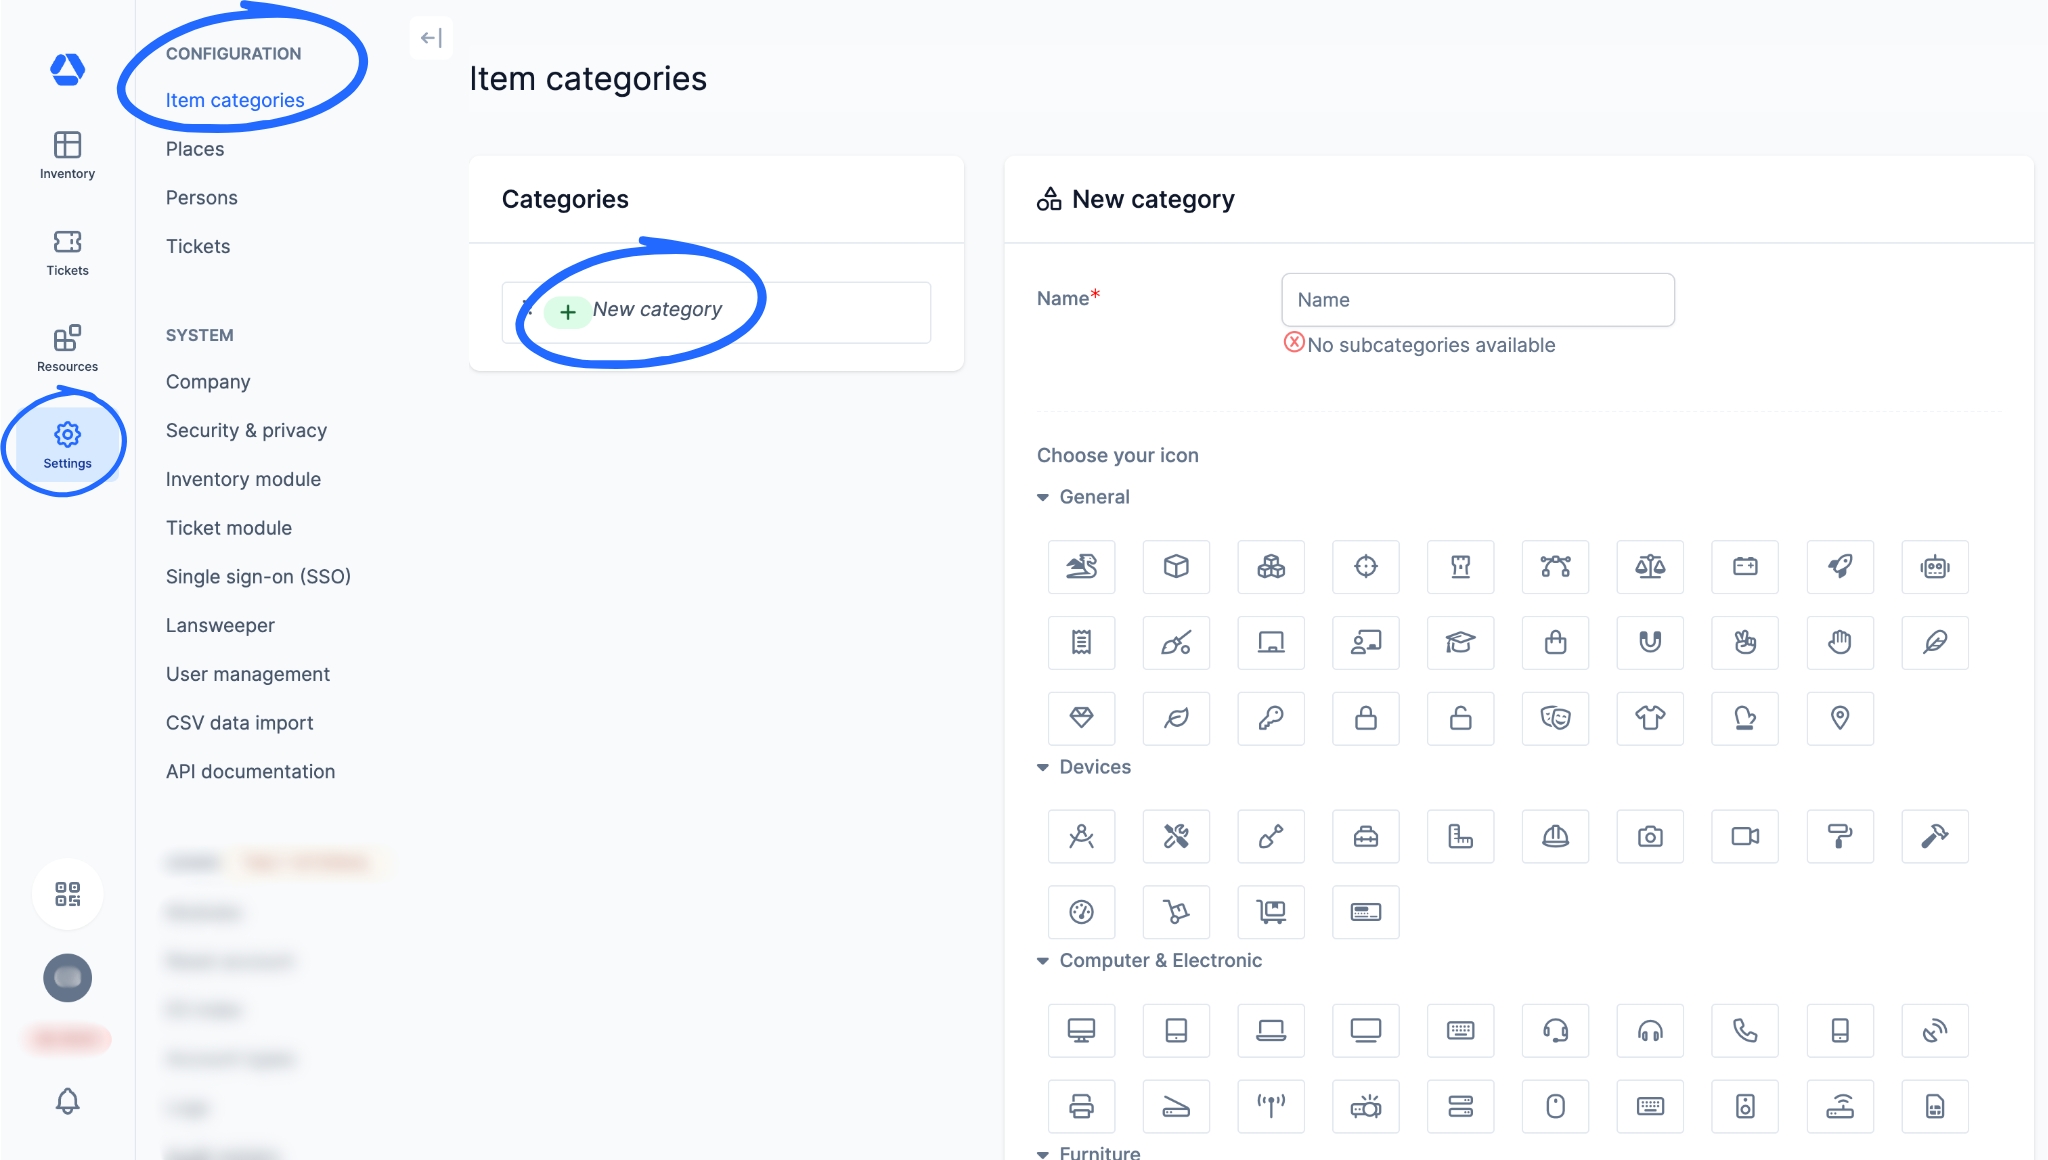
As with normal items, categories must be defined first. They serve as the foundation of your inventory and help you organize your data in a clear and systematic way.
📚 Follow our detailed guides:
- To learn how to create your item categories: How Do I Create Item Categories?
- To learn how to create items: How Do I Create Items?
- Step 2: Create a Blueprint -
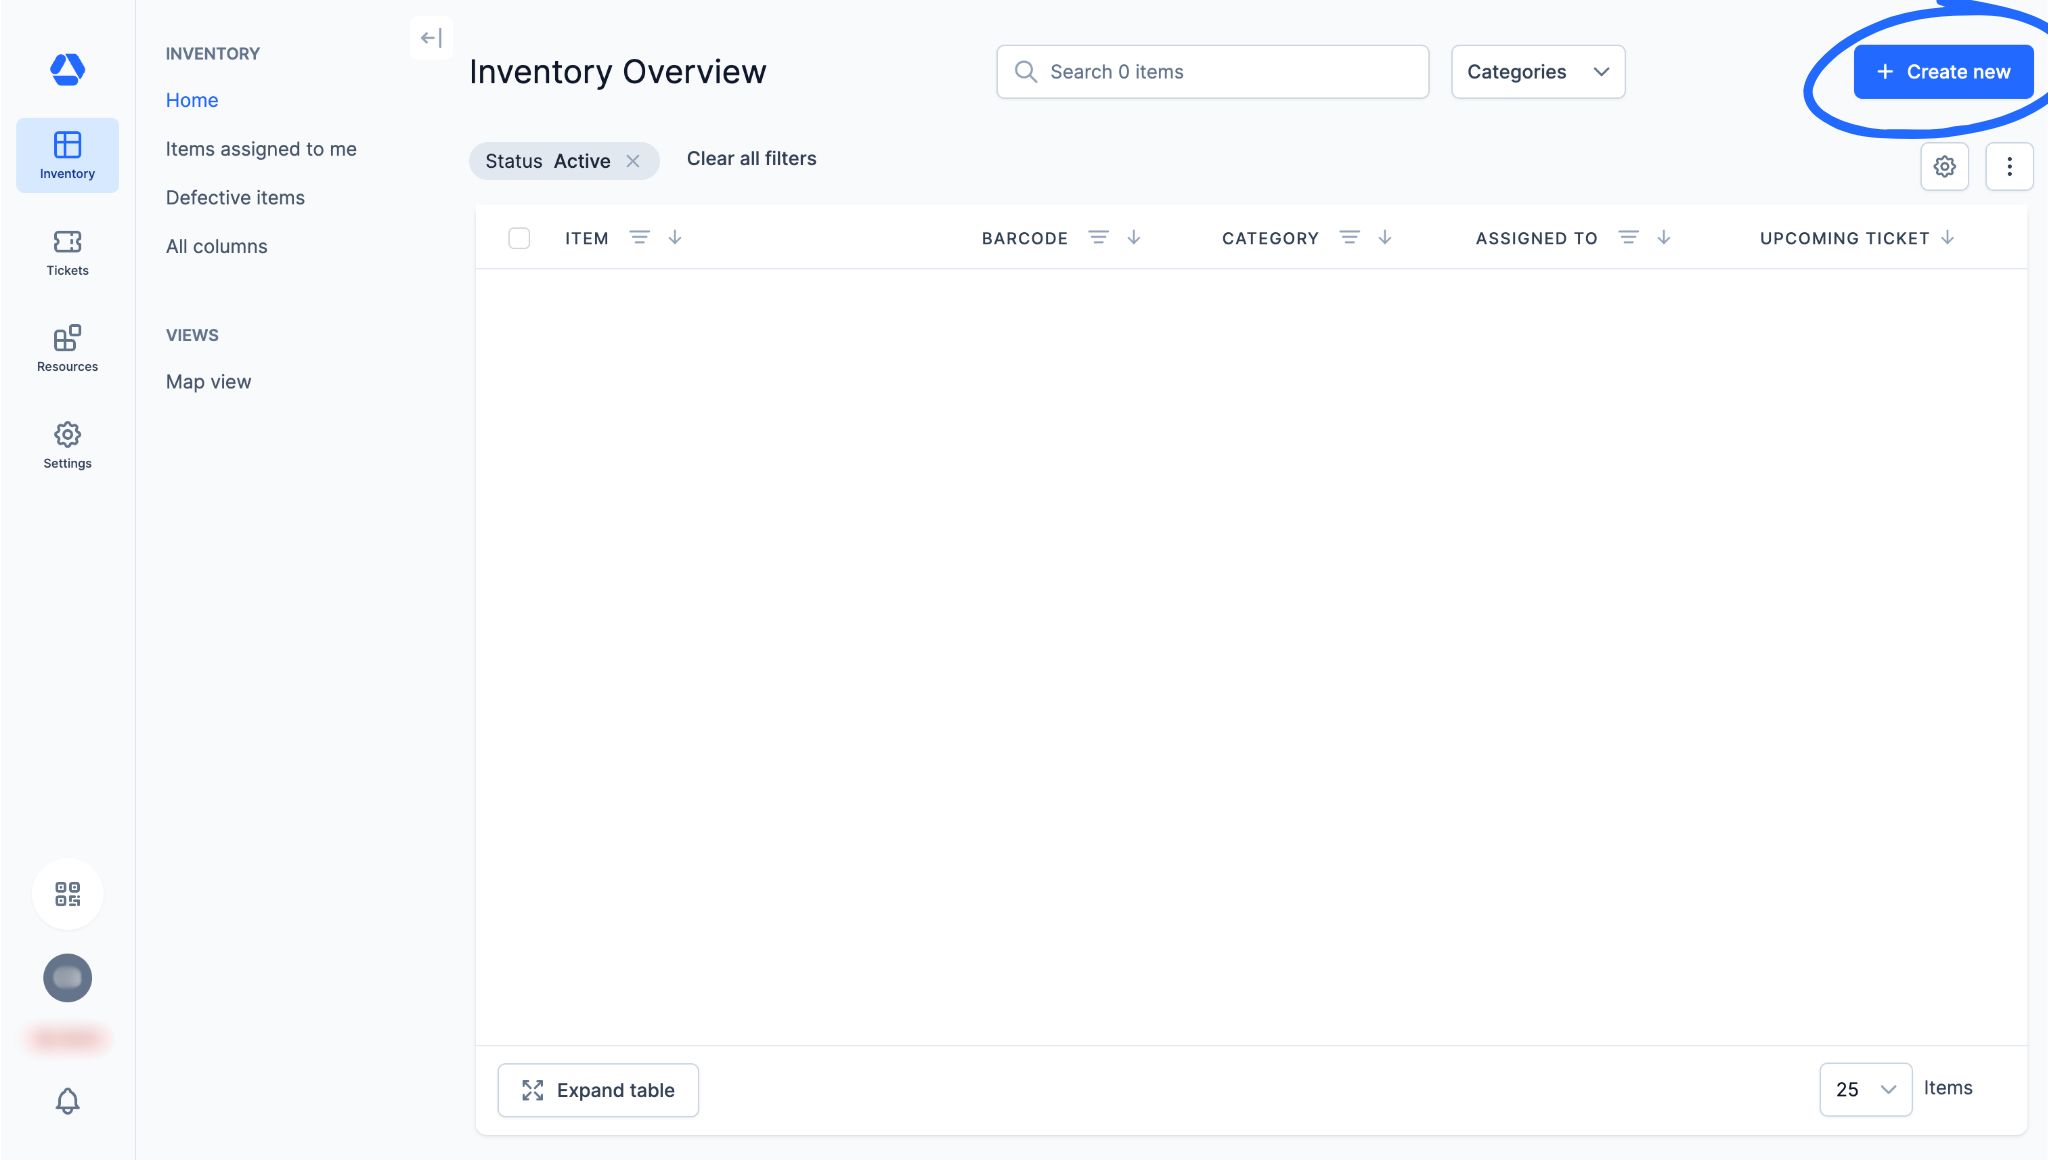
- Go to "Inventory Overview"
- Click “Create new”
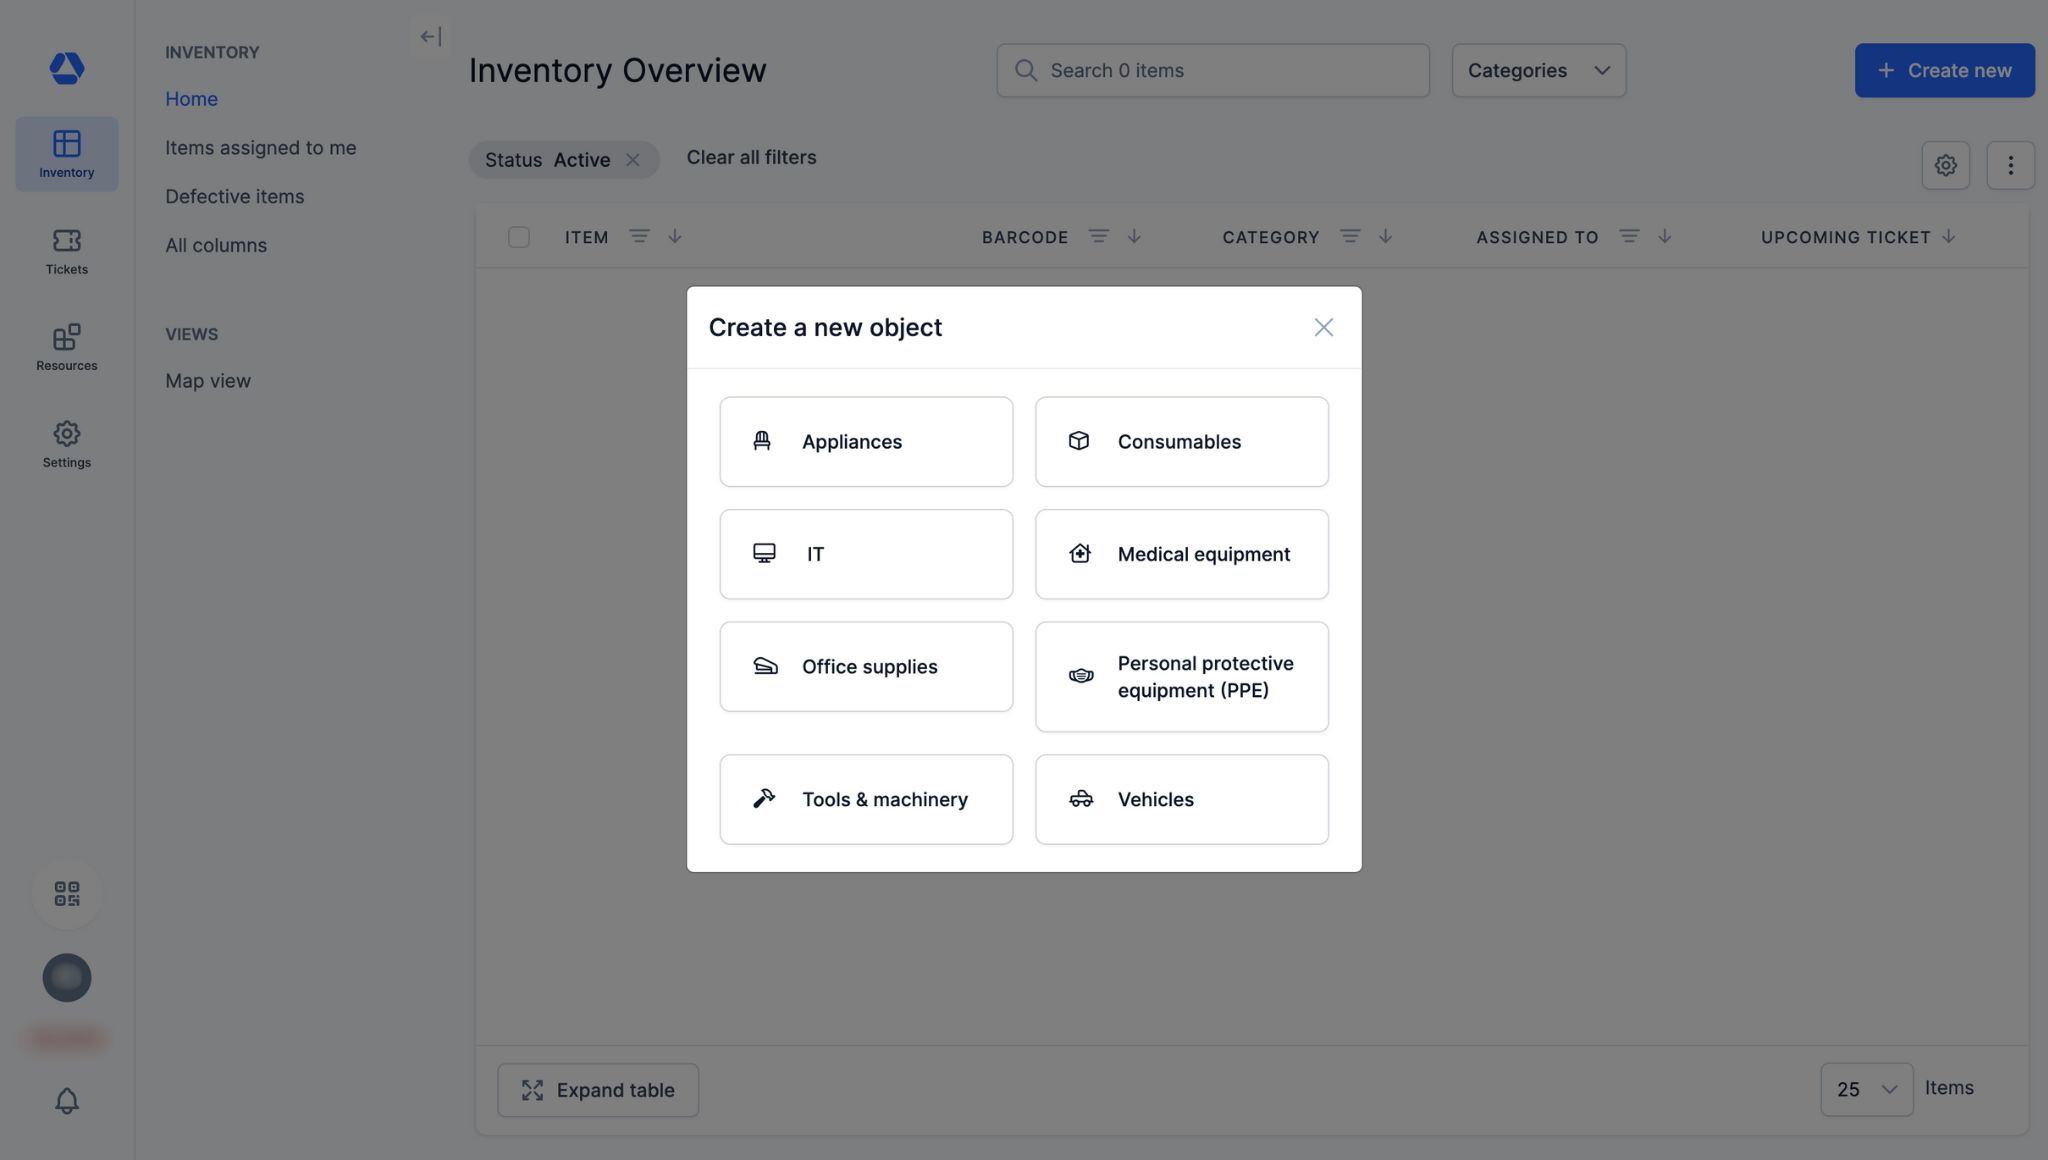
- Select the category under which you want to create a blueprint
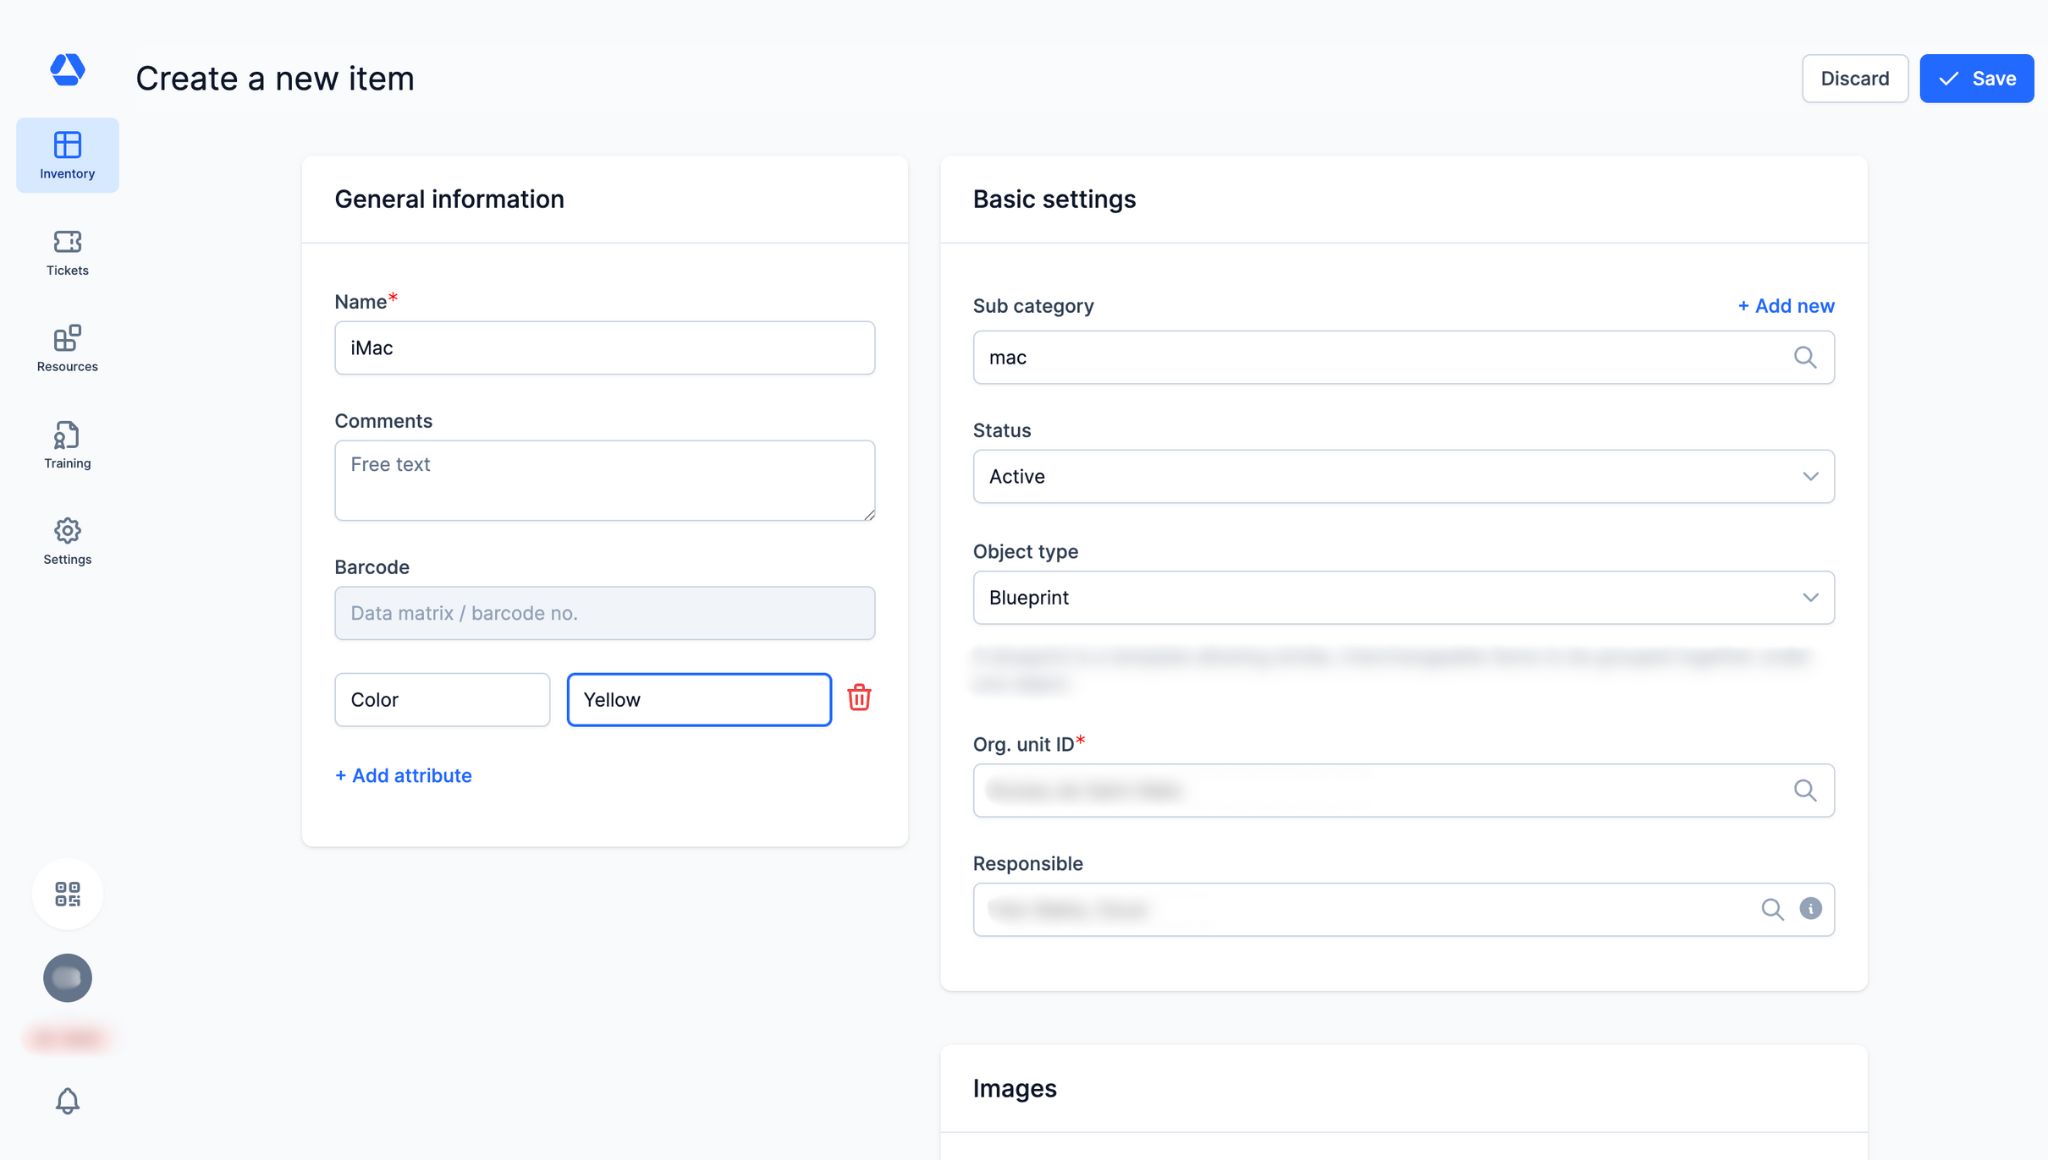
- Fill in the required and optional fields:
Required:
- Click "Item type" and select "Blueprint"
- Enter the name of the blueprint
- Specify the organizational unit associated with this blueprint
Optional:
- Add attributes
- Select or add a subcategory
- Assign a responsible person for the blueprint
- Add documents and/or photos
- Click "Save" to create the blueprint. You will then be redirected directly to its item page.
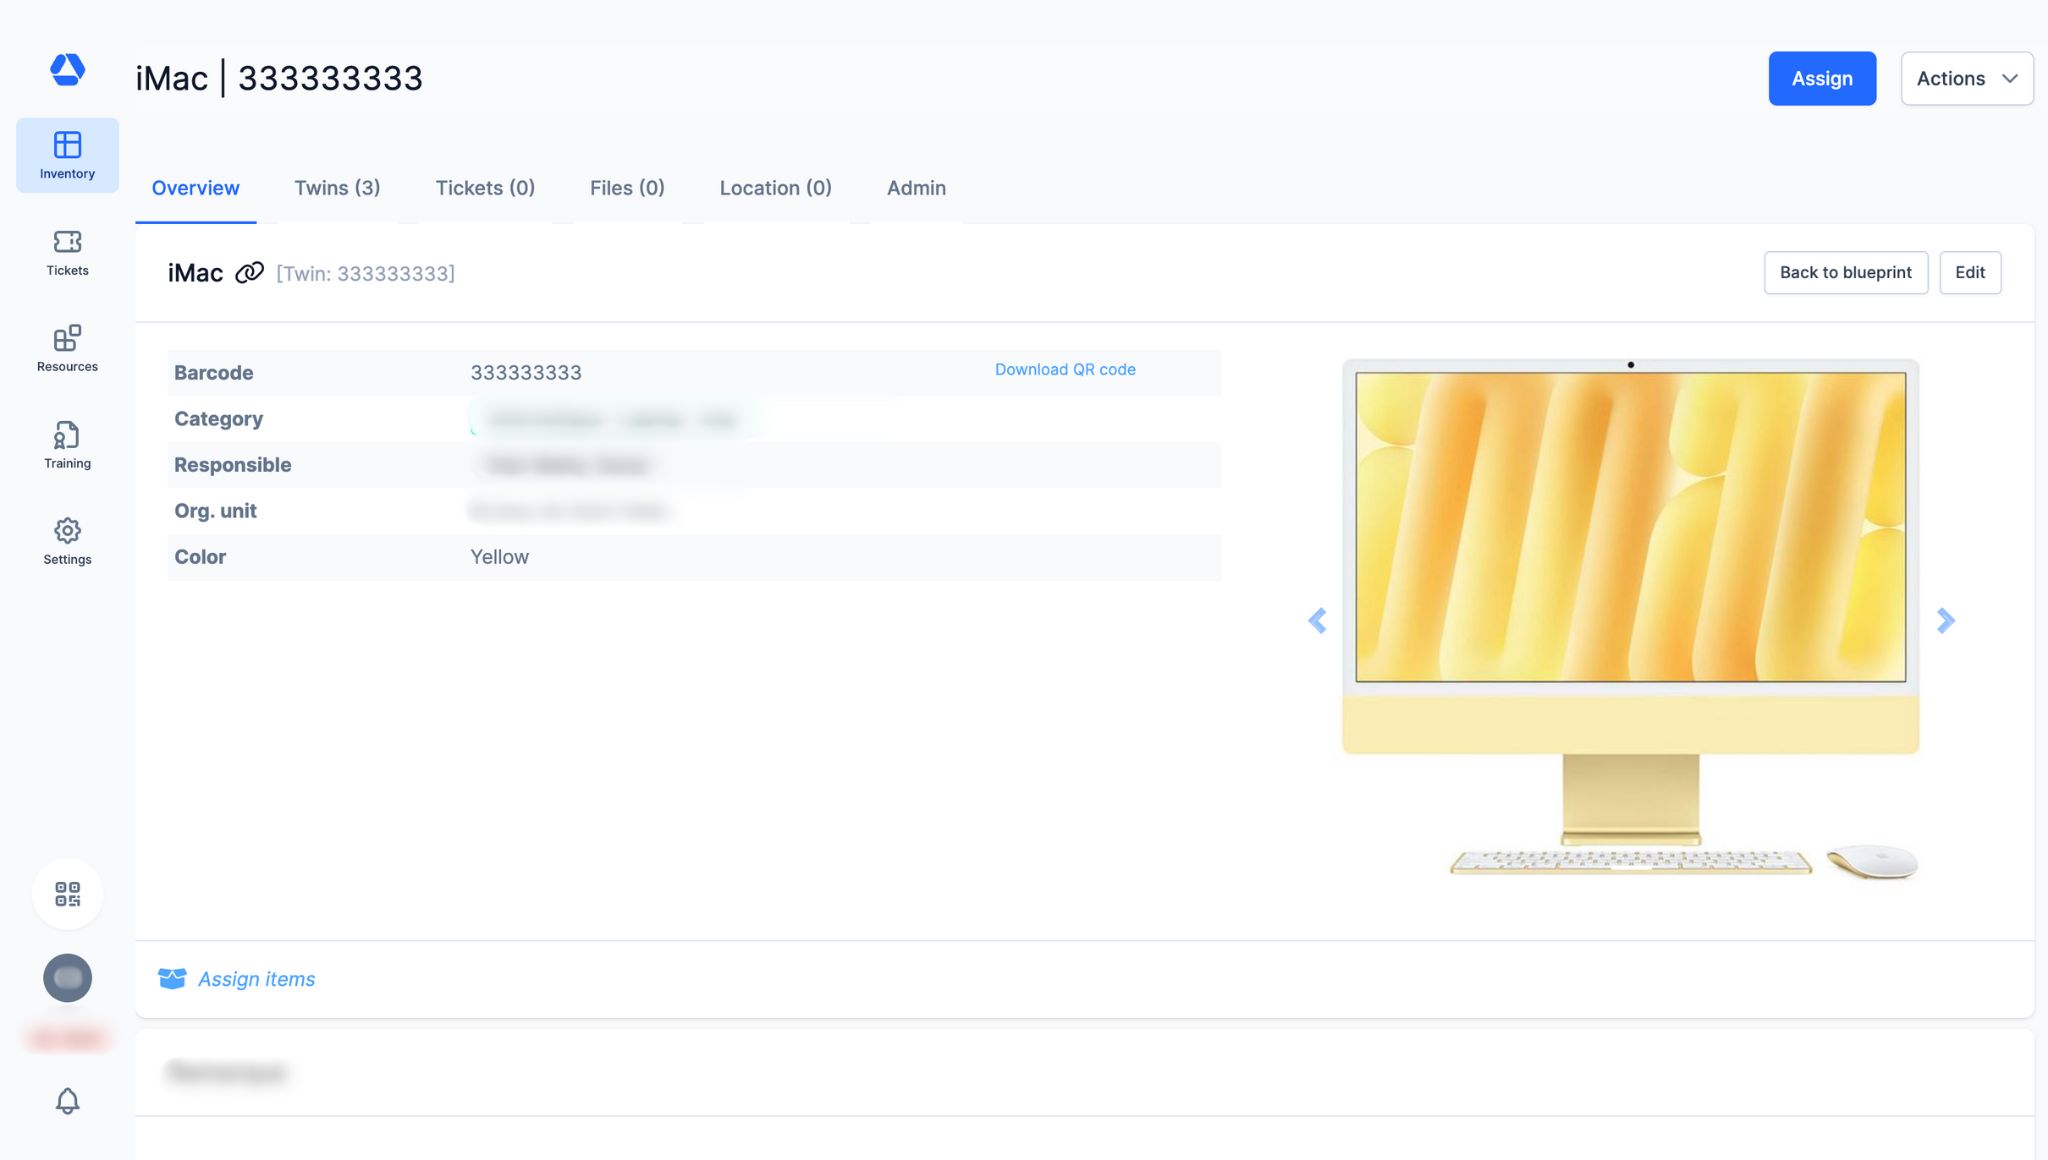
💡 When creating a blueprint, fill in the generic information you want to appear on the page of all twins created from this blueprint. The attributes defined in the item category to which the blueprint belongs will be applied by default, but you can add blueprint-specific attributes at this stage by clicking on "Add attribute".
Example: If you create an attribute "Color" and set "Yellow" as the default value, all twins created from this blueprint will have the "Color" attribute pre-filled with "Yellow".
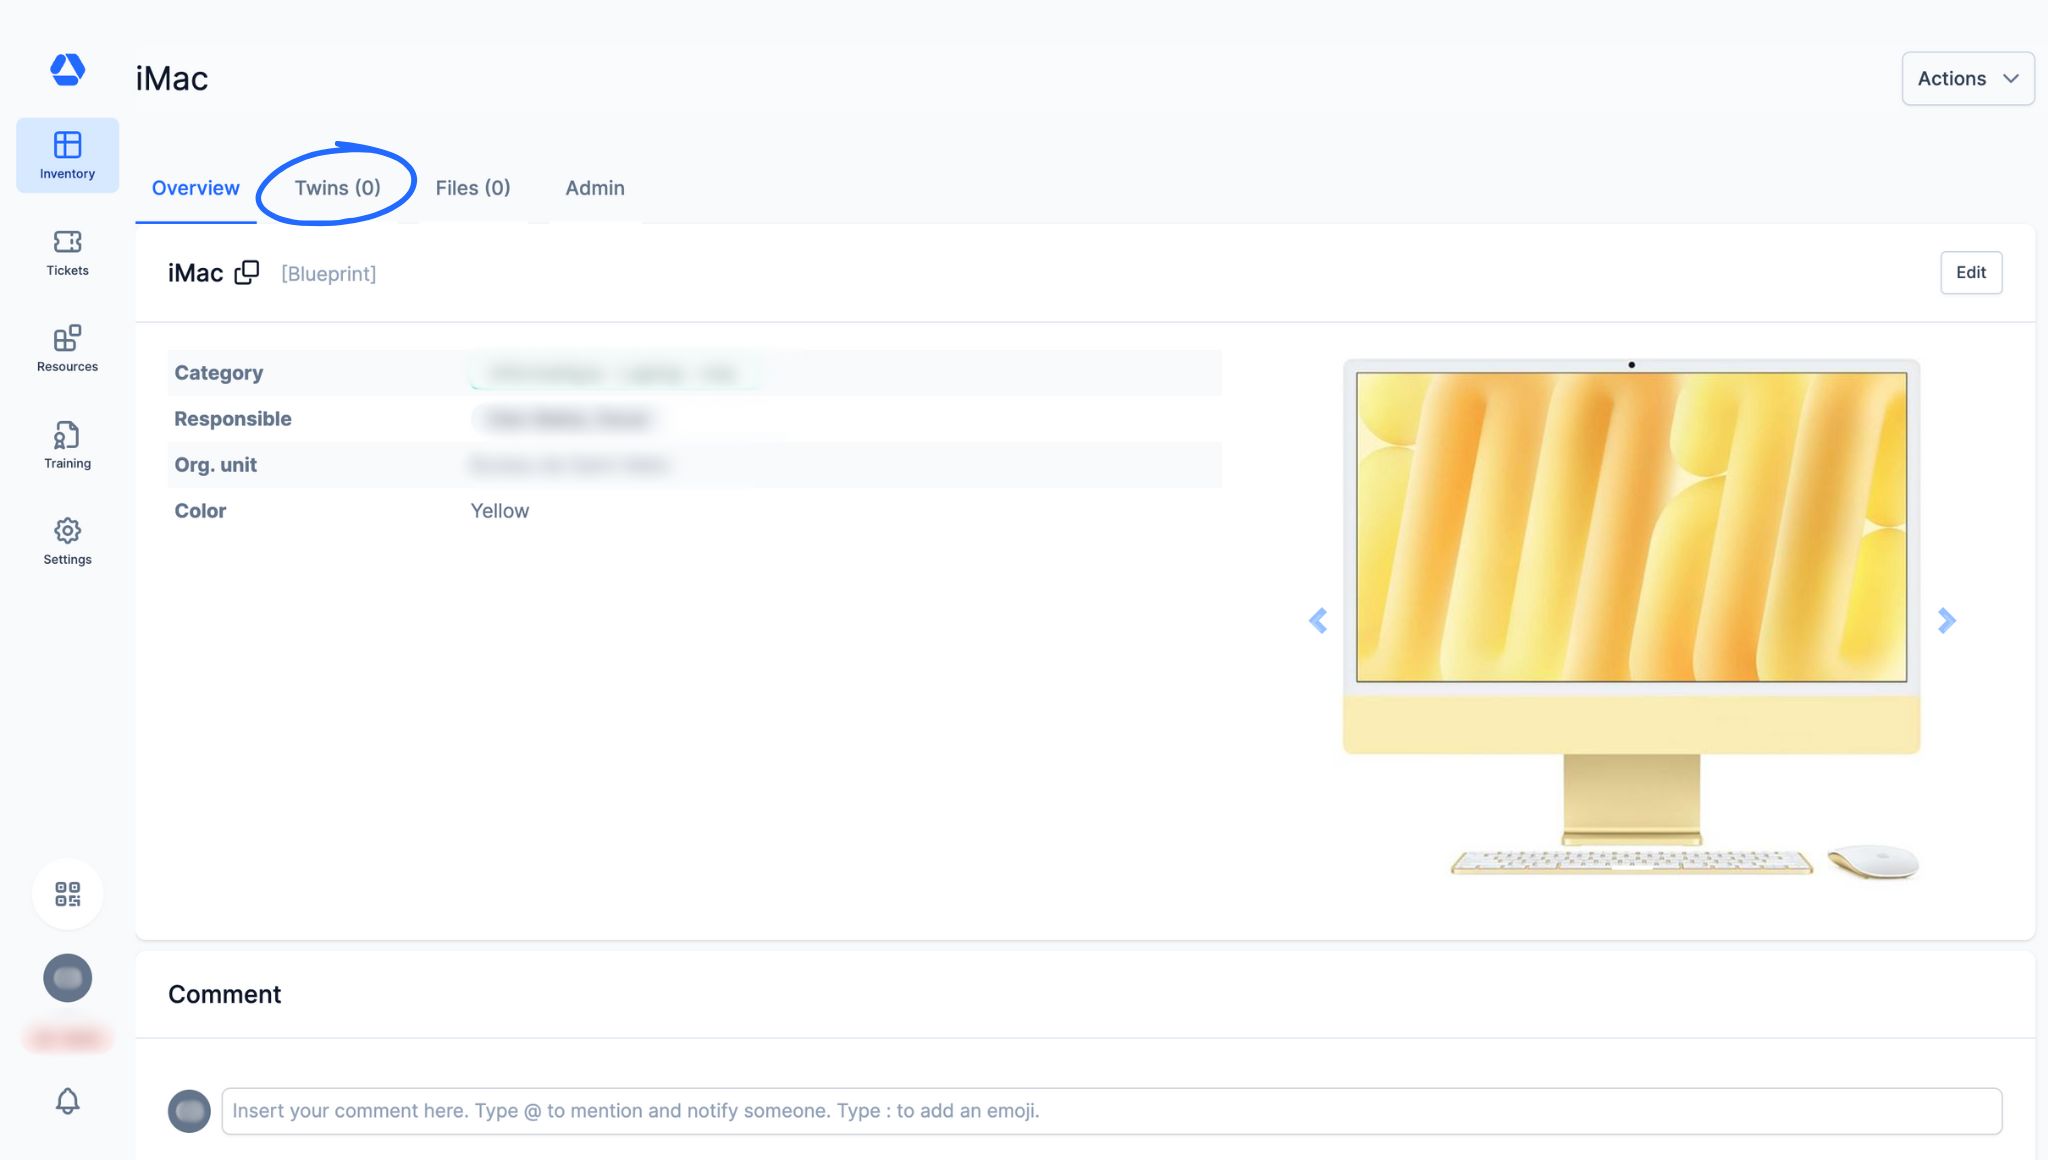
- To create a twin, go to the “Twins” tab
- Step 3: Create a Twin -
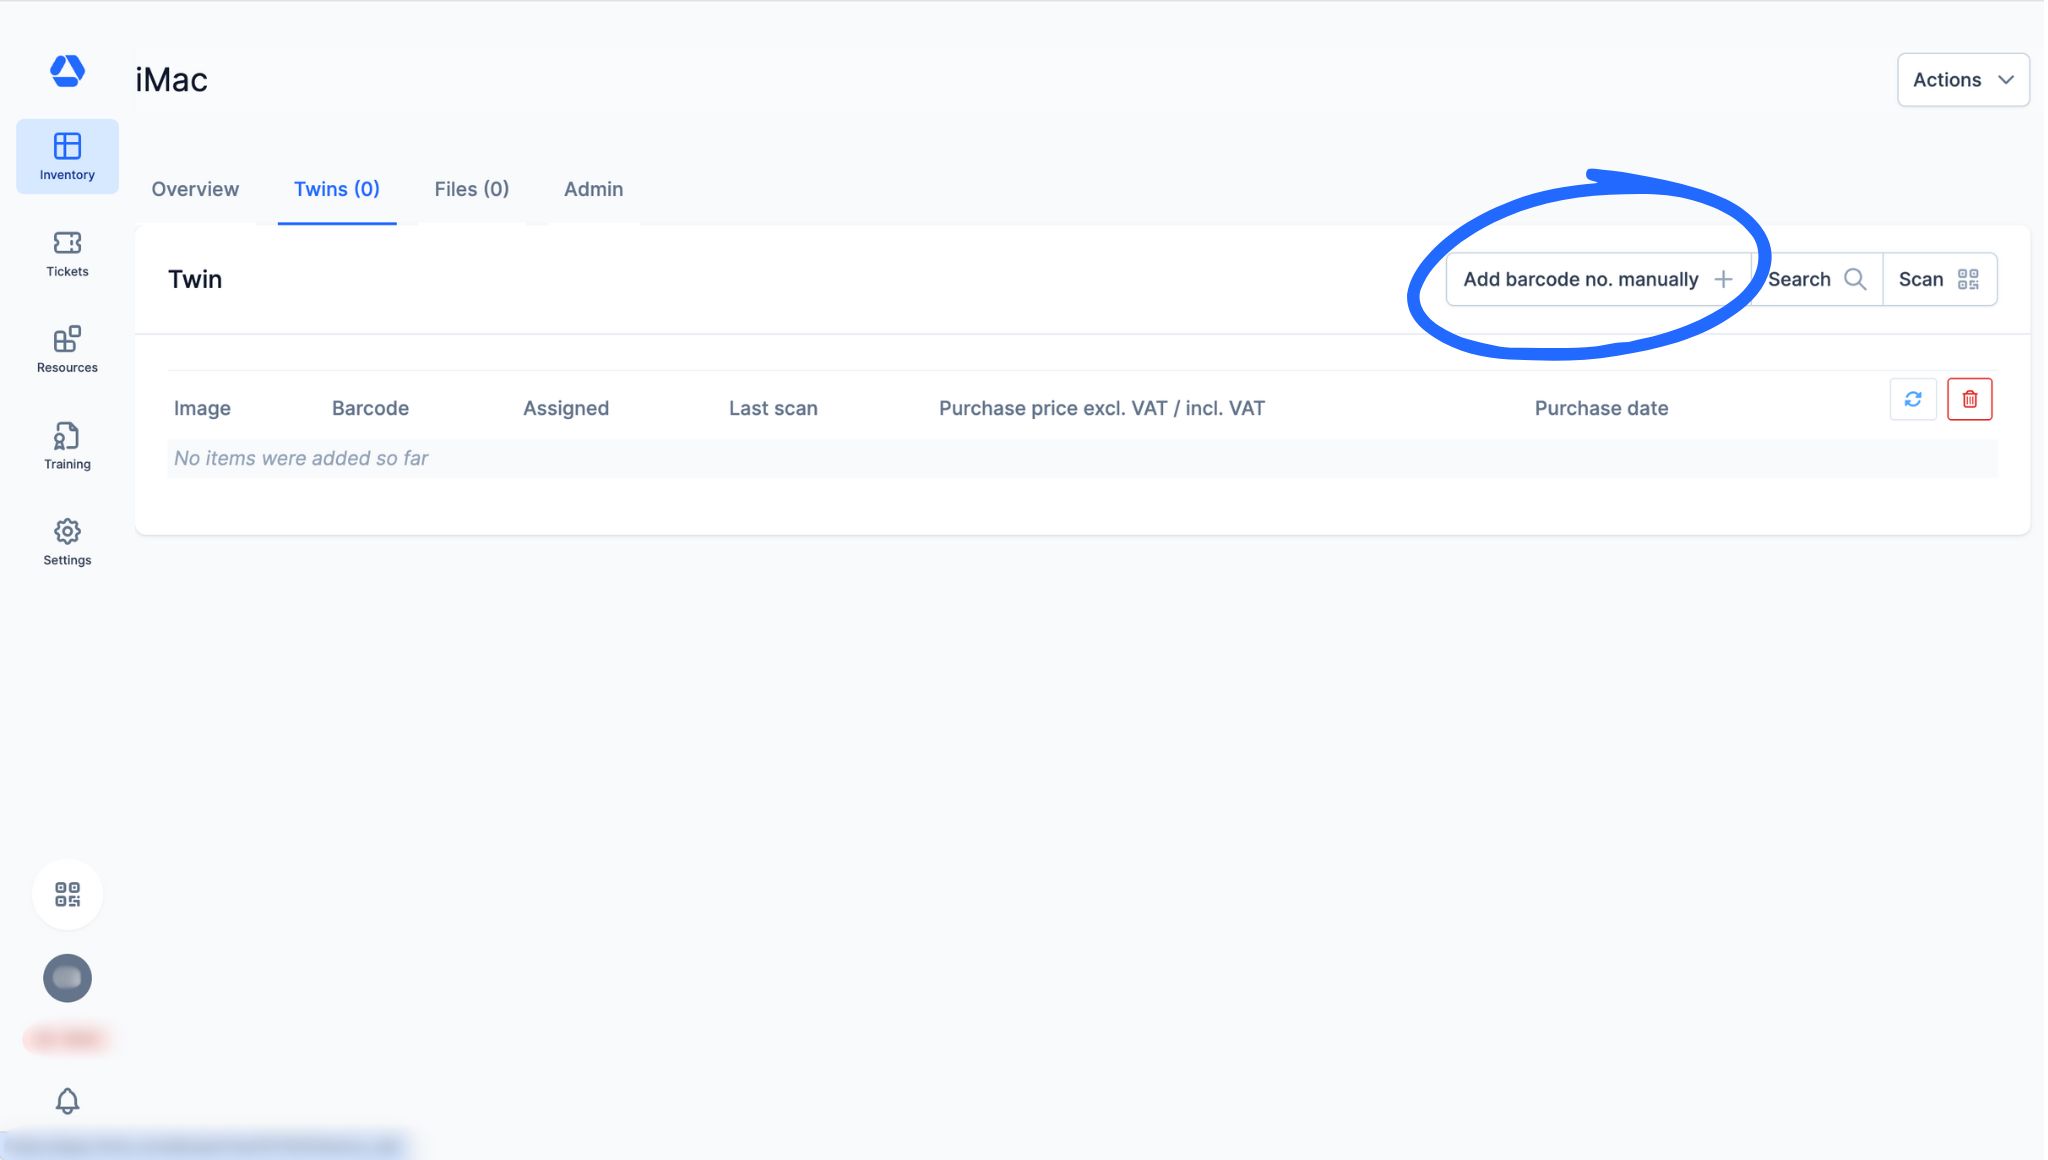
- From the “Twins” tab, you can create and view all twins created from the blueprint
- Twins can be created in three ways:
- “Add barcode no. manually”: click this button to open an input field. Enter the barcode number to assign to the twin, then confirm with the designated icon. The twin is automatically created with this number
- “Search”: click this button to open a dropdown list. Search for normal items and convert them into twins associated with the same blueprint by clicking “Convert”.
💡 Normal items without barcodes and stock items cannot be converted into twins
- “Scan”: click this button to open the barcode scanner. Scan one or more Timly QR codes. After scanning, click the cross to finish. Each scanned QR code automatically creates a twin with the number indicated on the code.
- Step 4: Edit a Twin -
- You have two options to edit a twin:
- Quick edit: from the twins overview
- Full edit: from the twin’s item page
Edit a twin from the twins overview:
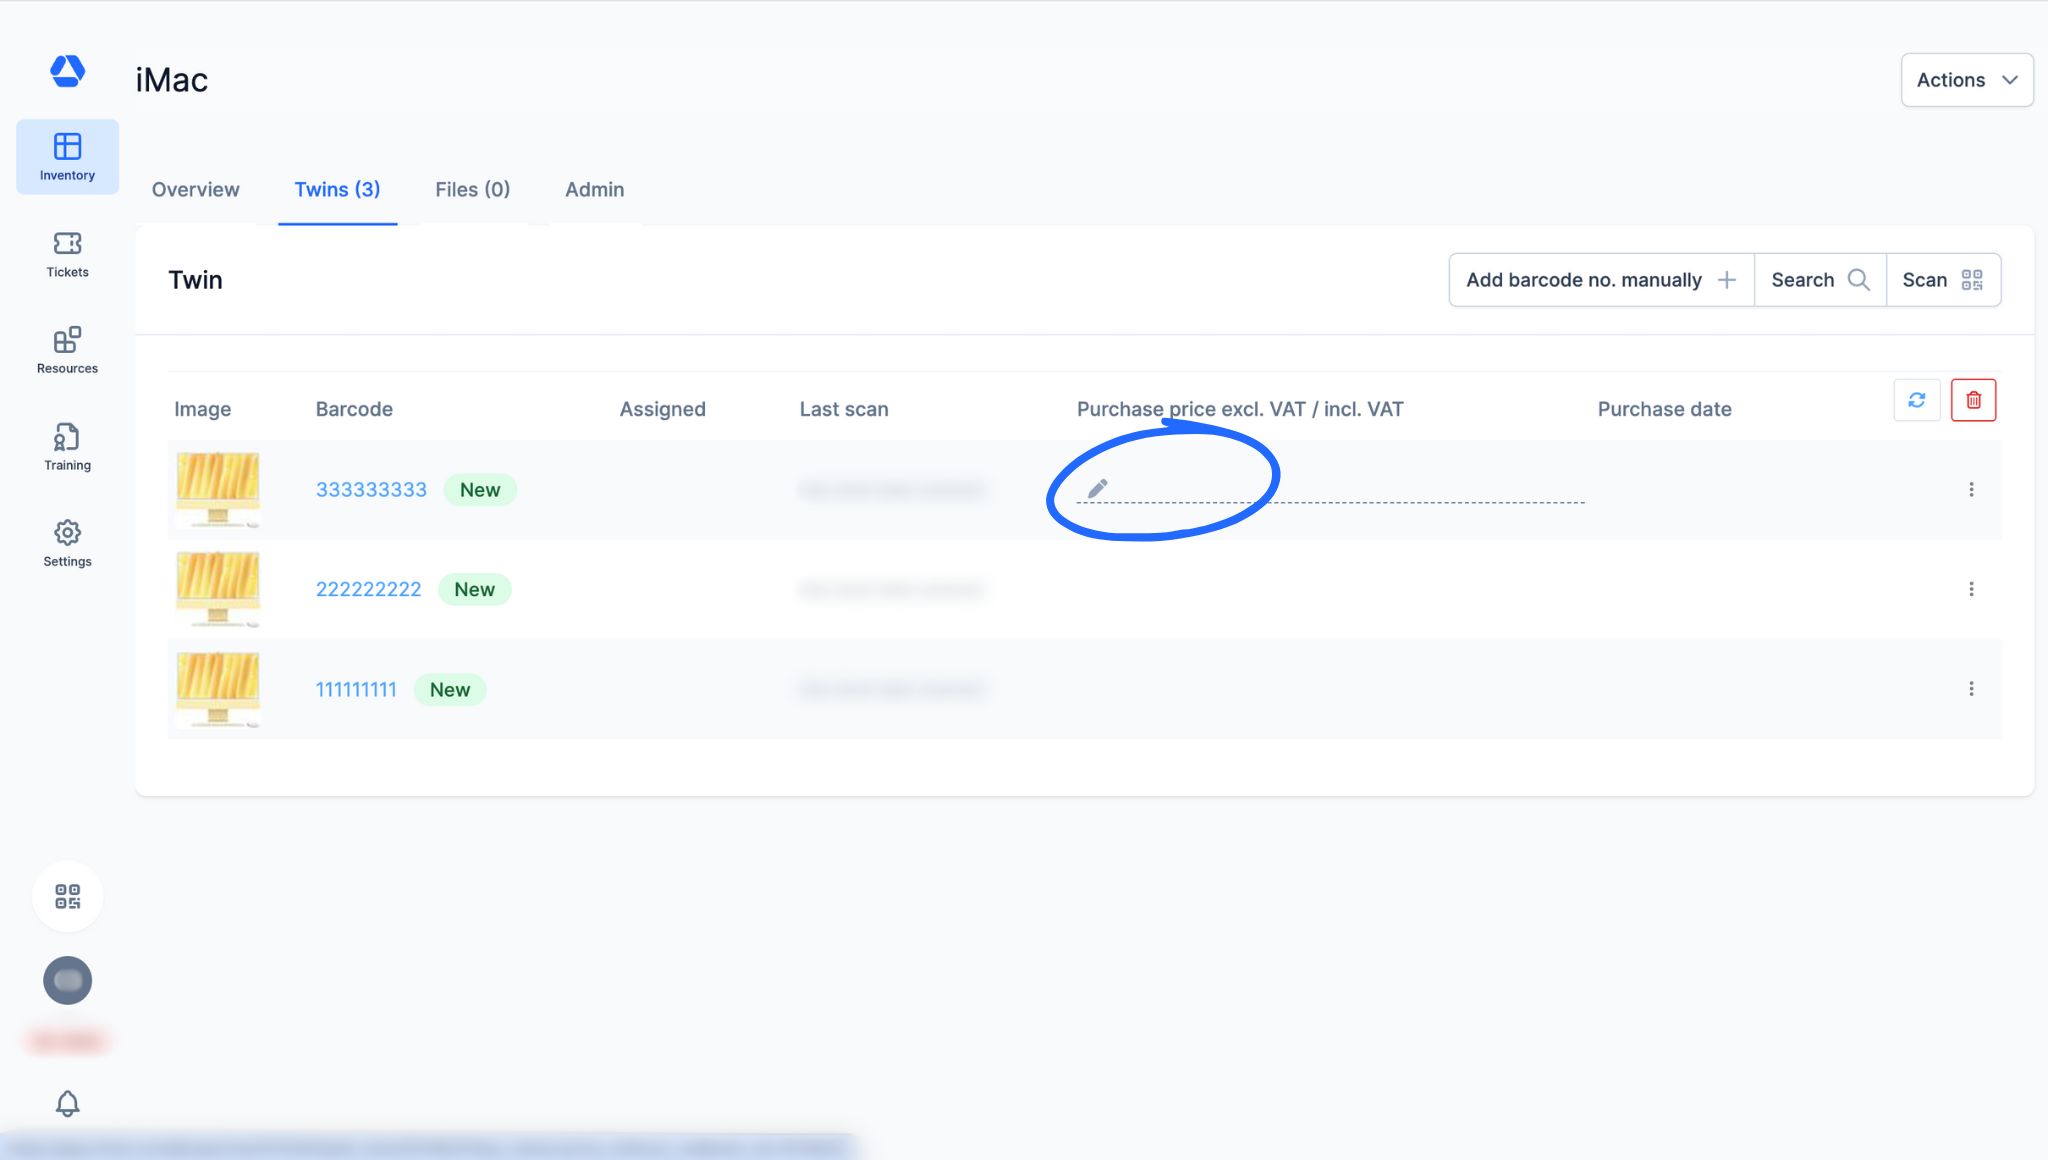
- From the twins overview, hover over the field you want to edit and click the pencil icon. An interactive panel will open, allowing you to modify the twin’s attributes.
Edit a twin from its page:
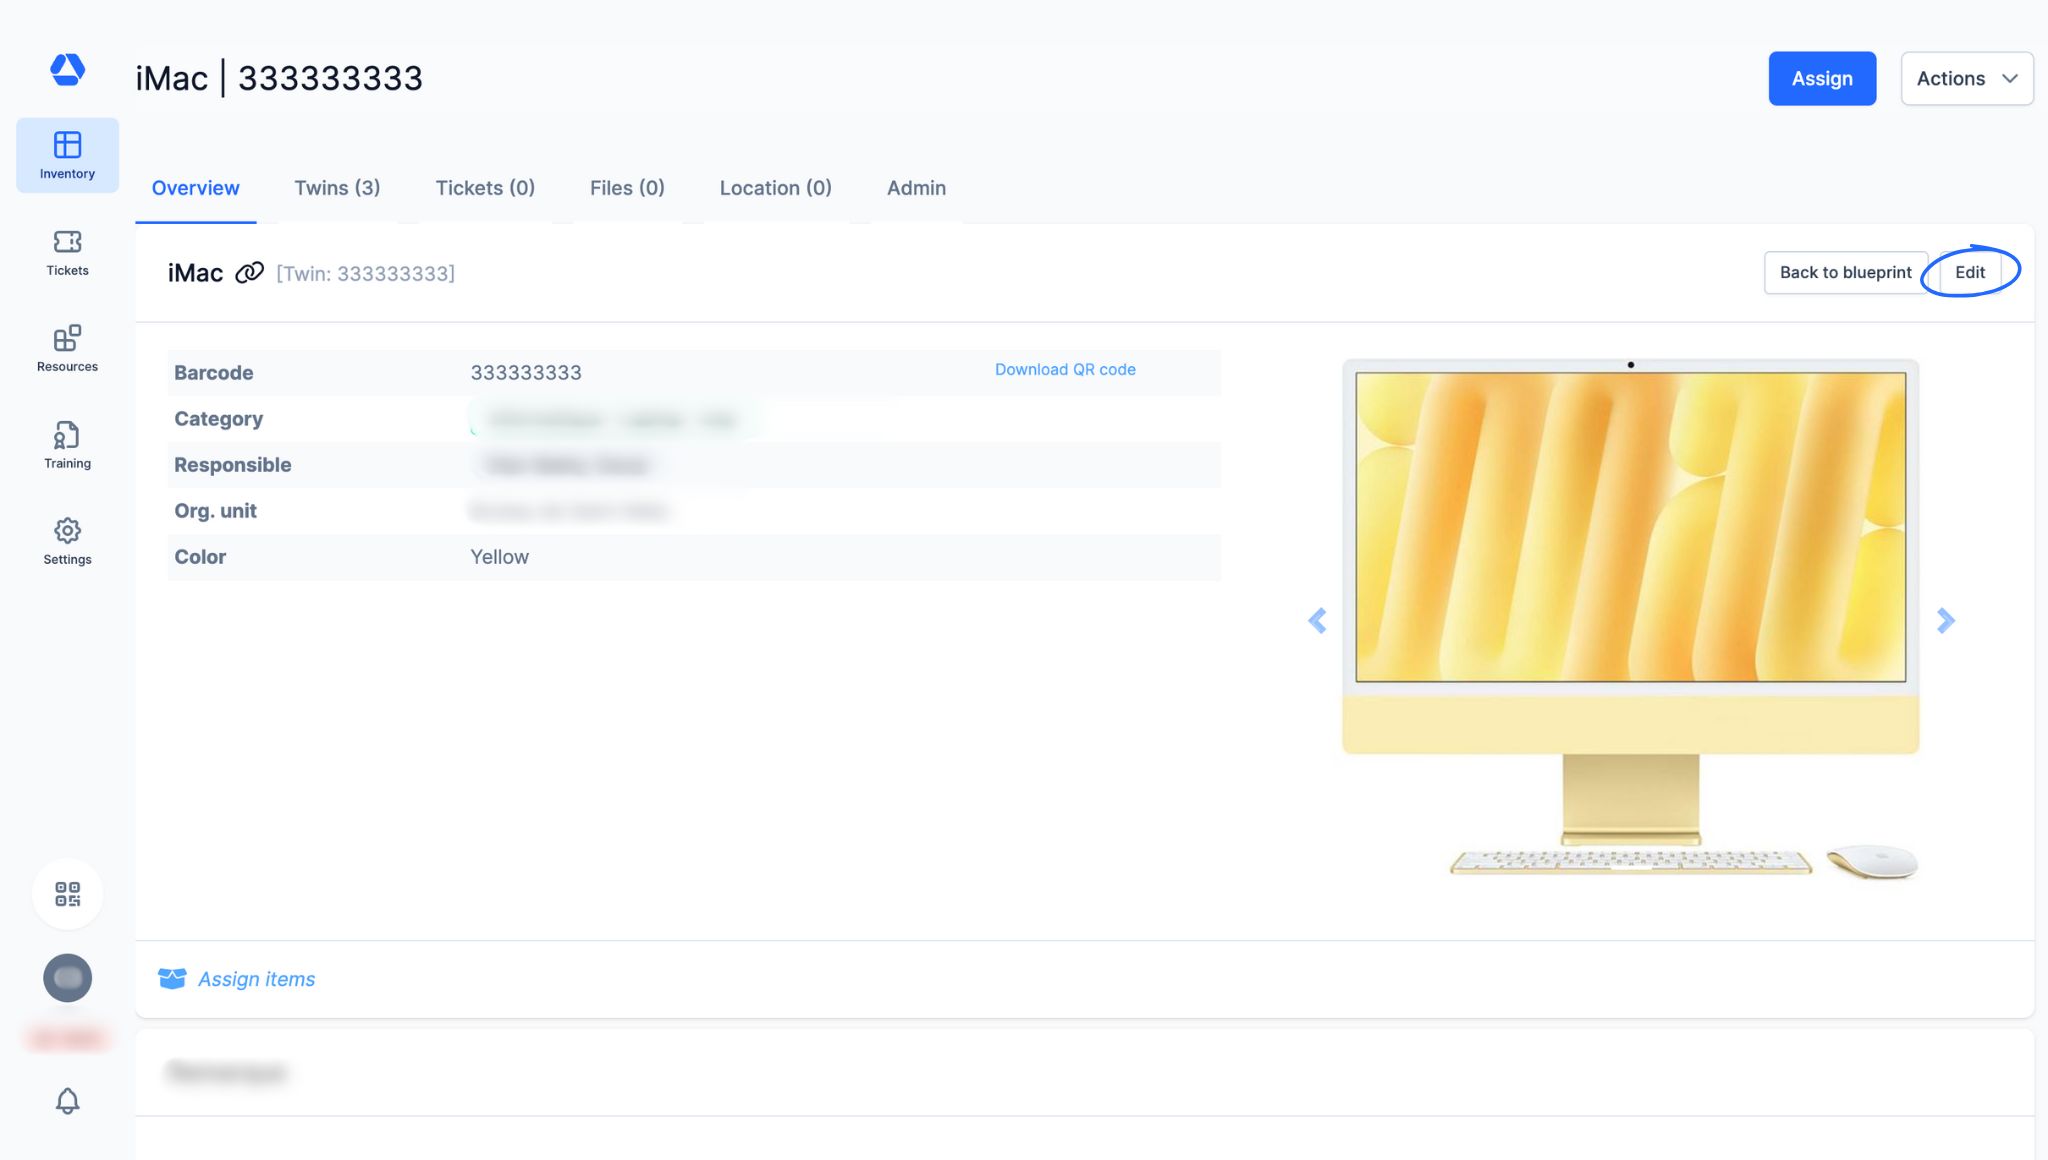
- On the twin’s item page, click the “Edit” button to modify its attributes.
- Step 5: The Twin's Item Page -
- The twin’s item page consolidates all information and actions related to the twin. You can:
- Assign the twin by clicking “Assign”
- Create a ticket:
- Click “Actions” → “New ticket” or
- Click “Create ticket” in the “Open tickets” section
- Duplicate the twin by clicking “Actions” → “Duplicate item”
- Convert it into a container item by clicking “Assign items”
- Comment by tagging someone to notify them about this twin
- Add contacts by clicking “Add / edit” in the contacts section
- View the assignment history of this twin in the “Item assignments (history)” section
- View tickets assigned to this twin in the “Tickets” tab
- Add files and/or photos in the “Files” tab
- View the movement history of this twin in the “Admin” tab (Available only for admin accounts)
- Create, deactivate, or reactivate a Direct Access Label by clicking “New direct access token” in the “Admin” tab
- Return to the originating blueprint by clicking “Back to blueprint”
- Find other twins created from this blueprint by clicking the “Twins” tab
💡 Note: tabs and sections may vary depending on the features included in your Timly package.
📖 Glossary
Inventory: The inventory is the set of items you manage and track in Timly.
Item page: The item page is the individual record dedicated to an item, an interface where all related information is displayed:
- Assignments
- Associated documents
- Audit log/history (assignments and movements – visible only by admins)
- Contacts
- General information (name, category, barcode, photo, and technical details)
- GPS position
- Location
- Open associated tickets
- Planning
- Remarks
- Usage data
📖 Find all the definitions in the Timly Glossary.
✅ Required Features & Functions
Inventory Module.
🔗 More Resources
- Help Center: How Do I Create Item Categories?
- Help Center: How Do I Create Items?
📩 Do you have more questions? Schedule a free and non-binding demo with one of our experts, or ask us at [email protected].