
How Do I Set Up Digital Signatures?
How Do I Set Up Digital Signatures?
💡 What You Need to Know
In Timly, digital signatures validate and record actions performed on items. Each confirmation, whether carried out remotely or directly on-site, is automatically logged in the platform, ensuring complete traceability.
📘 This guide introduces the essentials of setting up and using digital signatures in Timly.
Types of Digital Signatures
- Email Signature -
The email signature allows you to digitally confirm an action related to items. The recipient receives an email listing the items to confirm and can do so directly from their email address — no Timly account needed. It is an electronic confirmation, similar to DocuSign.
Available for: Inventory module
- On-Site Signature -
The on-site signature allows you to confirm actions, directly on site using a smartphone, tablet, or computer connected to Timly. It formalizes task execution on-site and provides reliable control over interventions.
Available for: Inventory module, stocktaking, ticketing system
⚙️ The Steps
- Digital Signature for the Inventory Module -
- Configure Signatures -
The first step is to configure your signature settings.
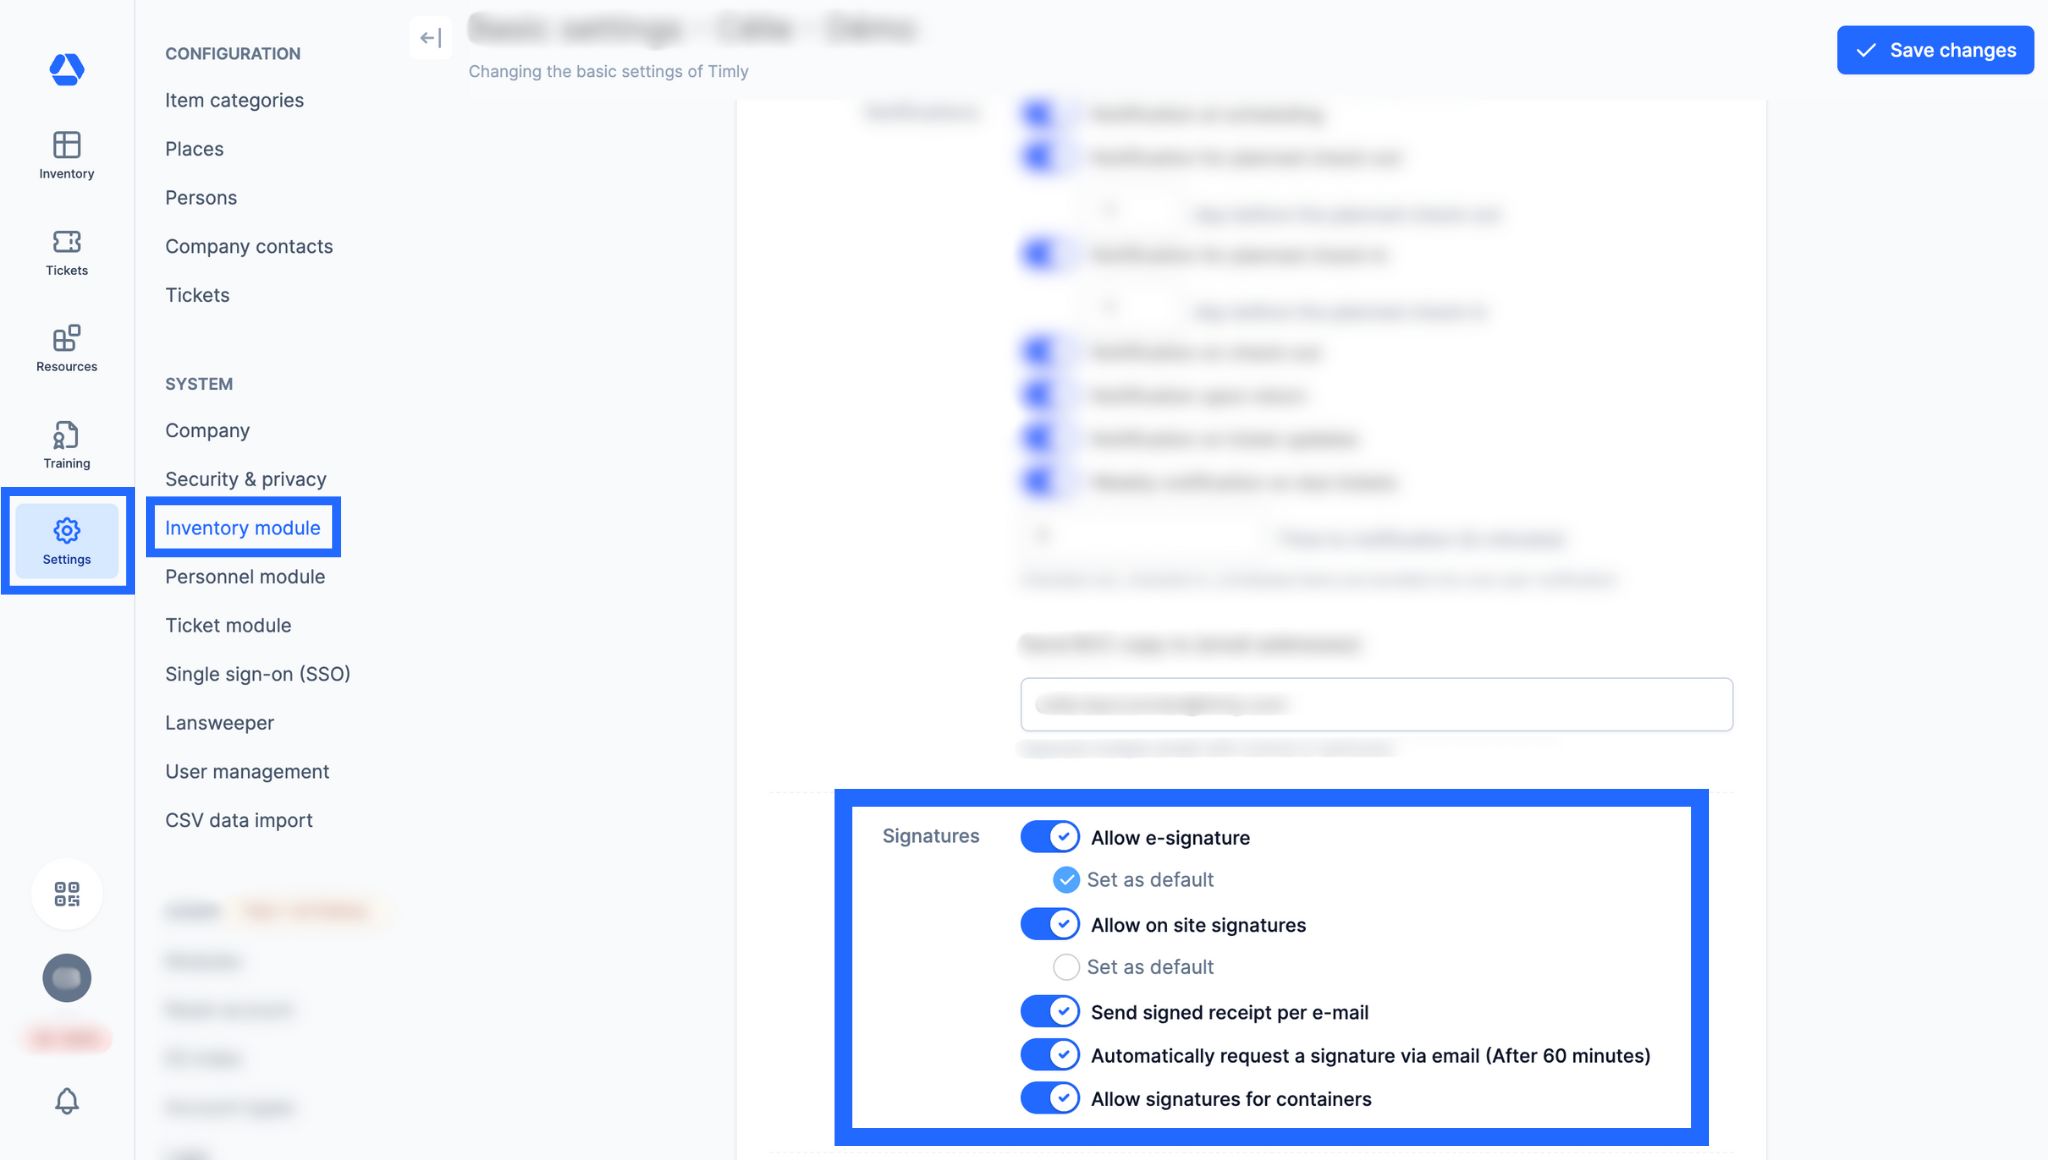
- Go to "Settings", then "Inventory module"
- Scroll down to "Signatures" section
- Define the settings that suit your needs
💡 The toggle "Allow signatures for containers" enables signatures for places (e.g., construction sites). Activating this allows a site manager to validate assignments, returns, or other actions for that place.
- Define Signature Templates -
To generate signatures, you must first define your signature templates, which can be used for both email signatures and on-site signatures.
💡 The signature template corresponds to the text displayed at the time of signing, and it will be included in the generated PDF.
Examples of signature templates:
- Item assignment
- Item loan
- Delivery reception
- Maintenance performed
- etc.
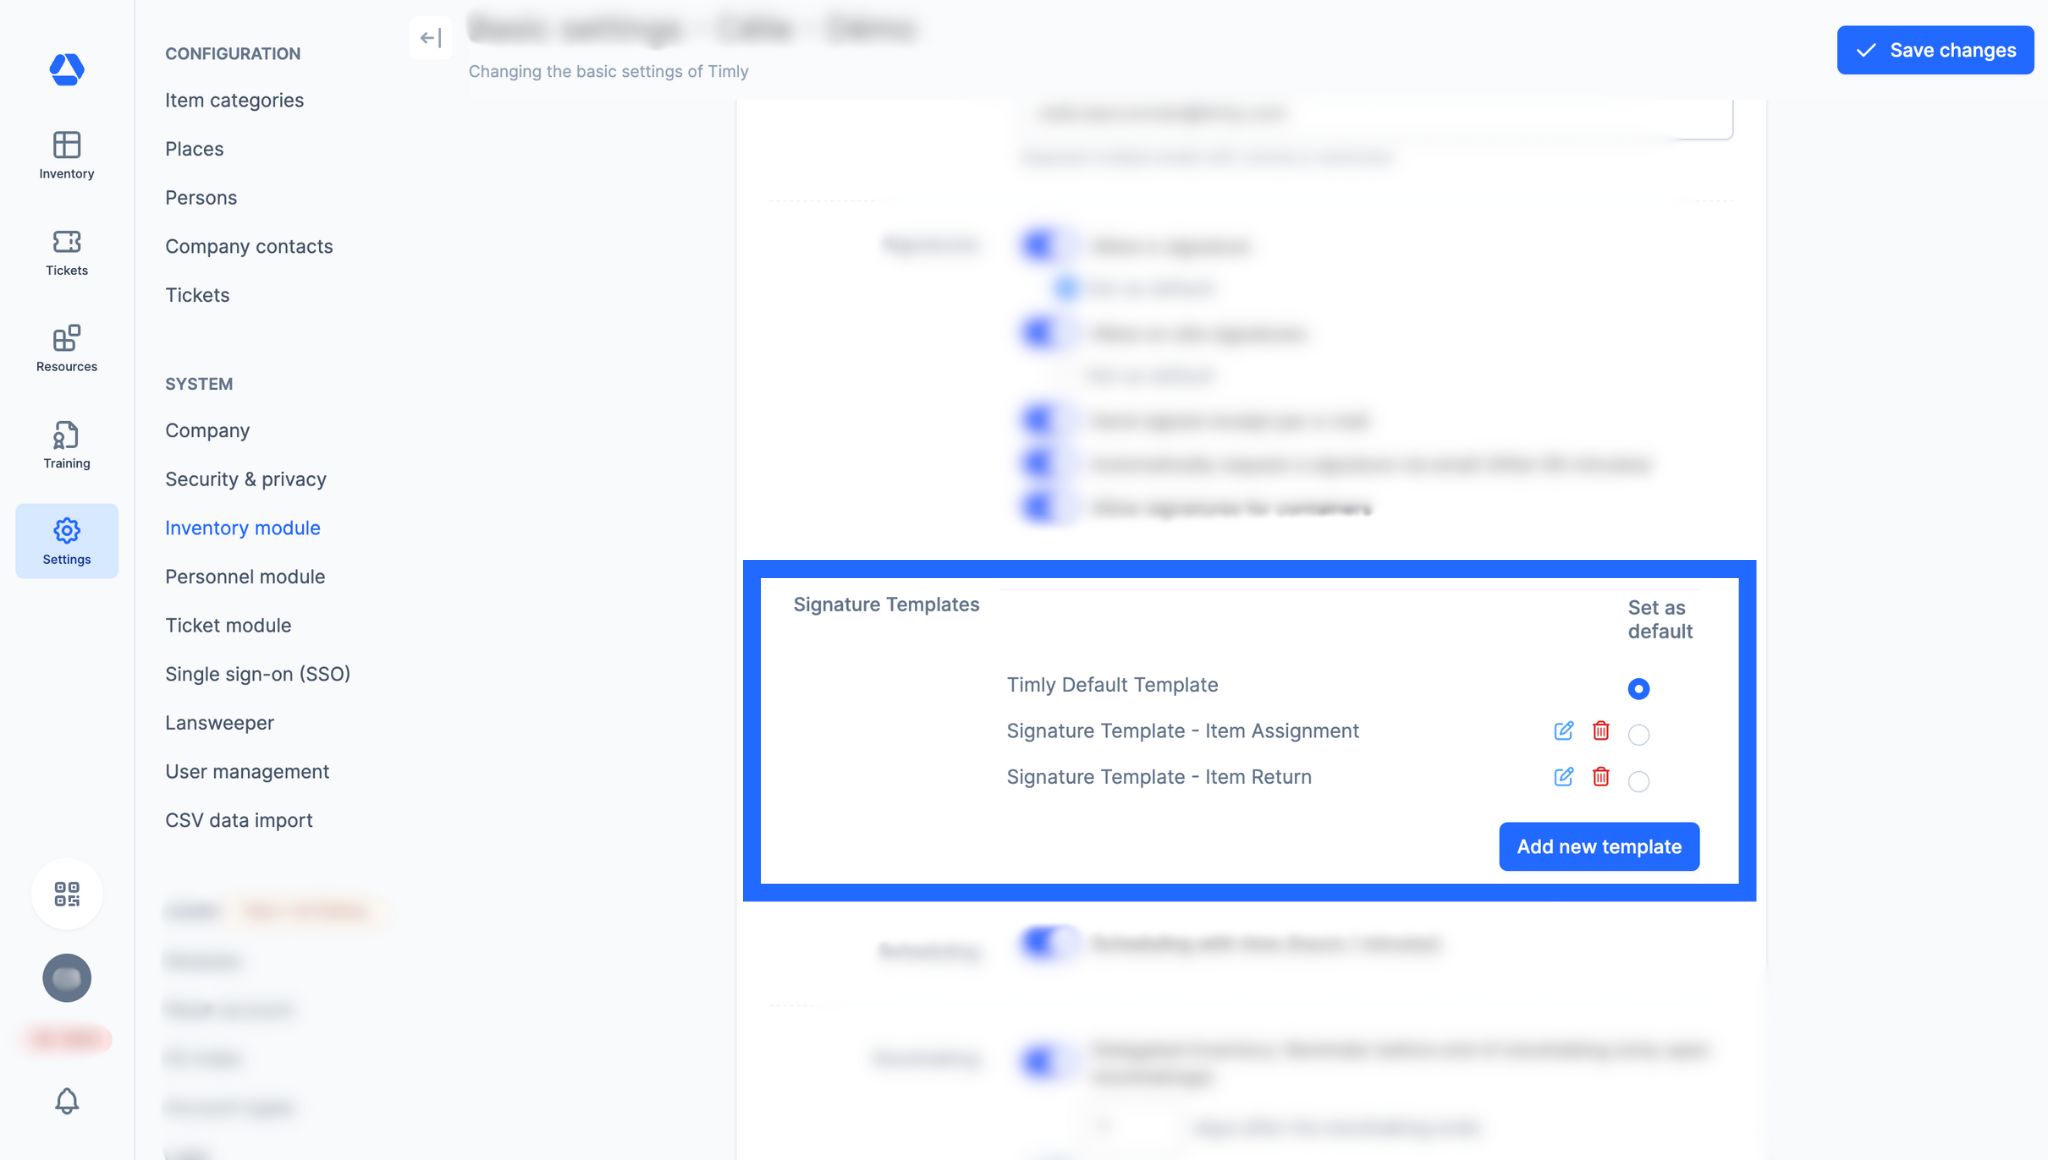
- Go to "Settings", then "Inventory module"
- Scroll down to "Signature templates" section
- A predefined signature template is provided by Timly. You can then manage your own templates by creating, editing, or deleting them as needed.
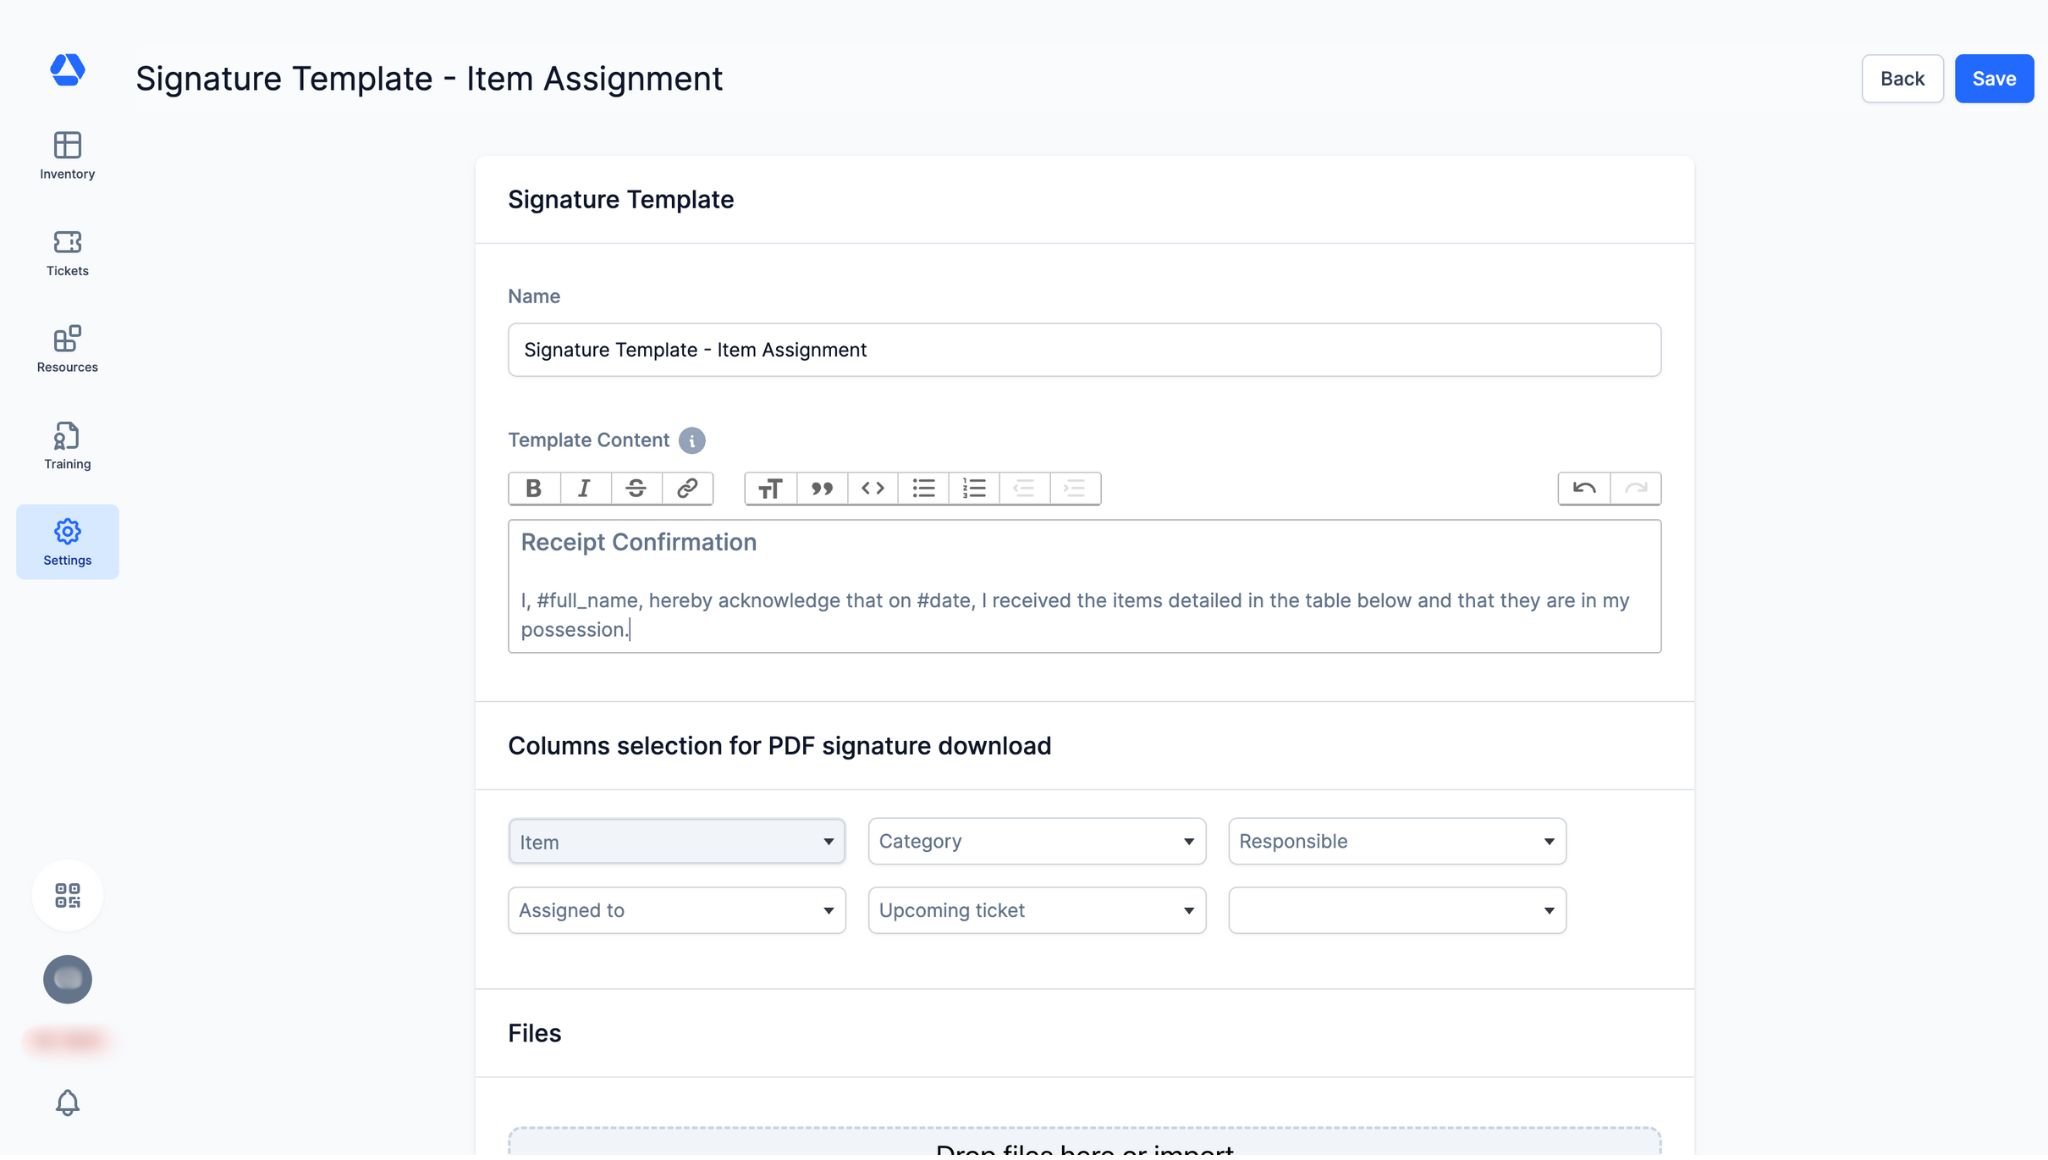
- When creating or editing a signature template, you can precisely configure the content (text, columns, files) that will be displayed during a signature.
- Method 1: Create a Signature from a Person’s Profile -
The most complete method is to request a signature from a person’s profile.

- Go to "Resources", then go to the person’s profile
- Go to "Receipt", then "Create a signature"
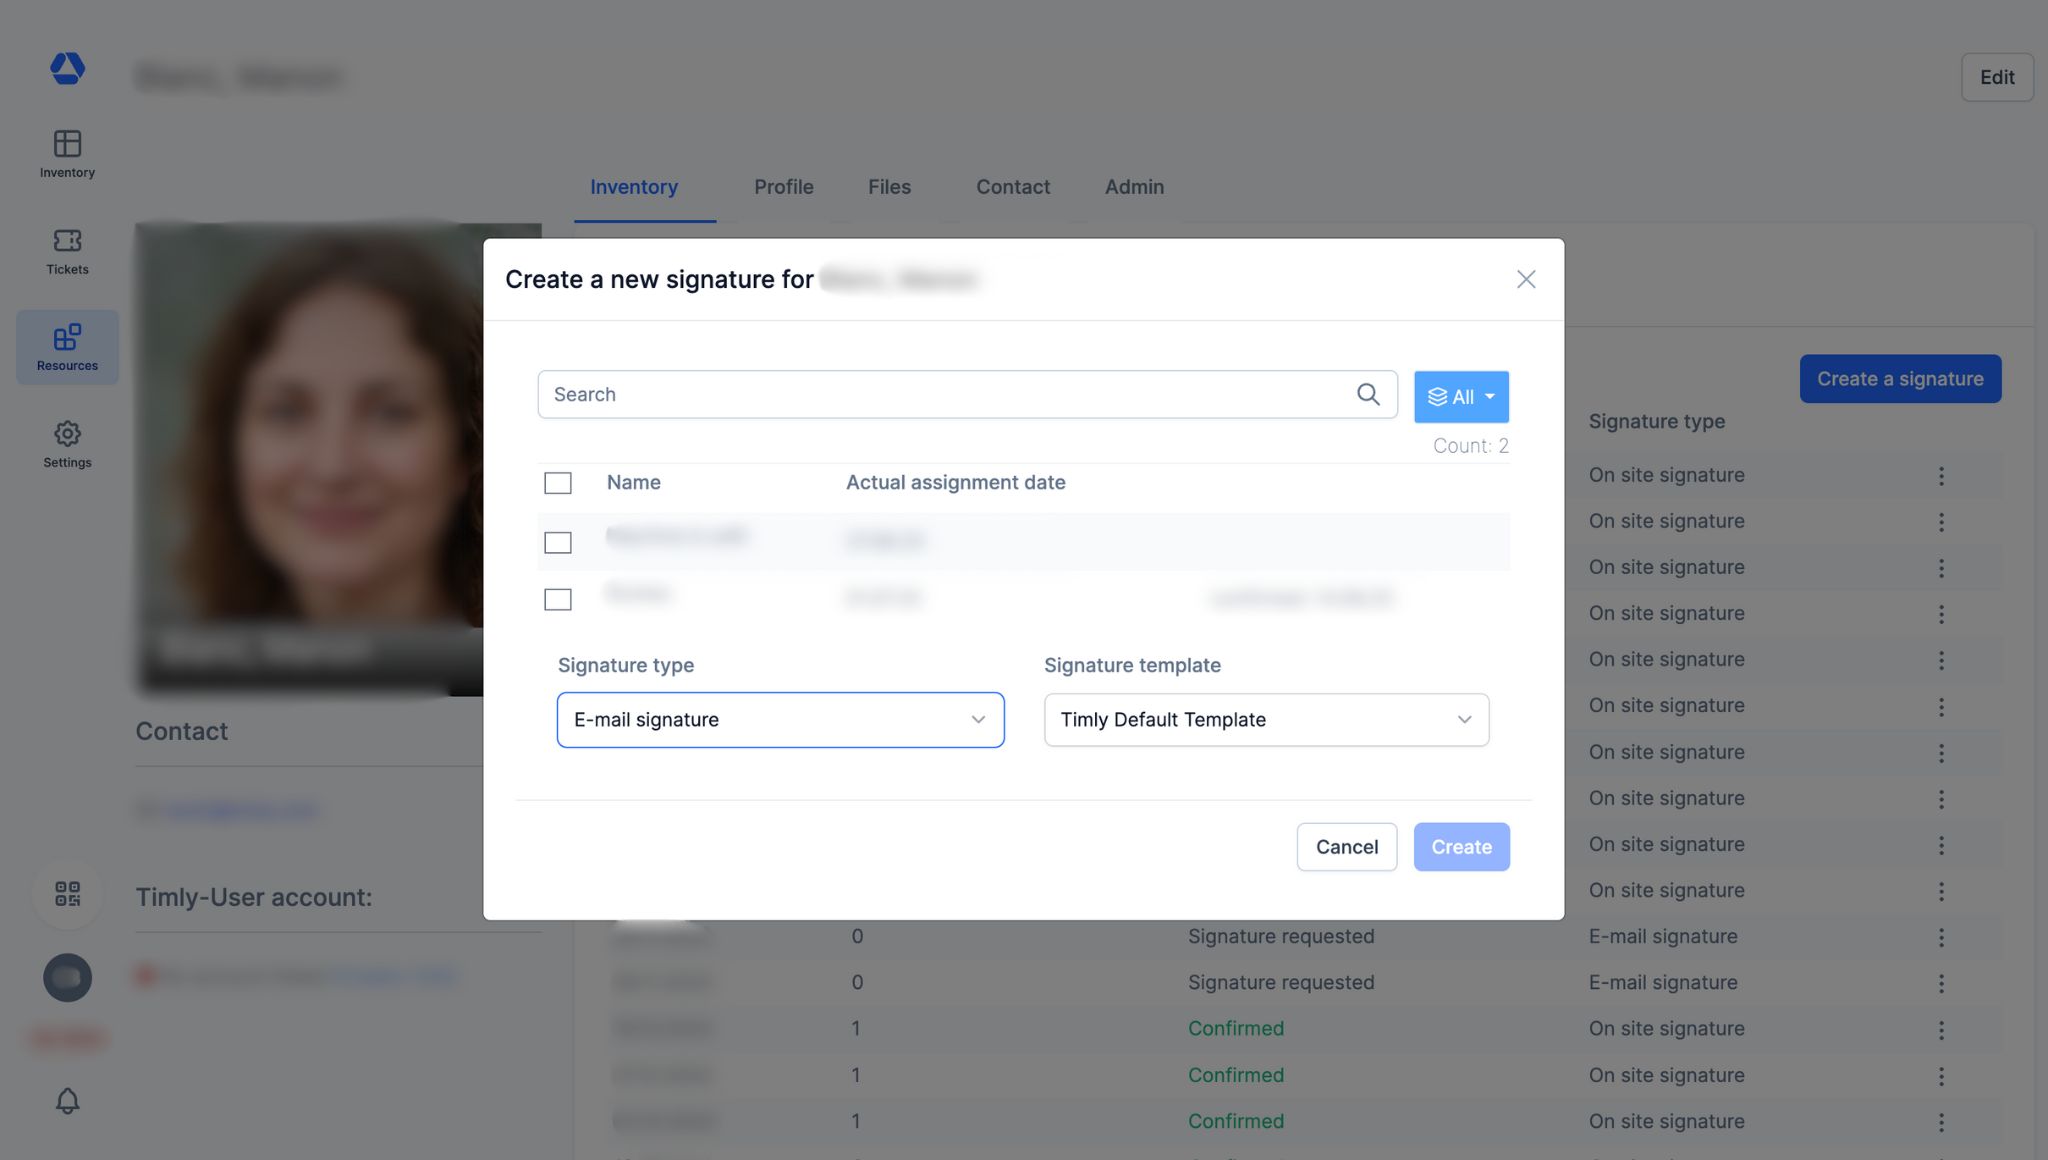
- An interactive panel opens, allowing you to:
- View all items assigned to that person
- Select the items for which you want to request a signature
- Choose the type of signature
- Choose the signature template - Click "Create"
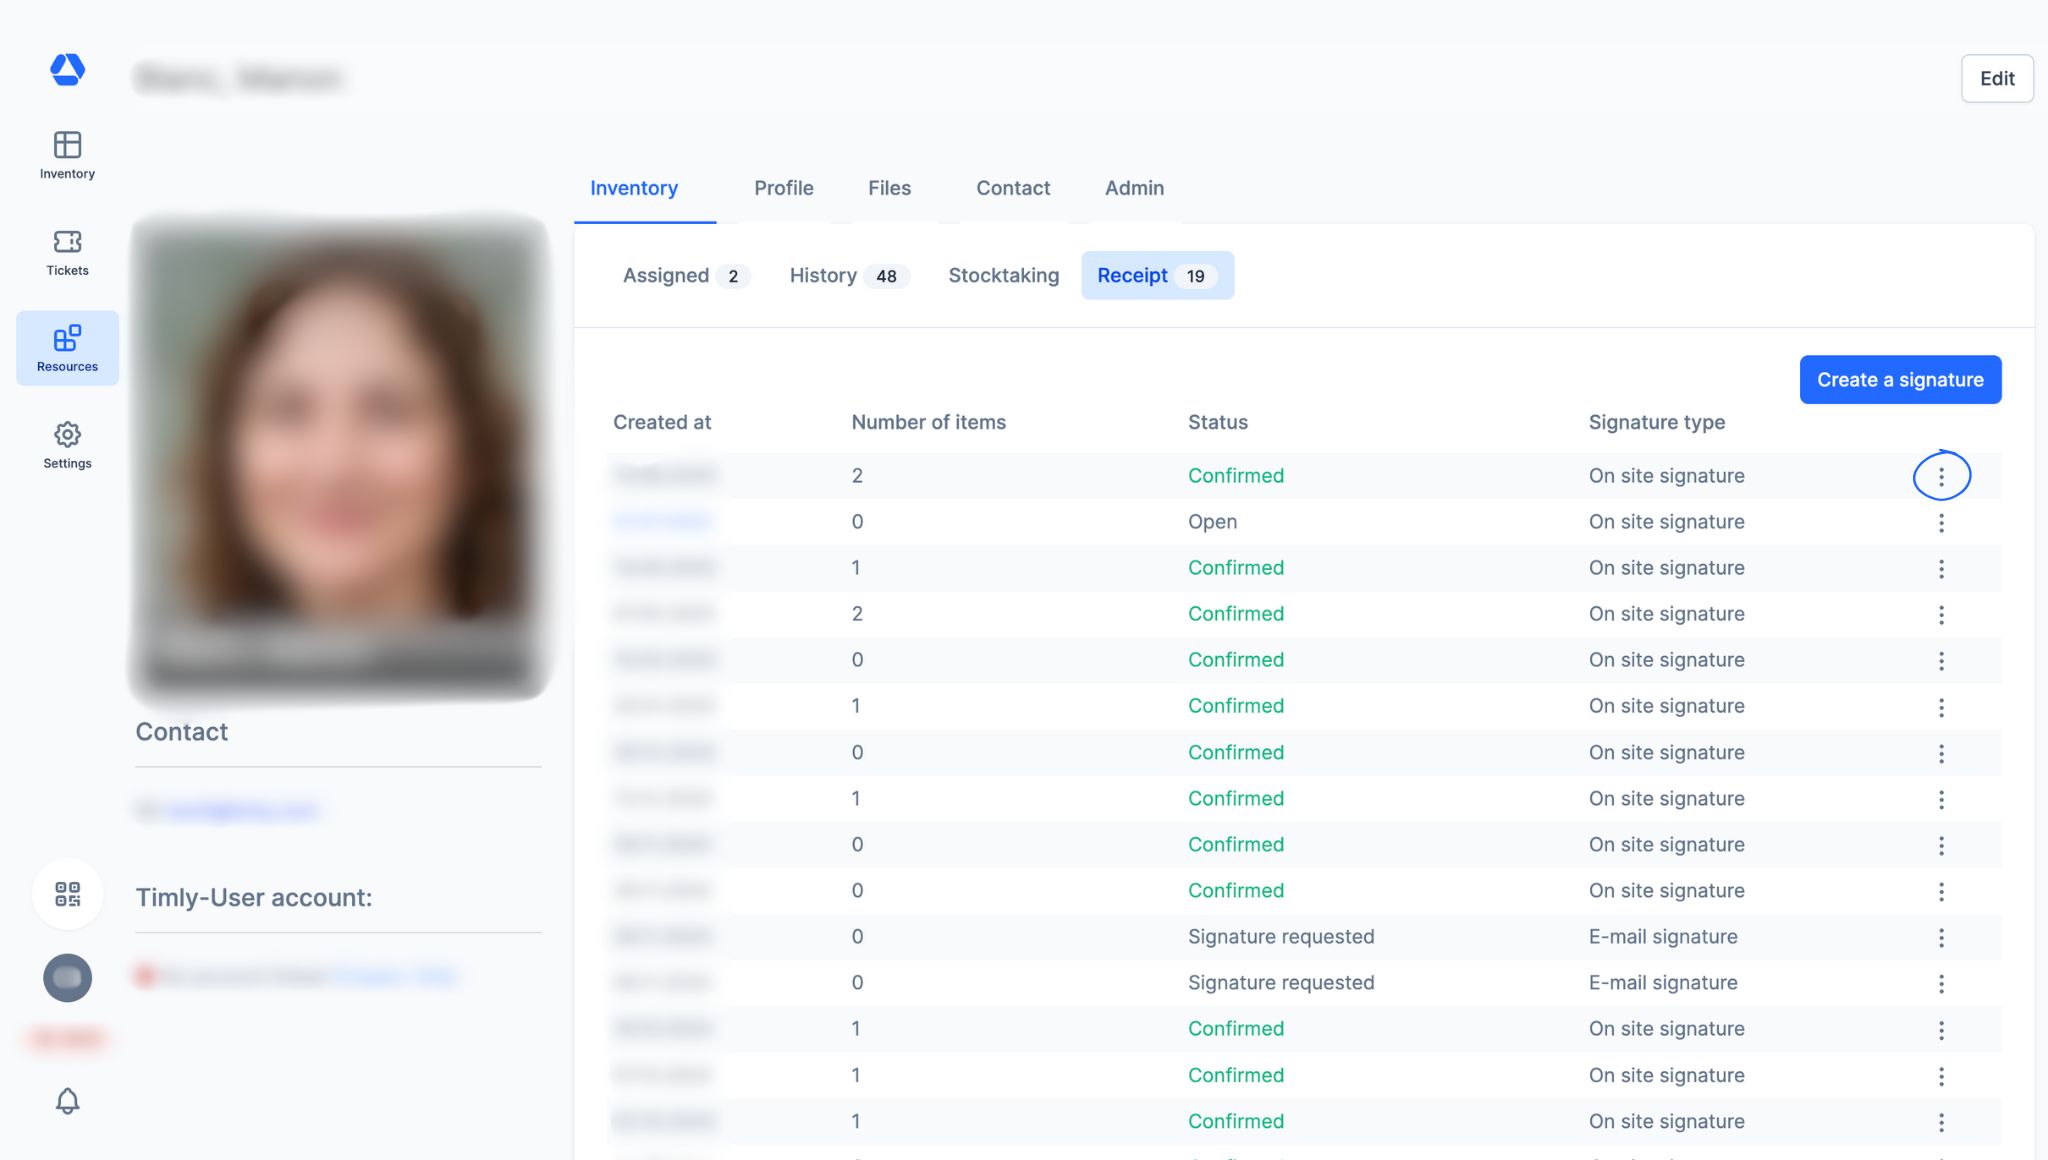
- In the "Receipt" tab, you can also preview all signatures for this person.
- By clicking the icon:
you will see these options:
For email signatures:
If status is "Open":
- "Send reminder"
- "Delete"
If status is "Confirmed":
- "Download"
- "Delete"
For on-site signatures:
If status is "Open":
- "Sign"
- "Delete"
If status is "Confirmed":
- "Download"
- "Delete"
- Method 2: Create a Signature from an Item Page -
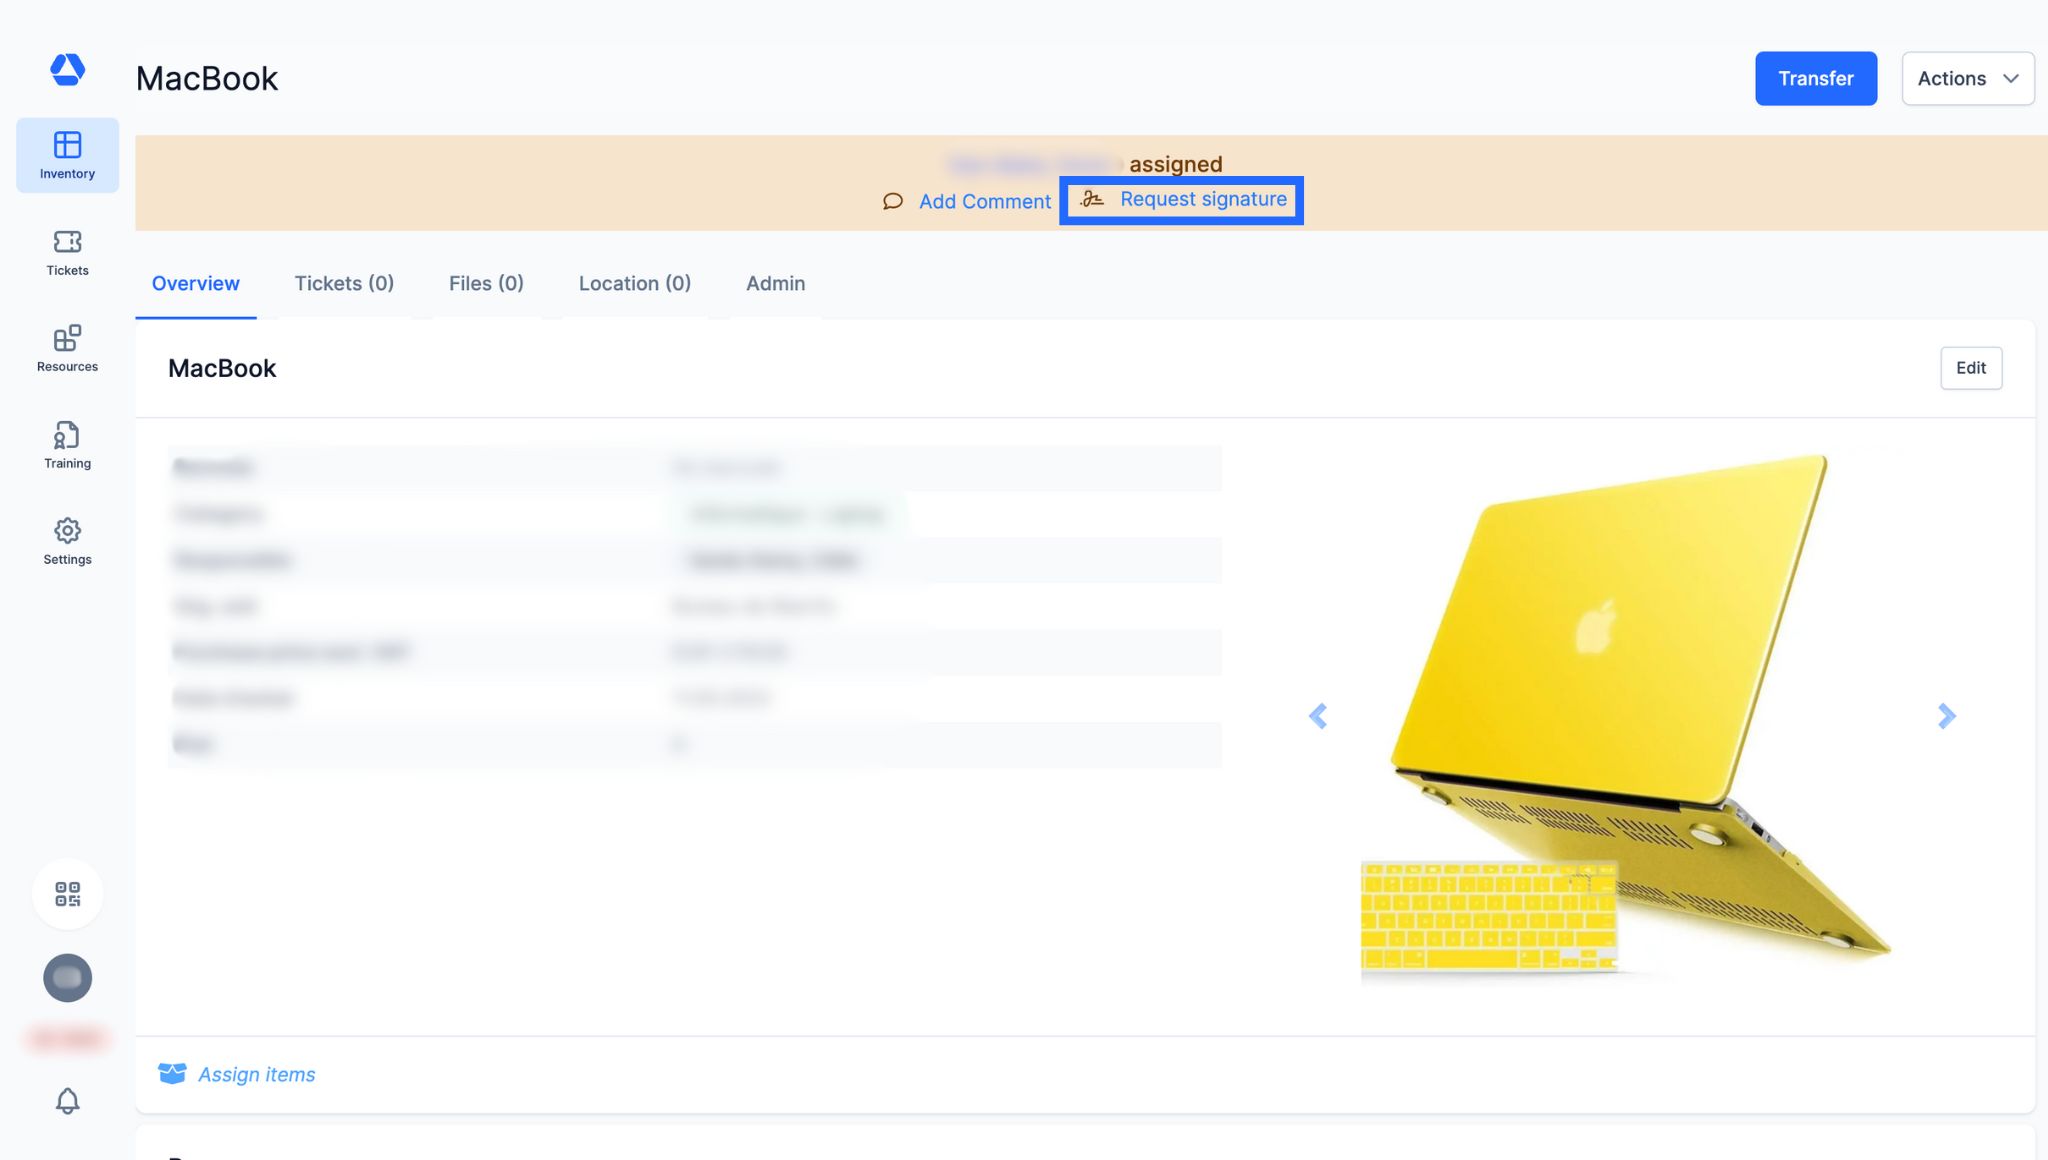
The quickest method is to request a signature directly from an item page.
- Go to an item page
- Click "Request signature"
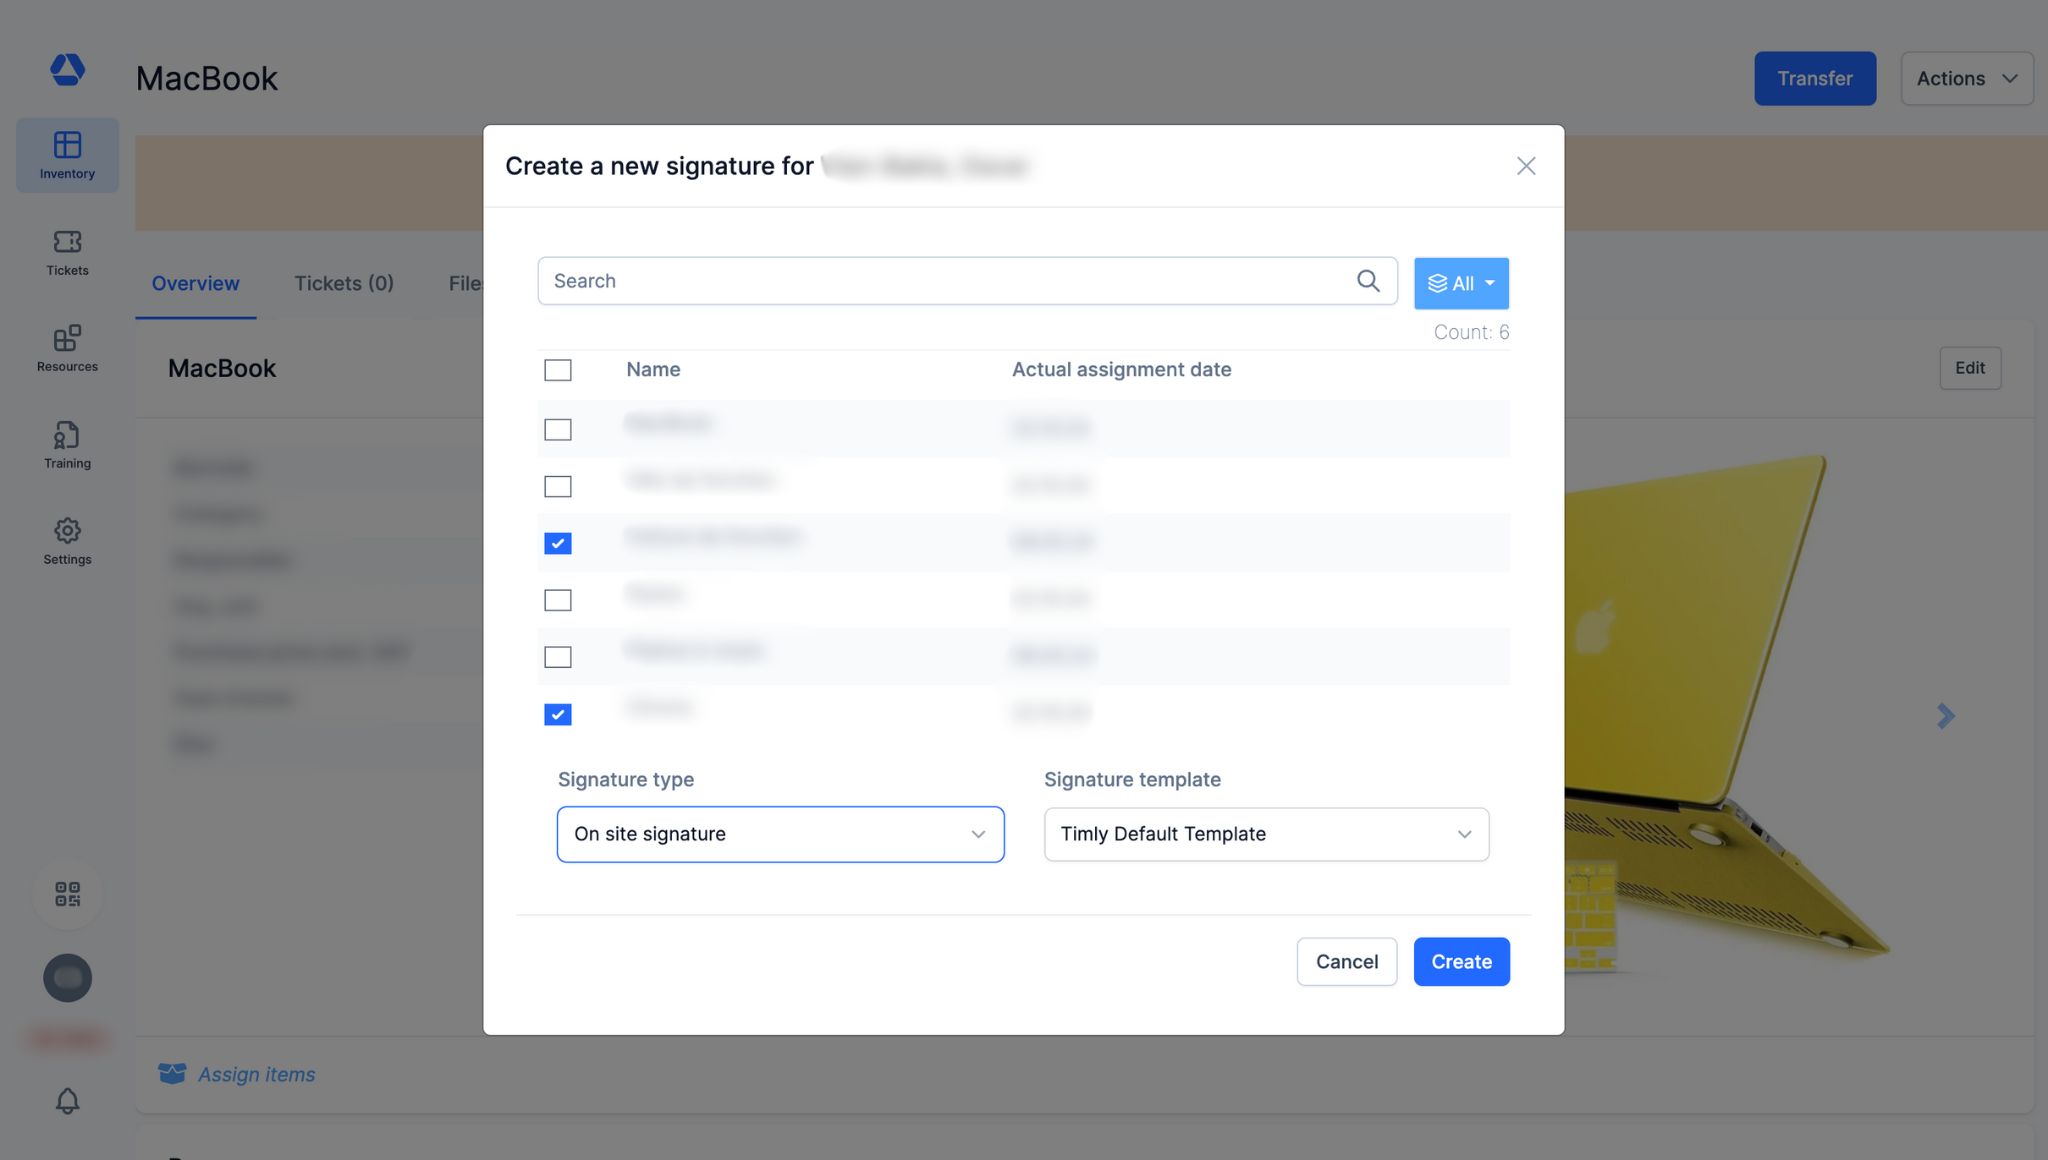
- An interactive panel opens, showing all items assigned to the same person as this item
- Select the items for which you want to create a signature
- Choose the type of signature
- Choose the signature template
- Click "Create"
- Signature Overview -
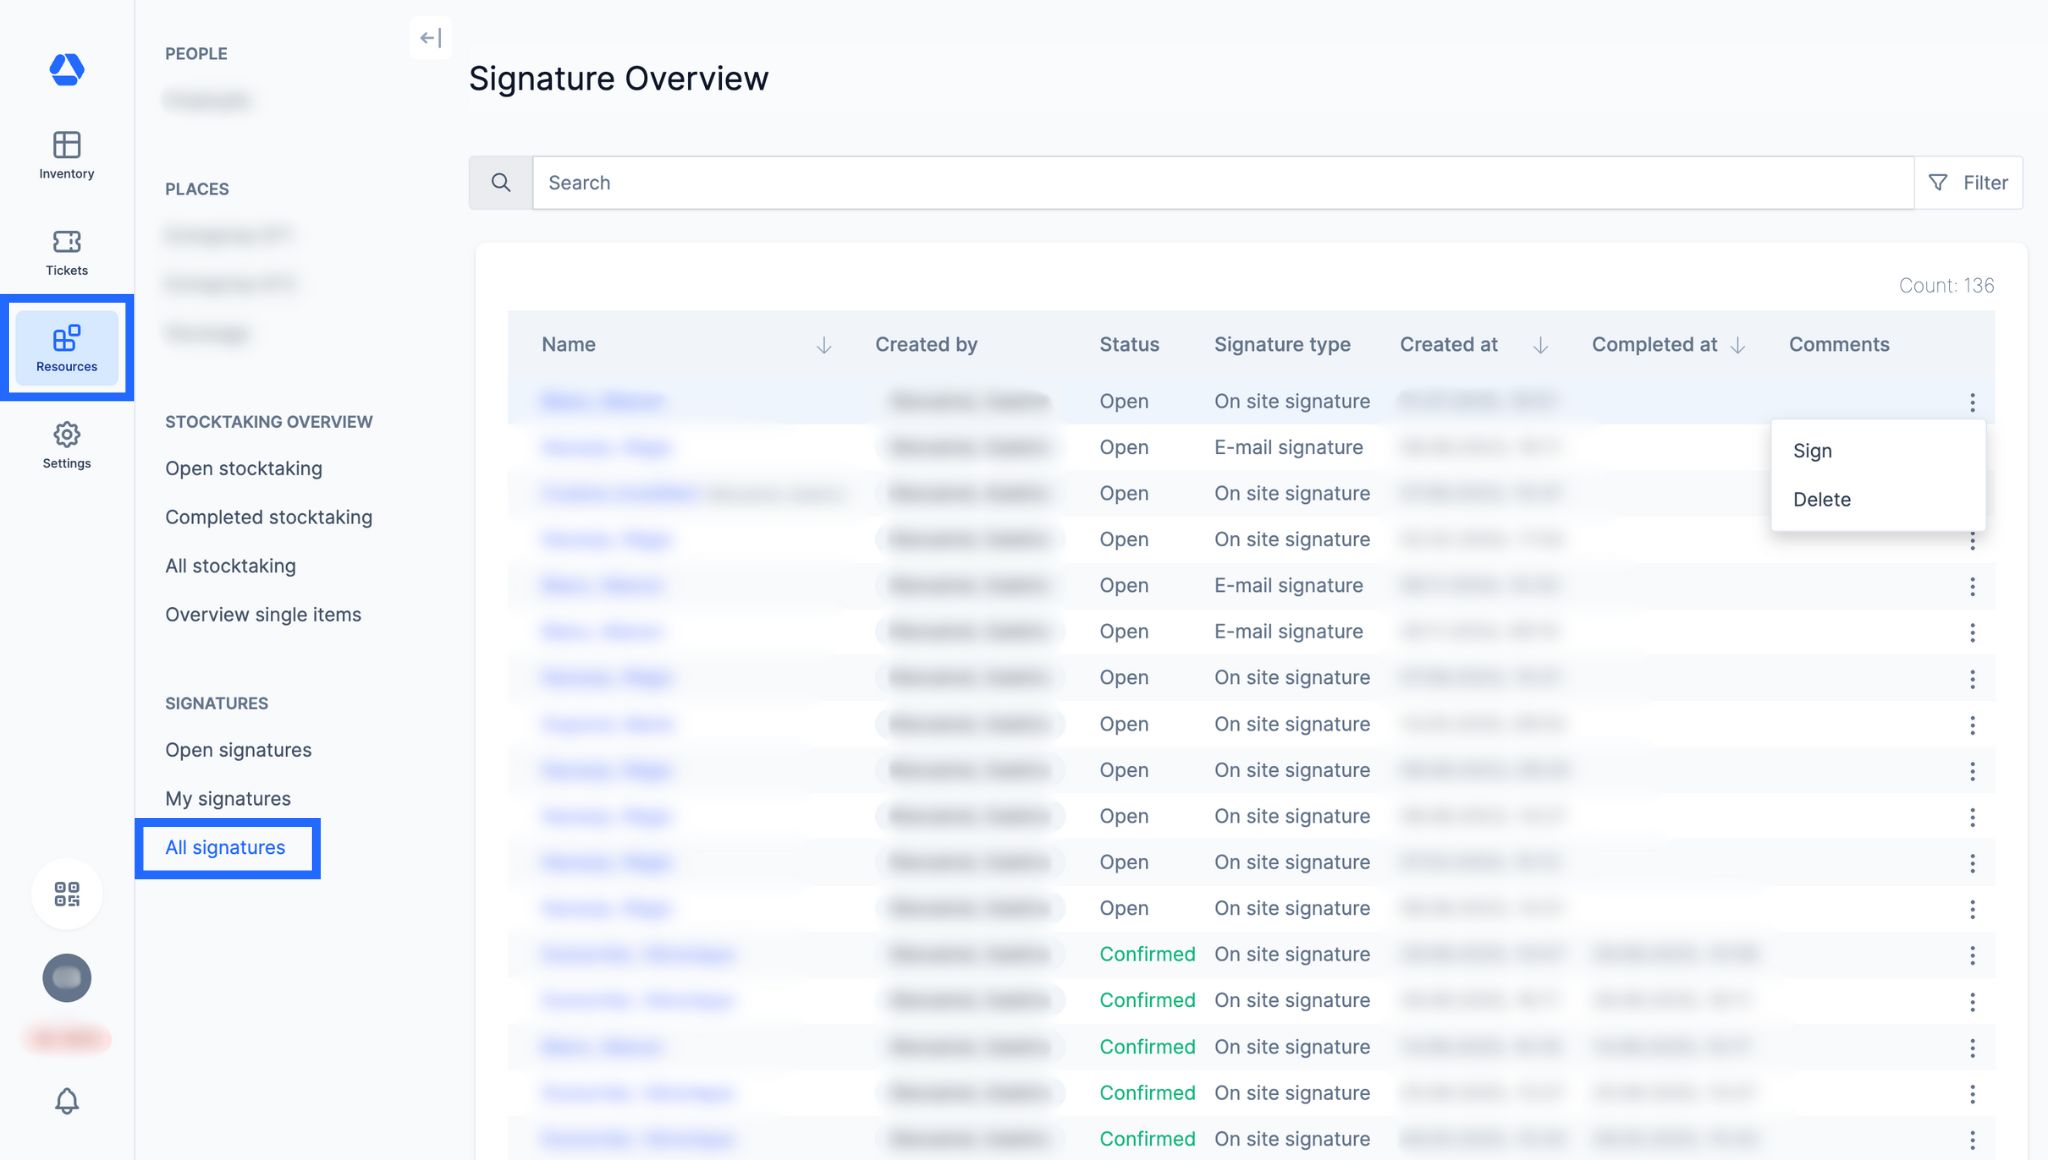
- Go to "Resources", then "All signatures"
- Use the search bar to find signatures
- Filter by:
- Status ("Open", "Confirmed", "Rejected")
- Signature type ("On-site signature", "Email signature")
- Resource type ("Place", "Person") - Sort by:
- Name
- Signature creation date
- Signature completion date
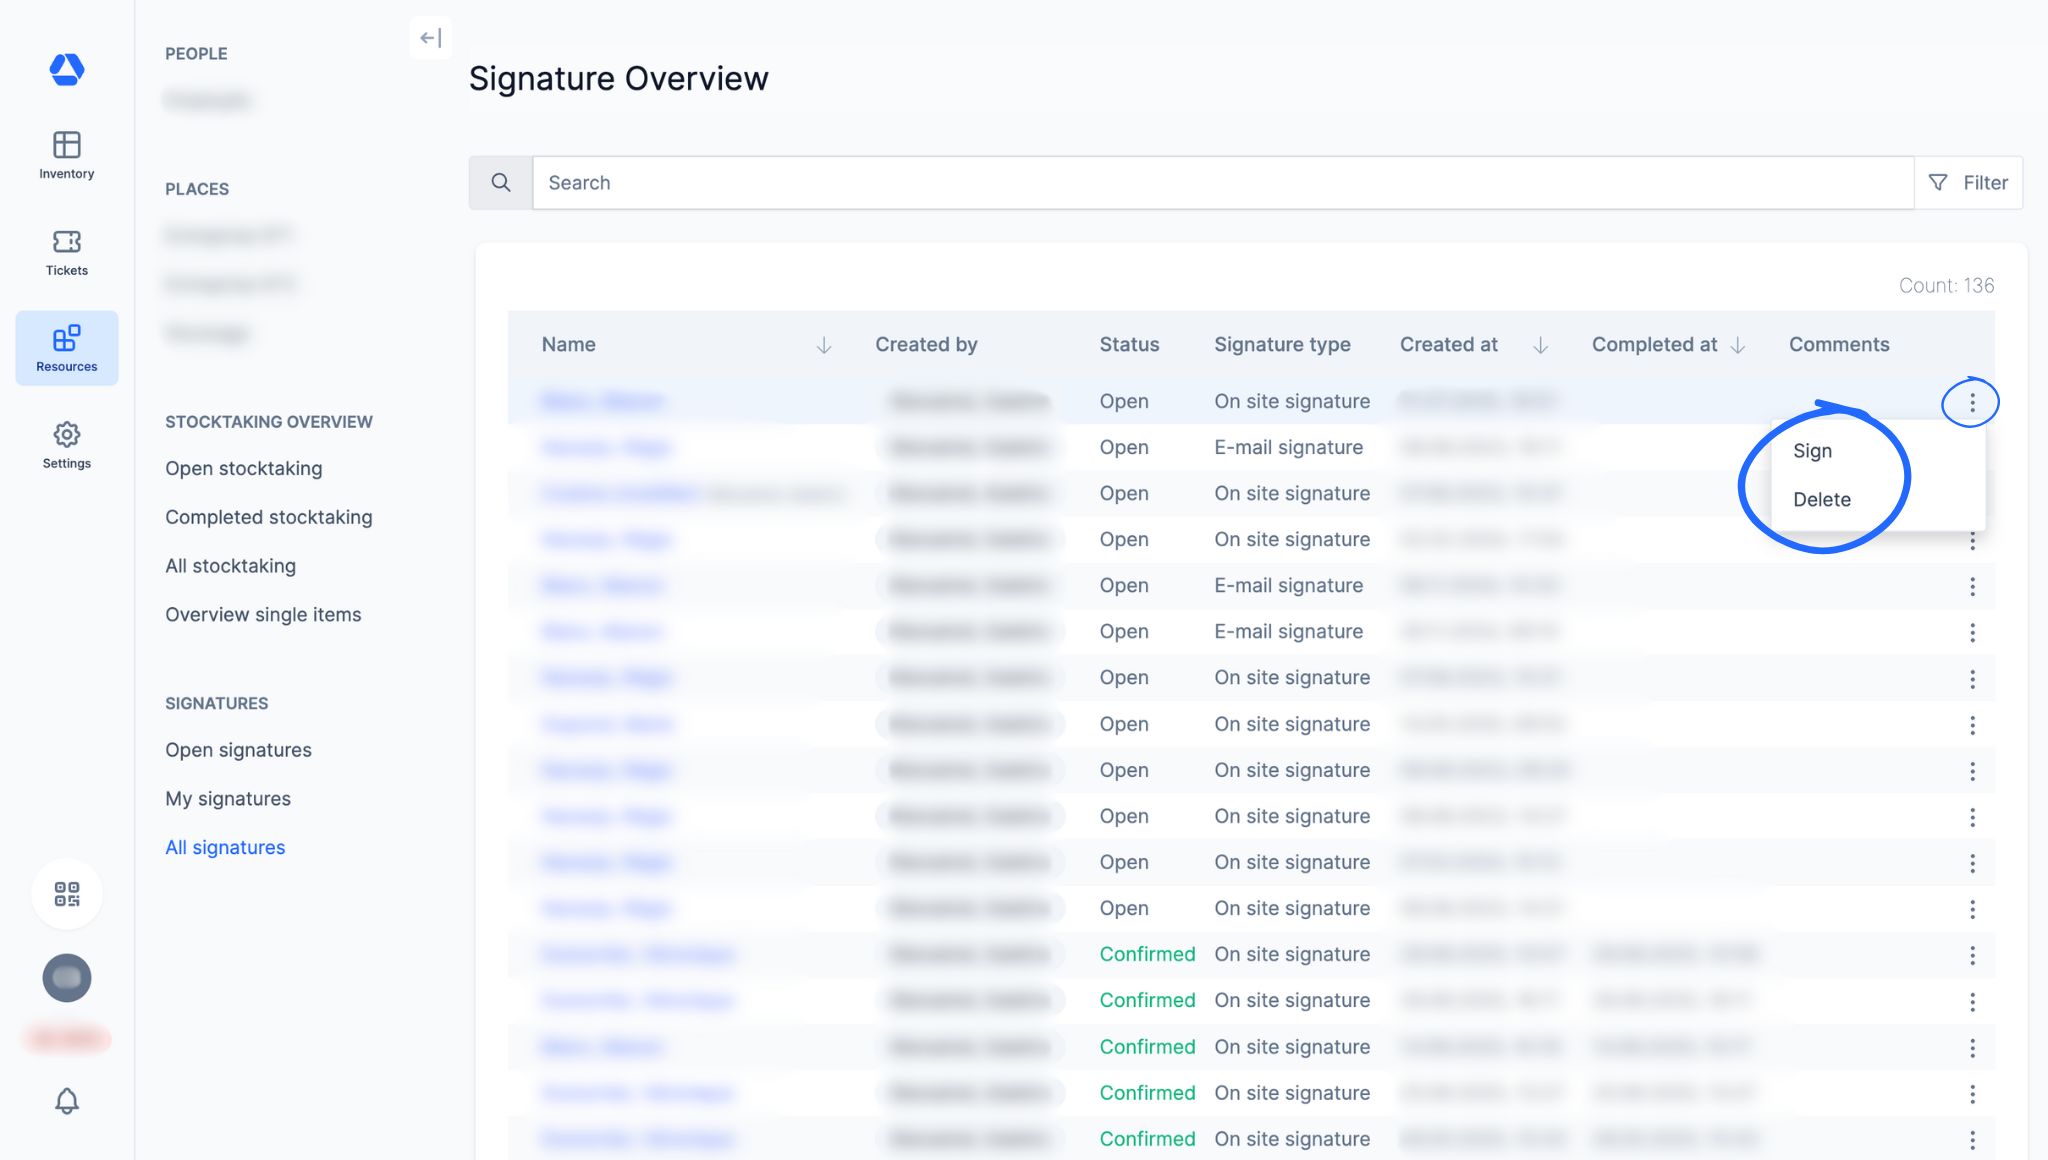
- By clicking this icon:
For email signatures:
If status is "Open":
- "Send reminder"
- "Delete"
If status is "Confirmed":
- "Download"
- "Delete"
For on-site signatures:
If status is "Open":
- "Sign"
- "Delete"
If status is "Confirmed":
- "Download"
- "Delete"
- Digital Signature for Stocktaking -
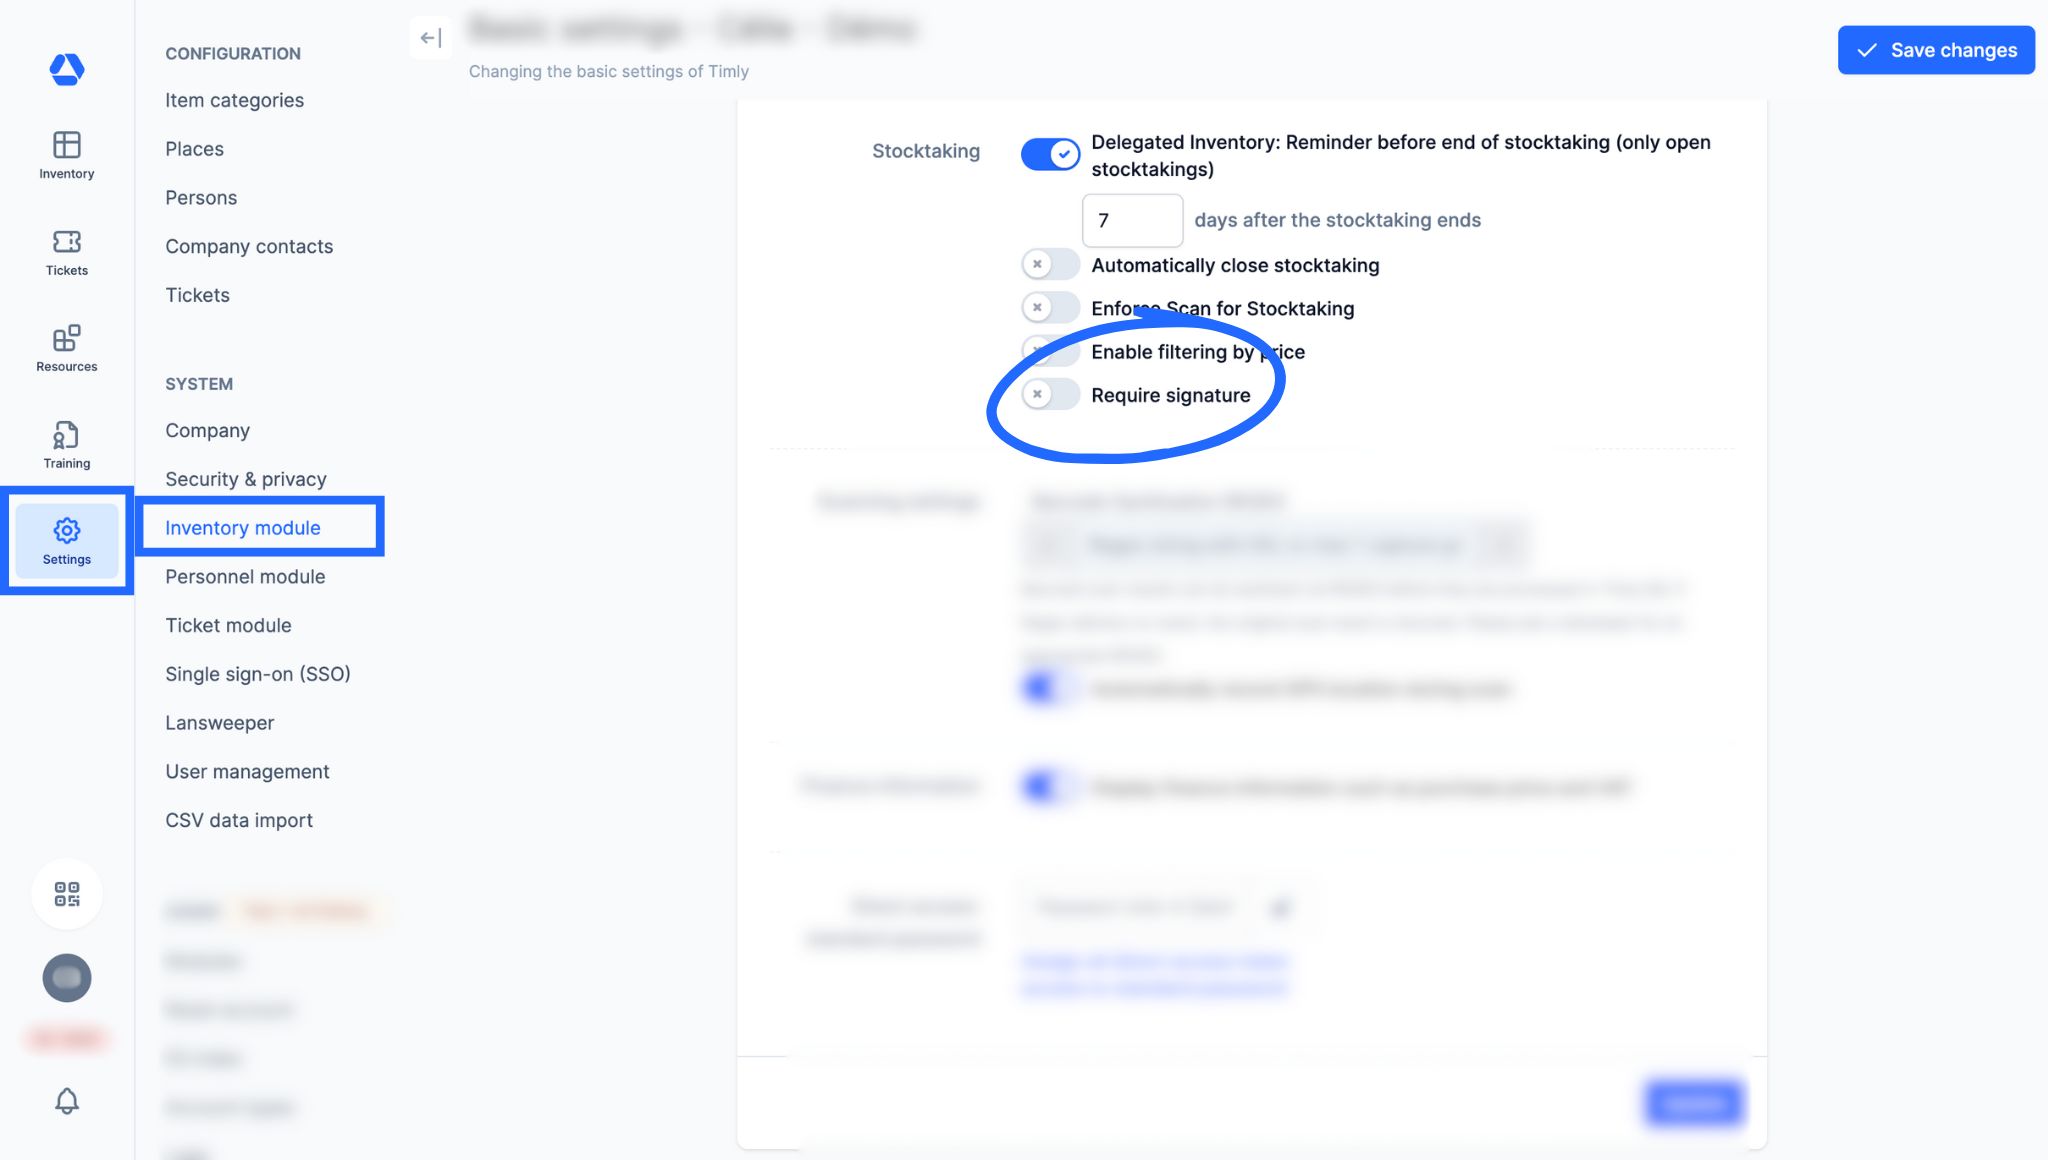
In the stocktaking settings, it is possible to require a signature to validate a stocktake. This signature is only available as an on-site signature and cannot be done by email.
- Go to "Settings", then "Inventory module"
- Scroll to the "Stocktaking" section
- Enable the toggle "Require signature"
To perform a stocktake with a signature, you can start:
From the Stocktaking Overview
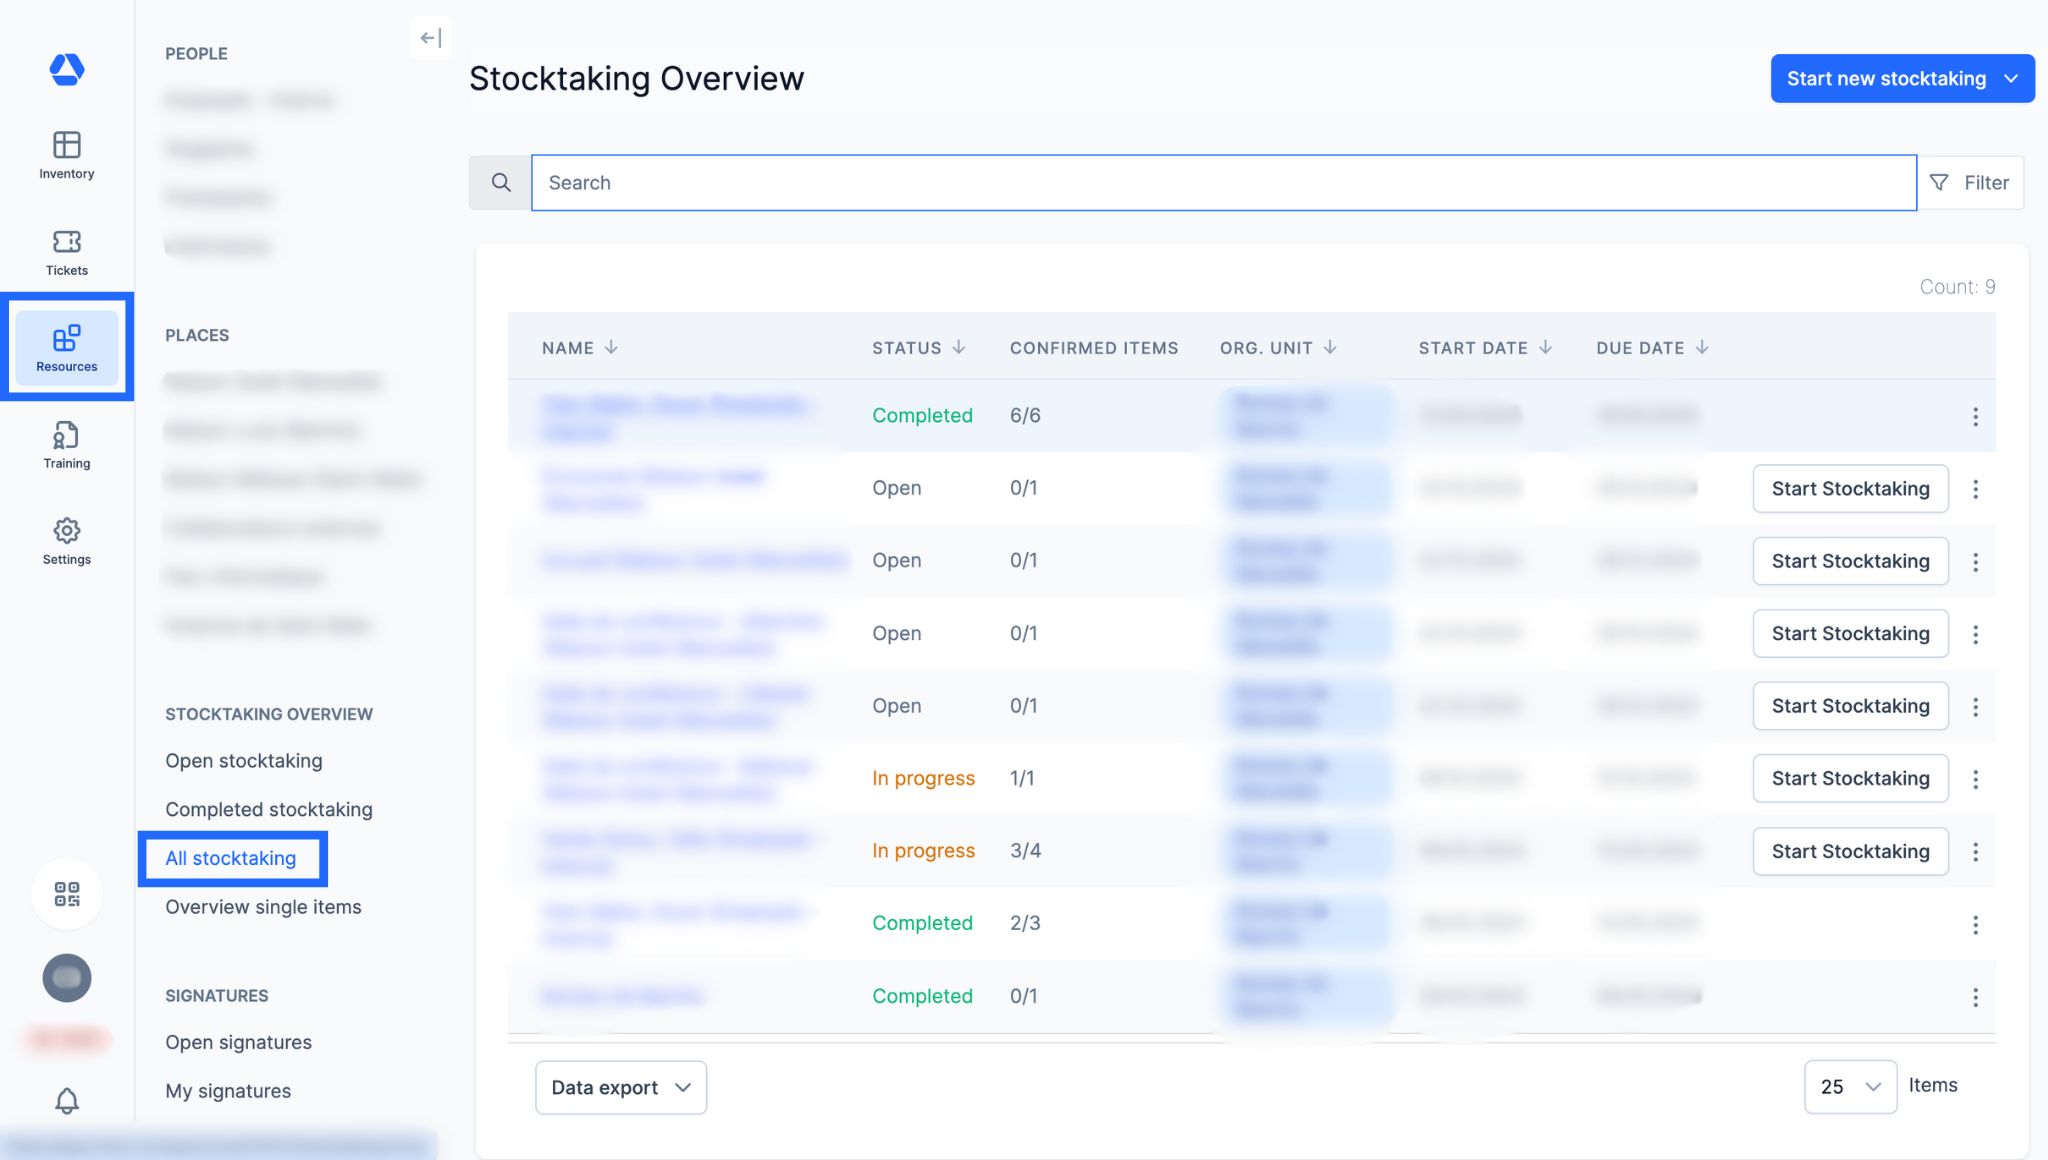
- Go to "Resources", then "All stocktakes". Choose:
- "Start new stocktaking" to create one
- "Start Stocktaking" for an existing one
From a Person’s Profile
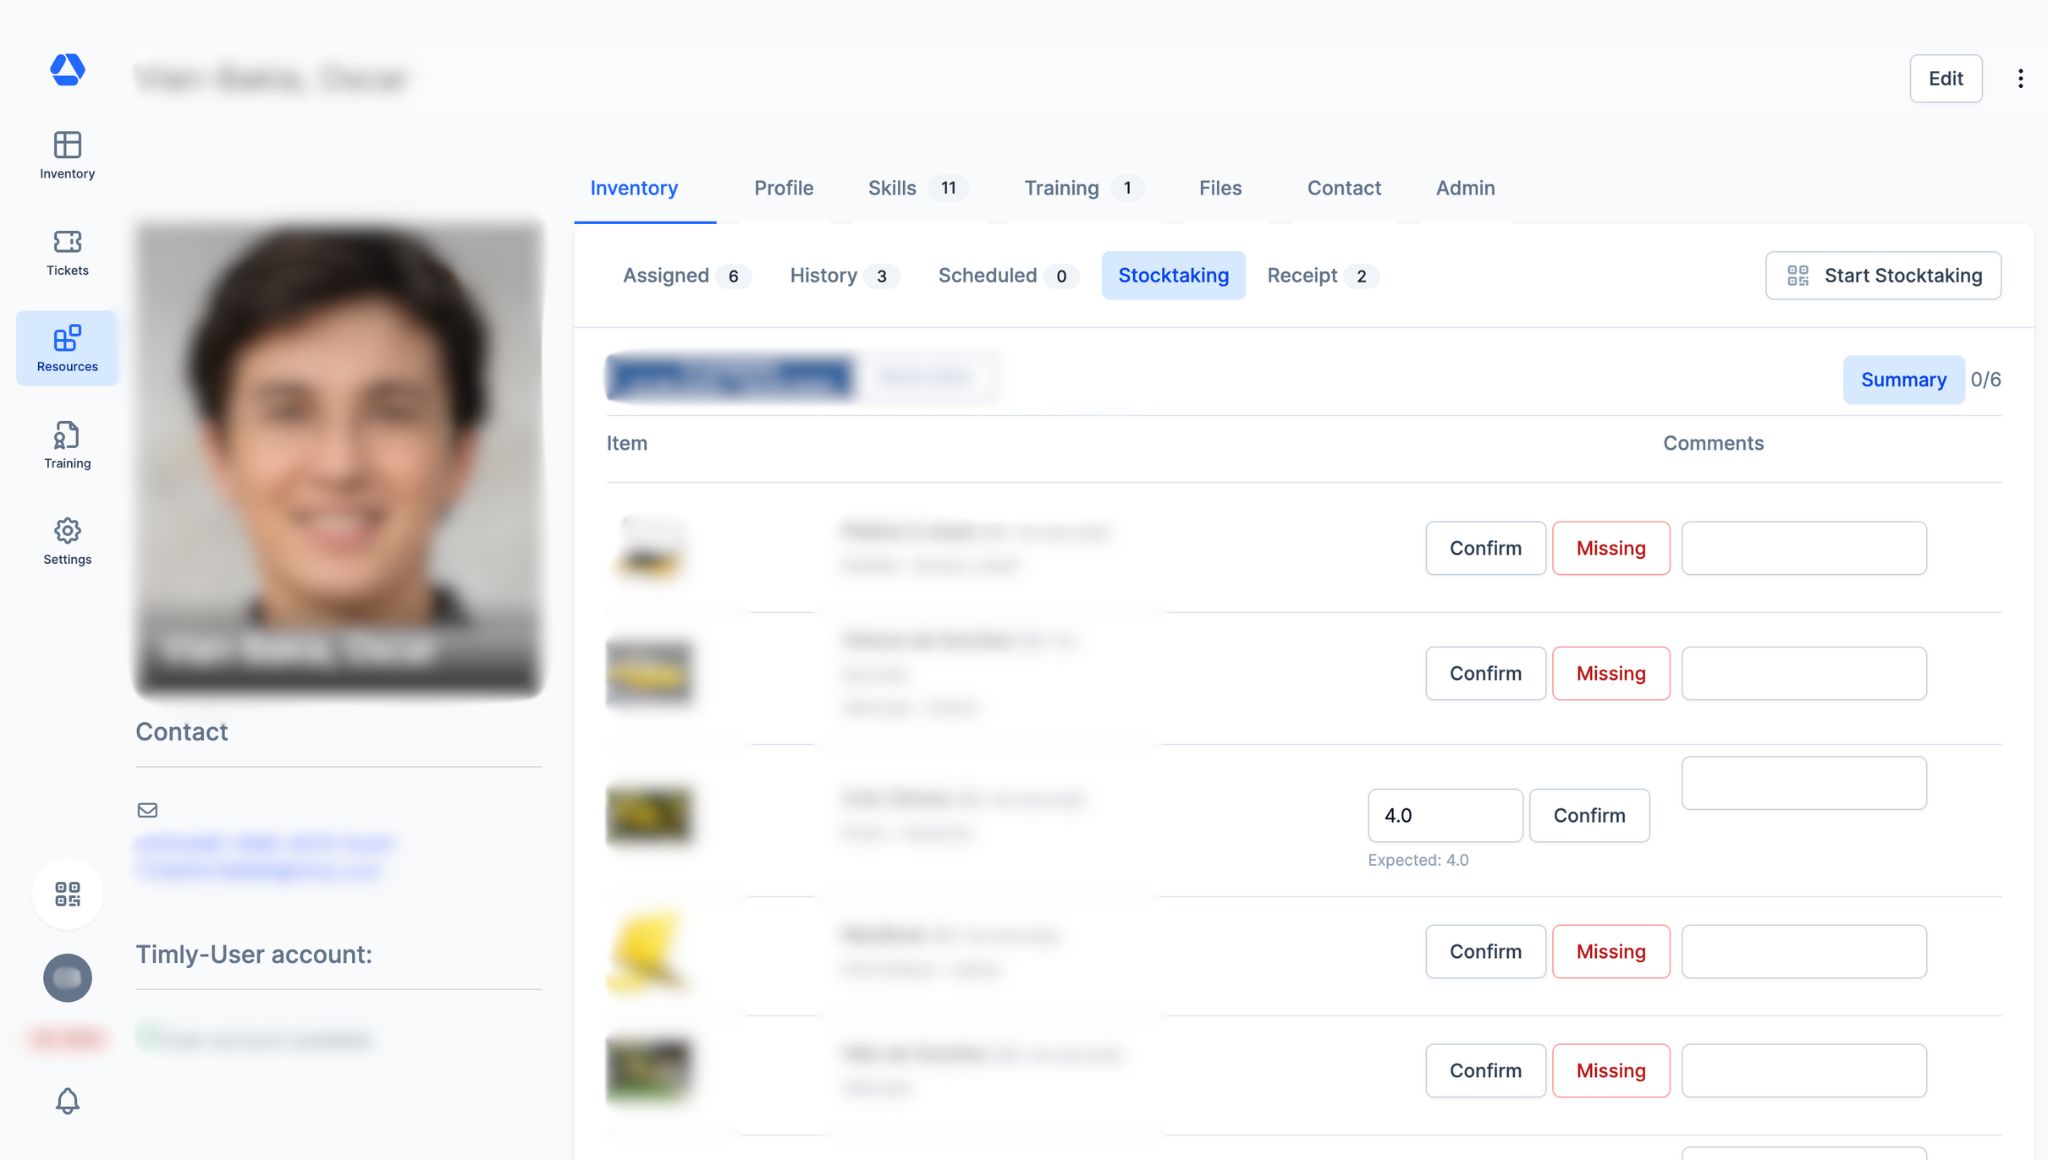
- Go to "Resources", then to the person’s profile
- In the "Inventory" tab, click on "Stocktaking"
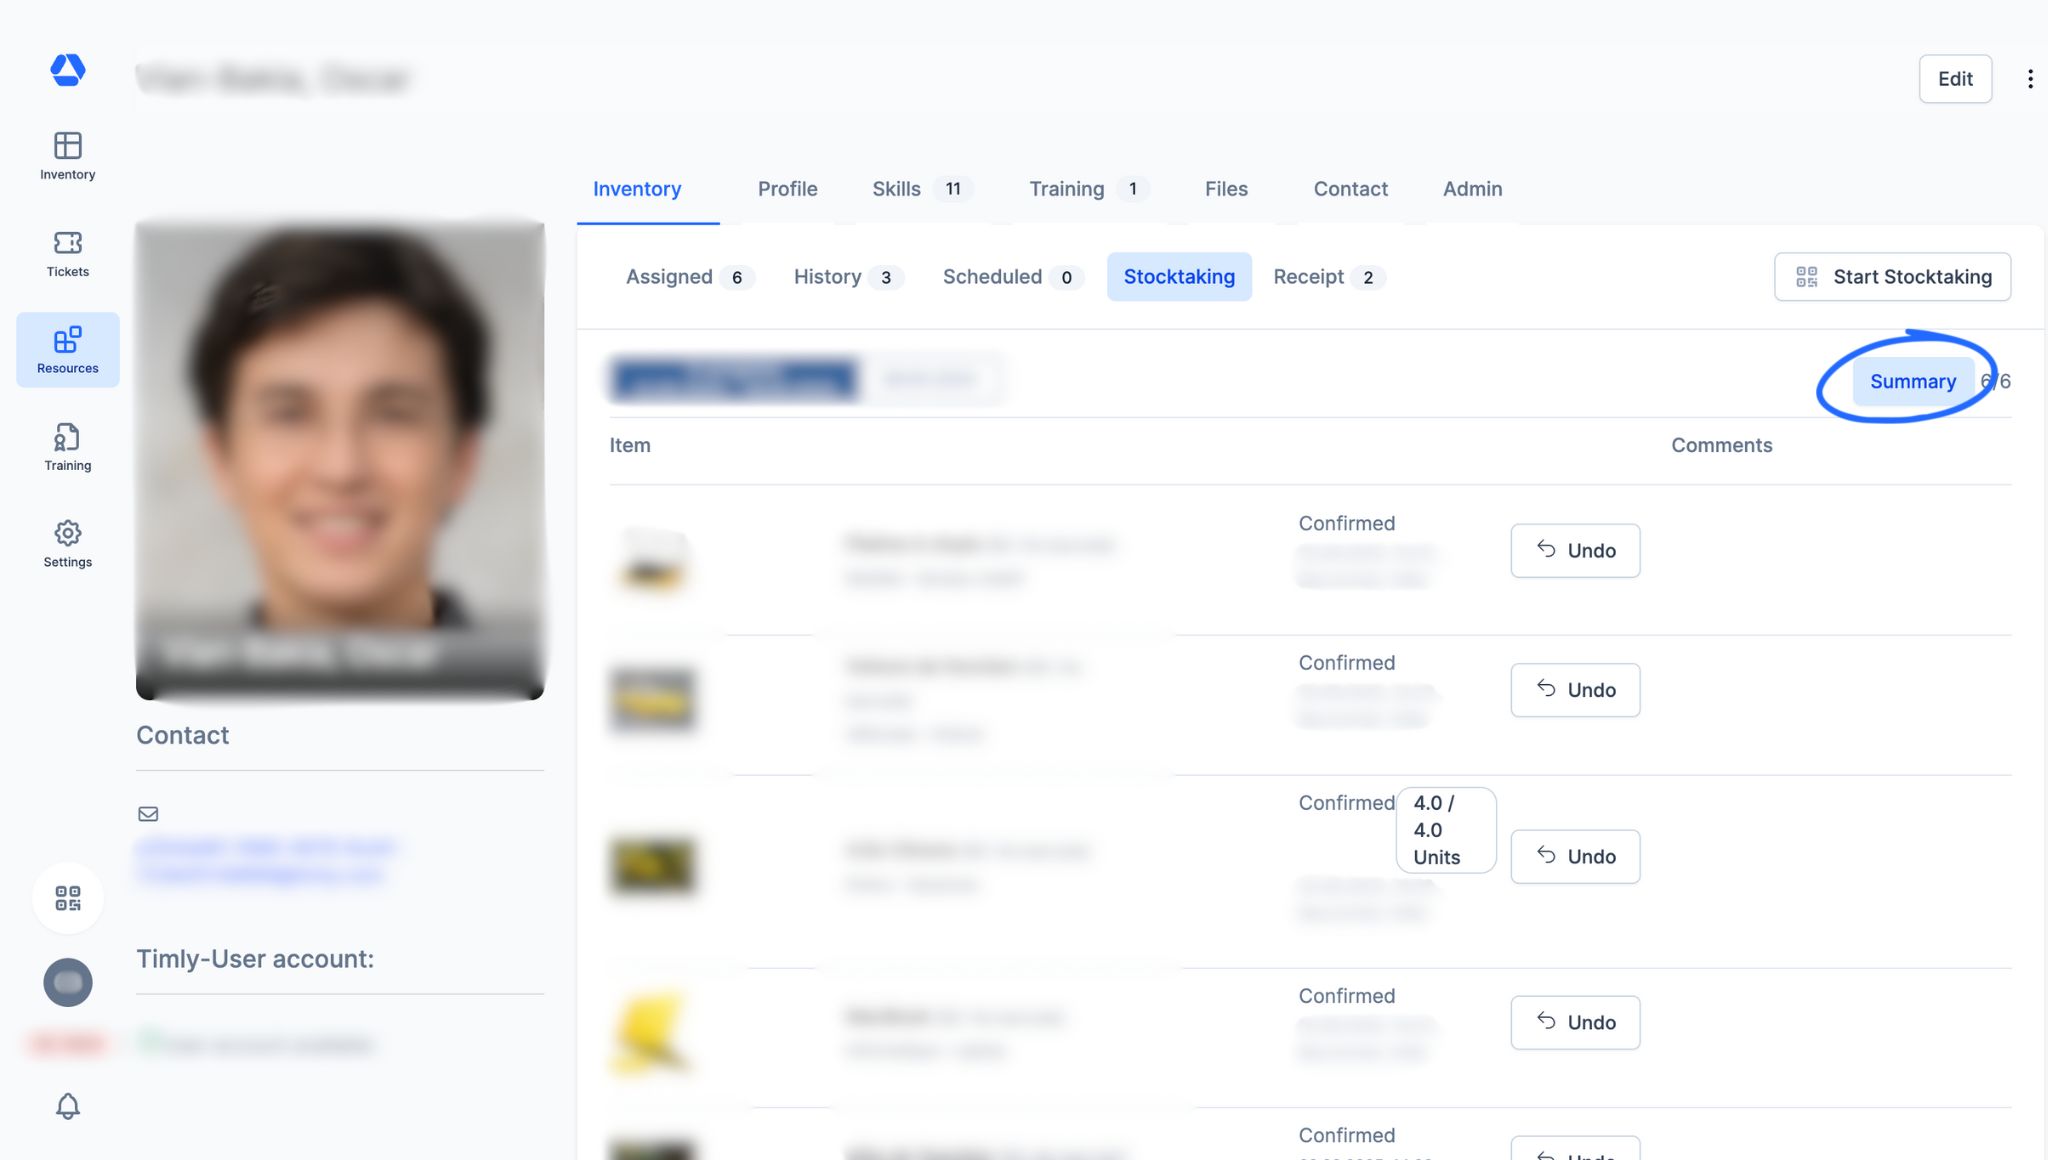
- After performing the stocktake, click "Summary" to generate the stocktaking summary
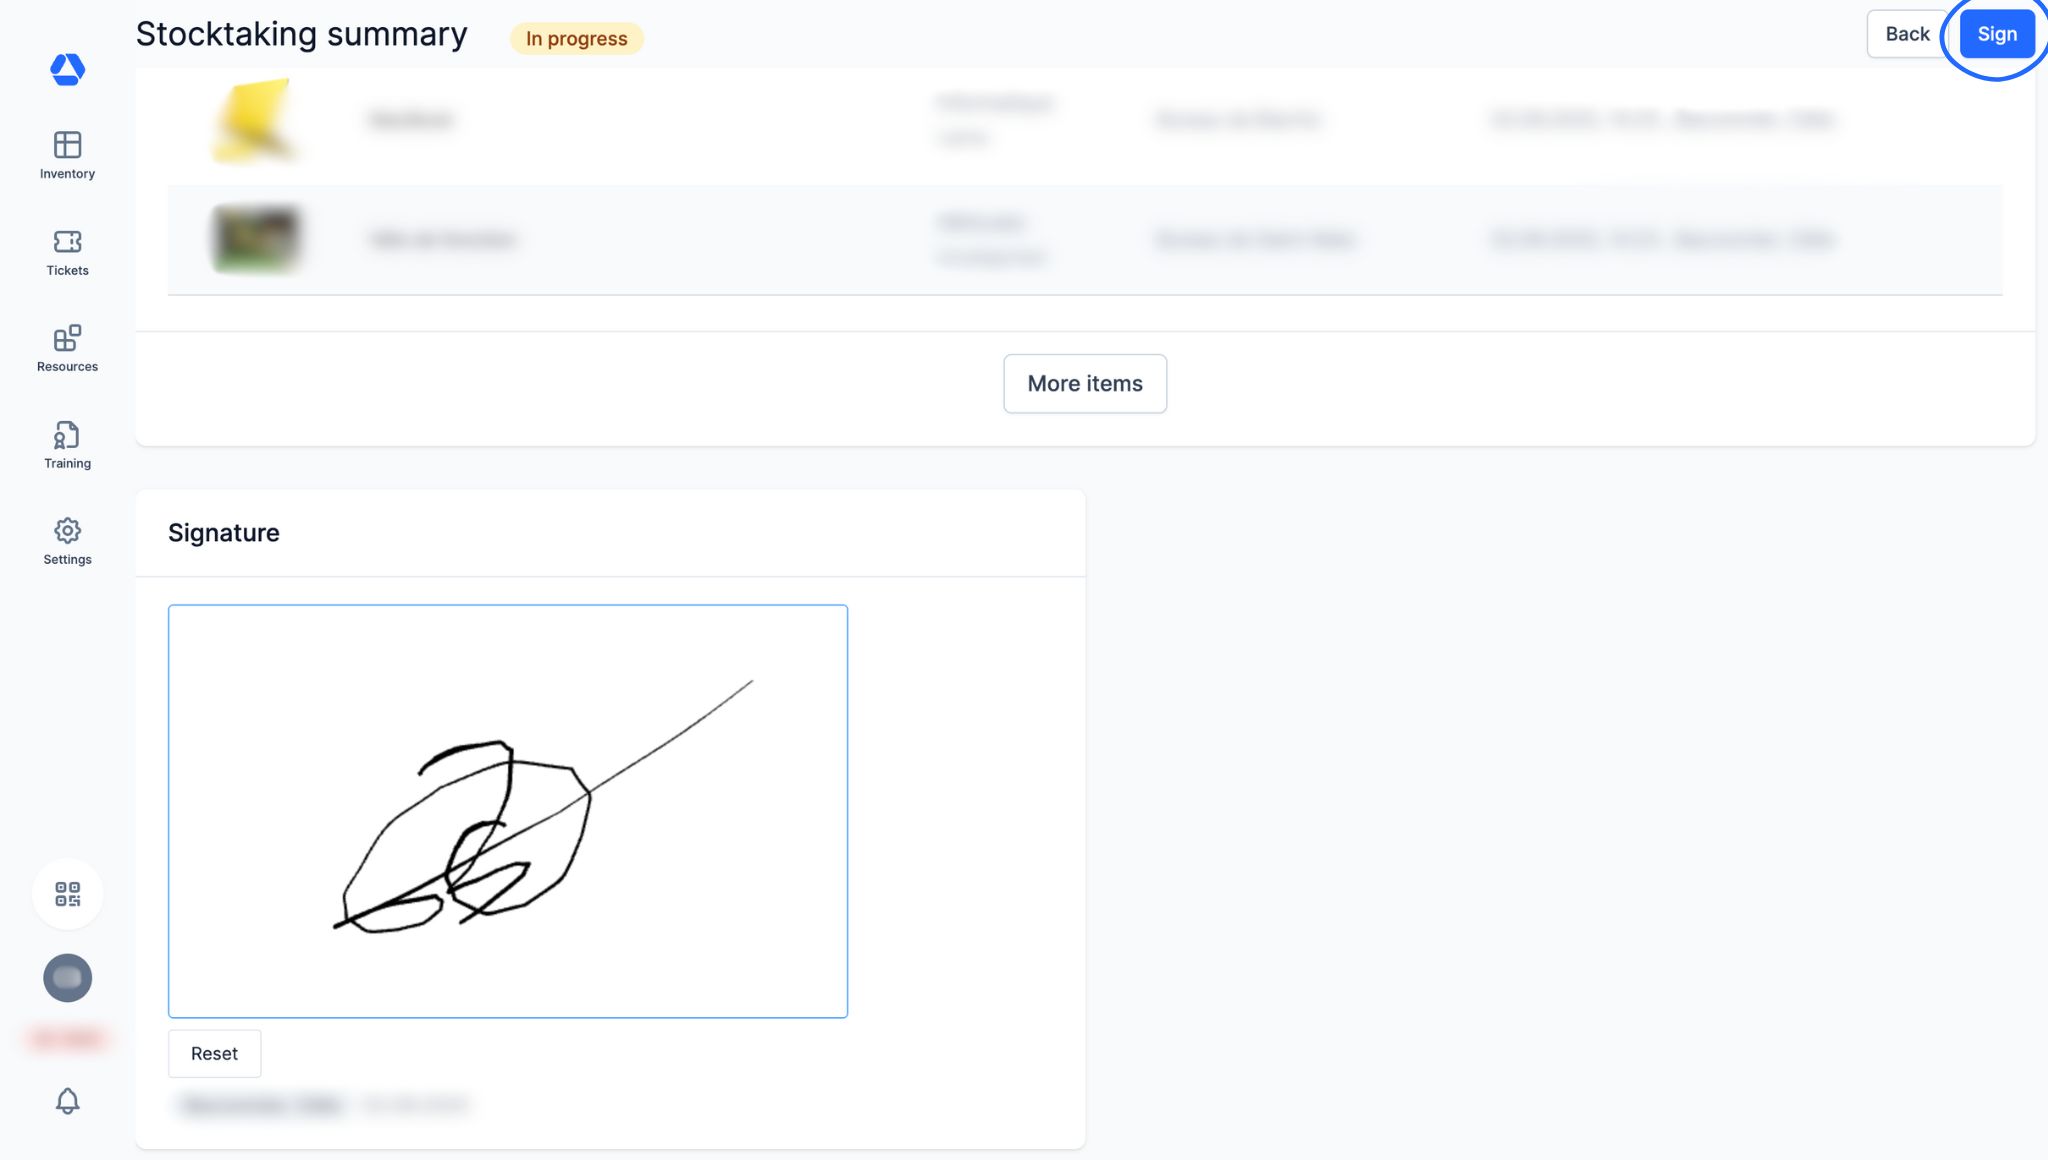
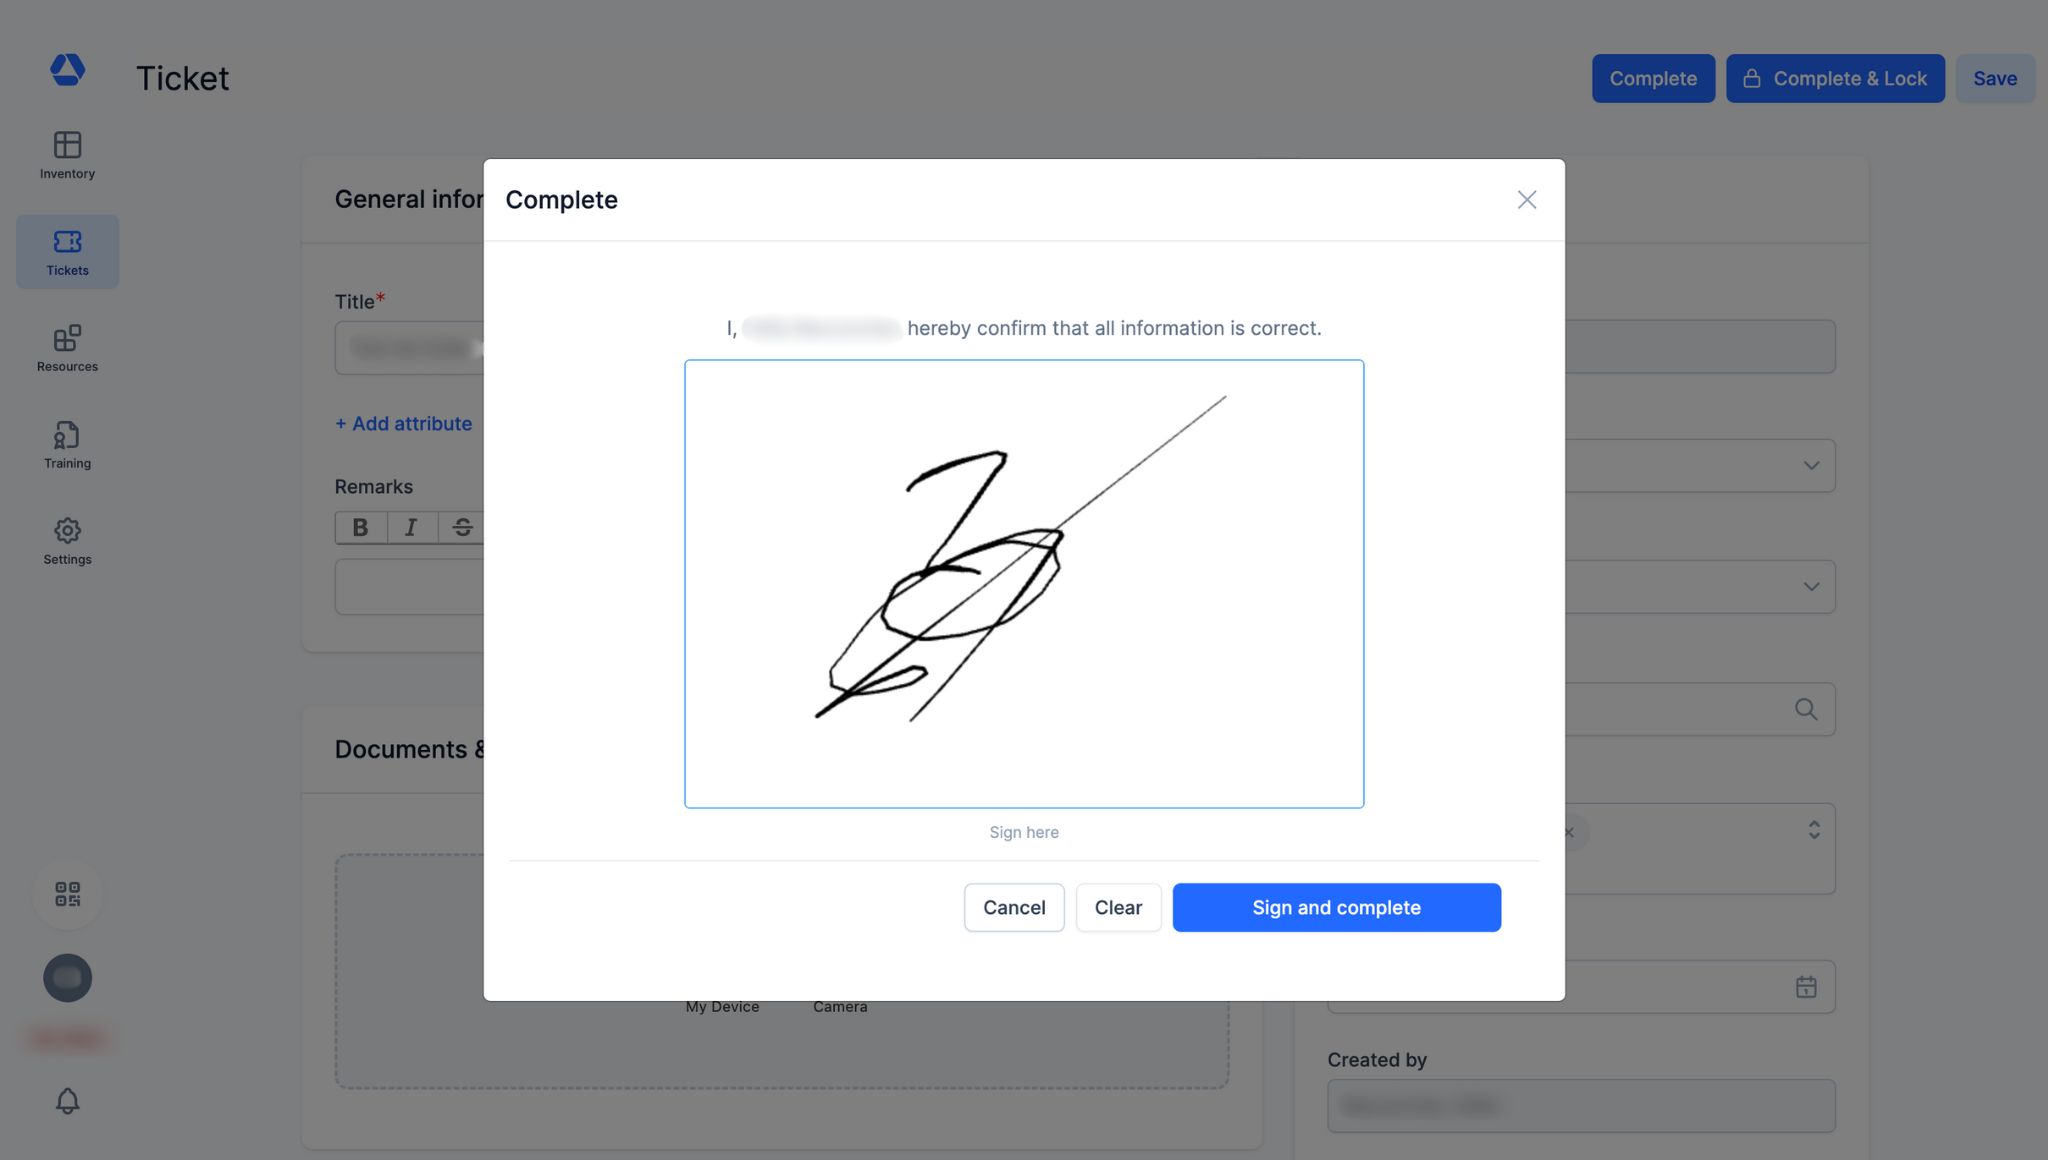
- On the stocktaking summary page, scroll down to the digital signature section, sign (or have the responsible person sign), and click "Sign" to close the stocktake
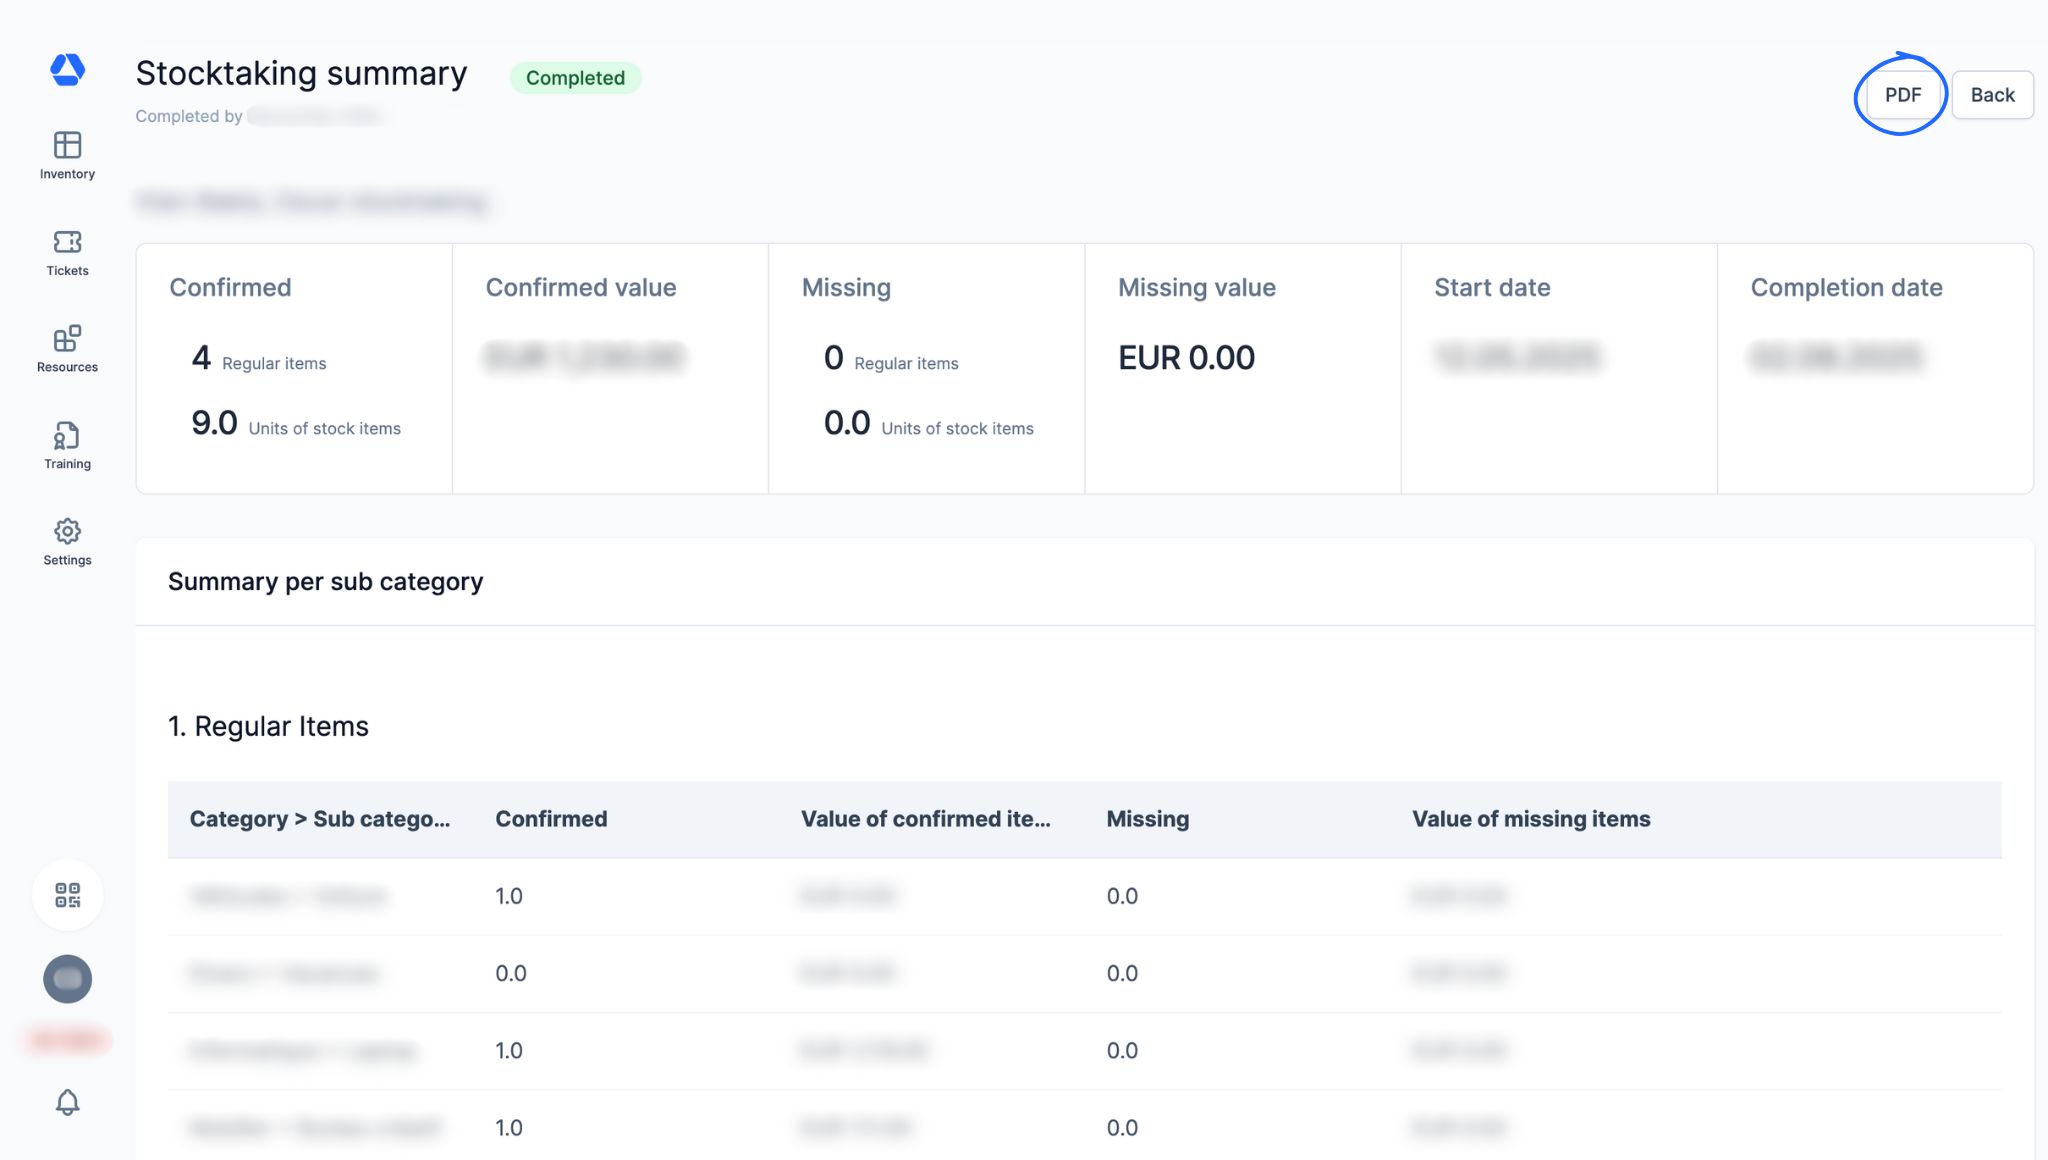
- Once closed, click "PDF" to generate the stocktaking summary including the digital signature
- Digital Signature for the Ticketing System -
The ticketing system combined with digital signatures allows you to require a signature to validate a ticket. This signature is only available as an on-site signature and cannot be done by email.
💡 You can configure signatures in a granular way: you can make the signature mandatory only for certain types of tickets (e.g., those related to critical maintenance or safety), while leaving it optional or disabled for others.
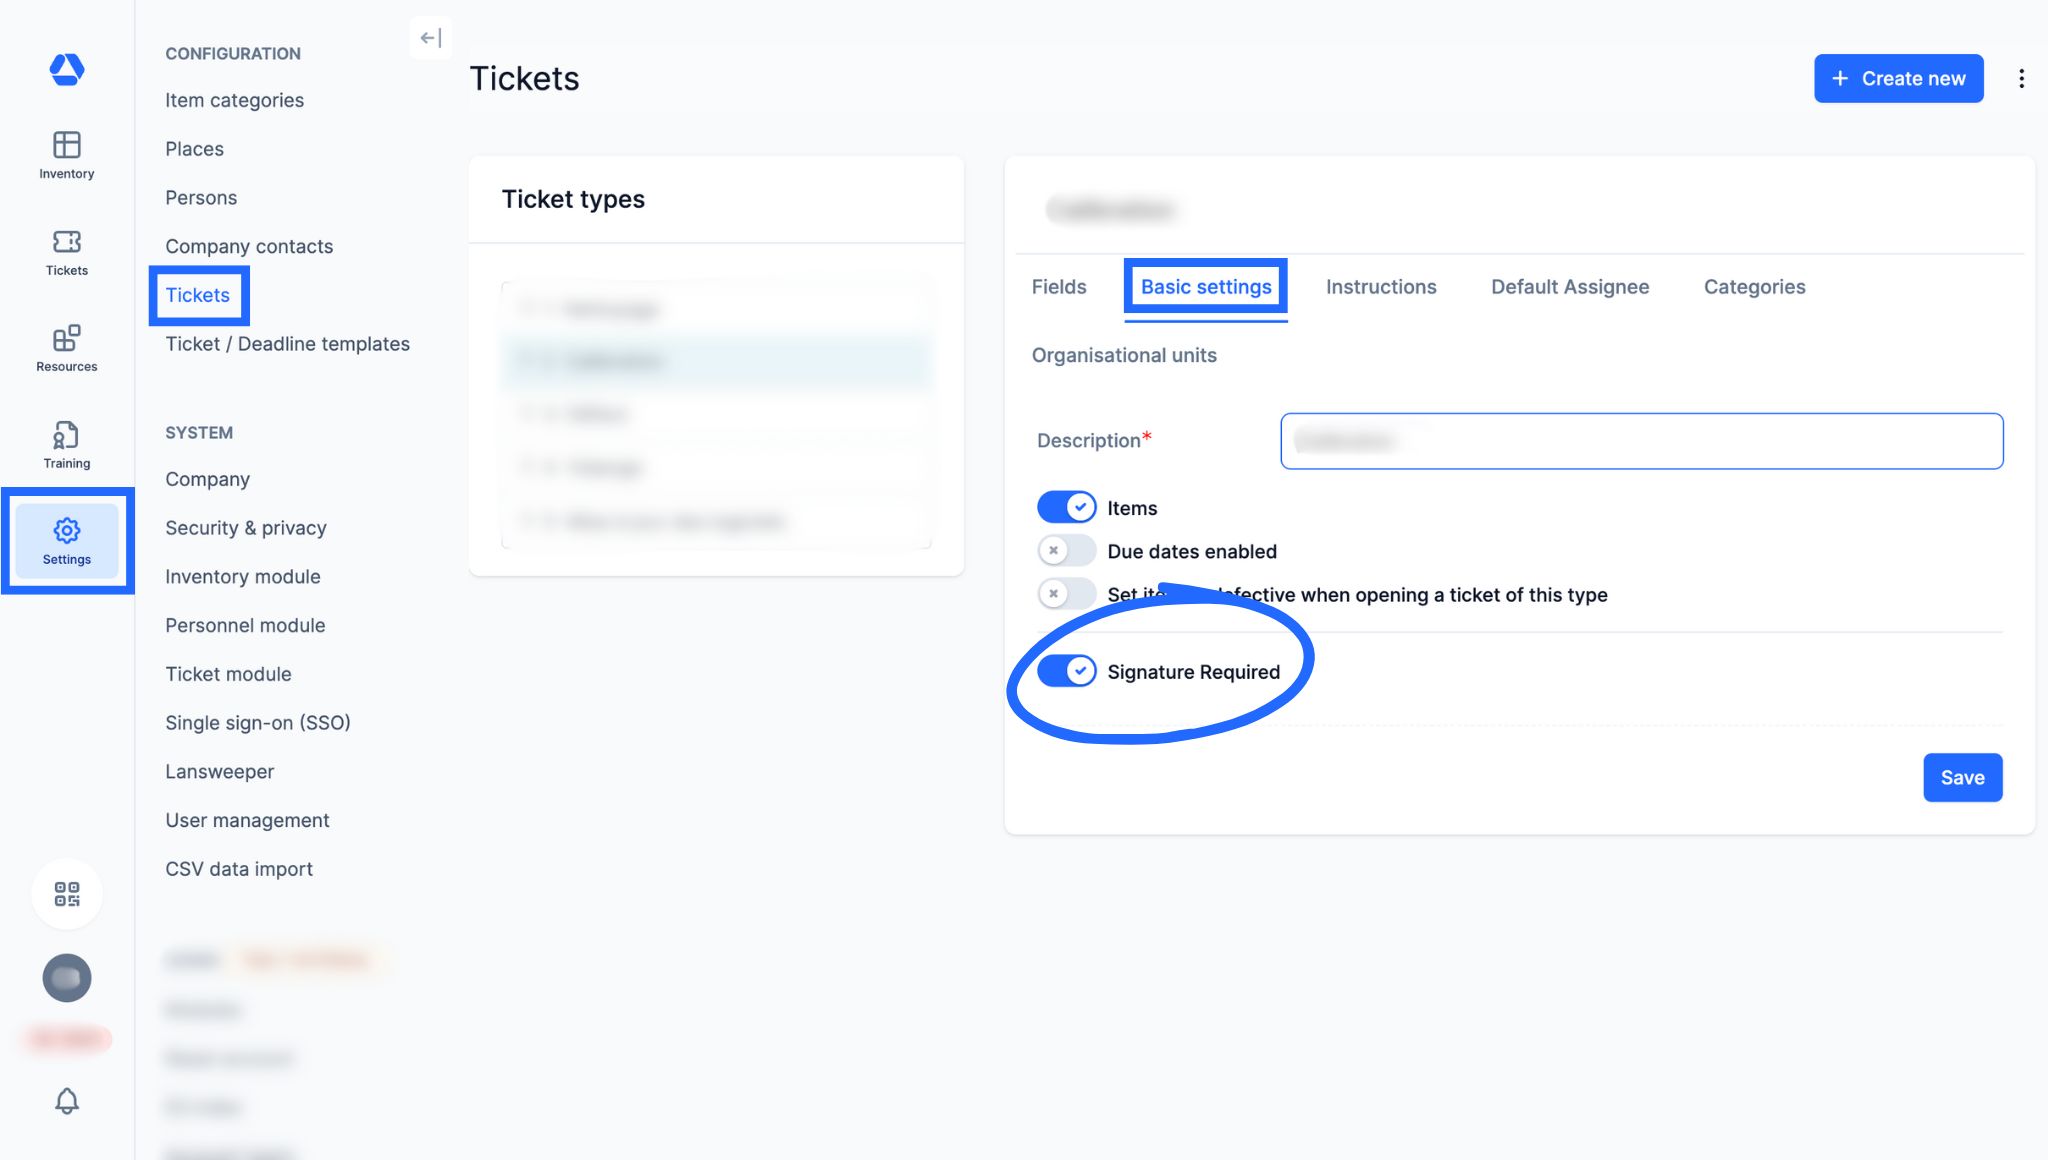
- Go to "Settings", then "Tickets"
- Select the ticket type for which you want to enable digital signatures
- Click on the "Basic settings" tab
- Enable the toggle "Signature Required"
- When this toggle is enabled, the person responsible for the ticket must sign it to close it
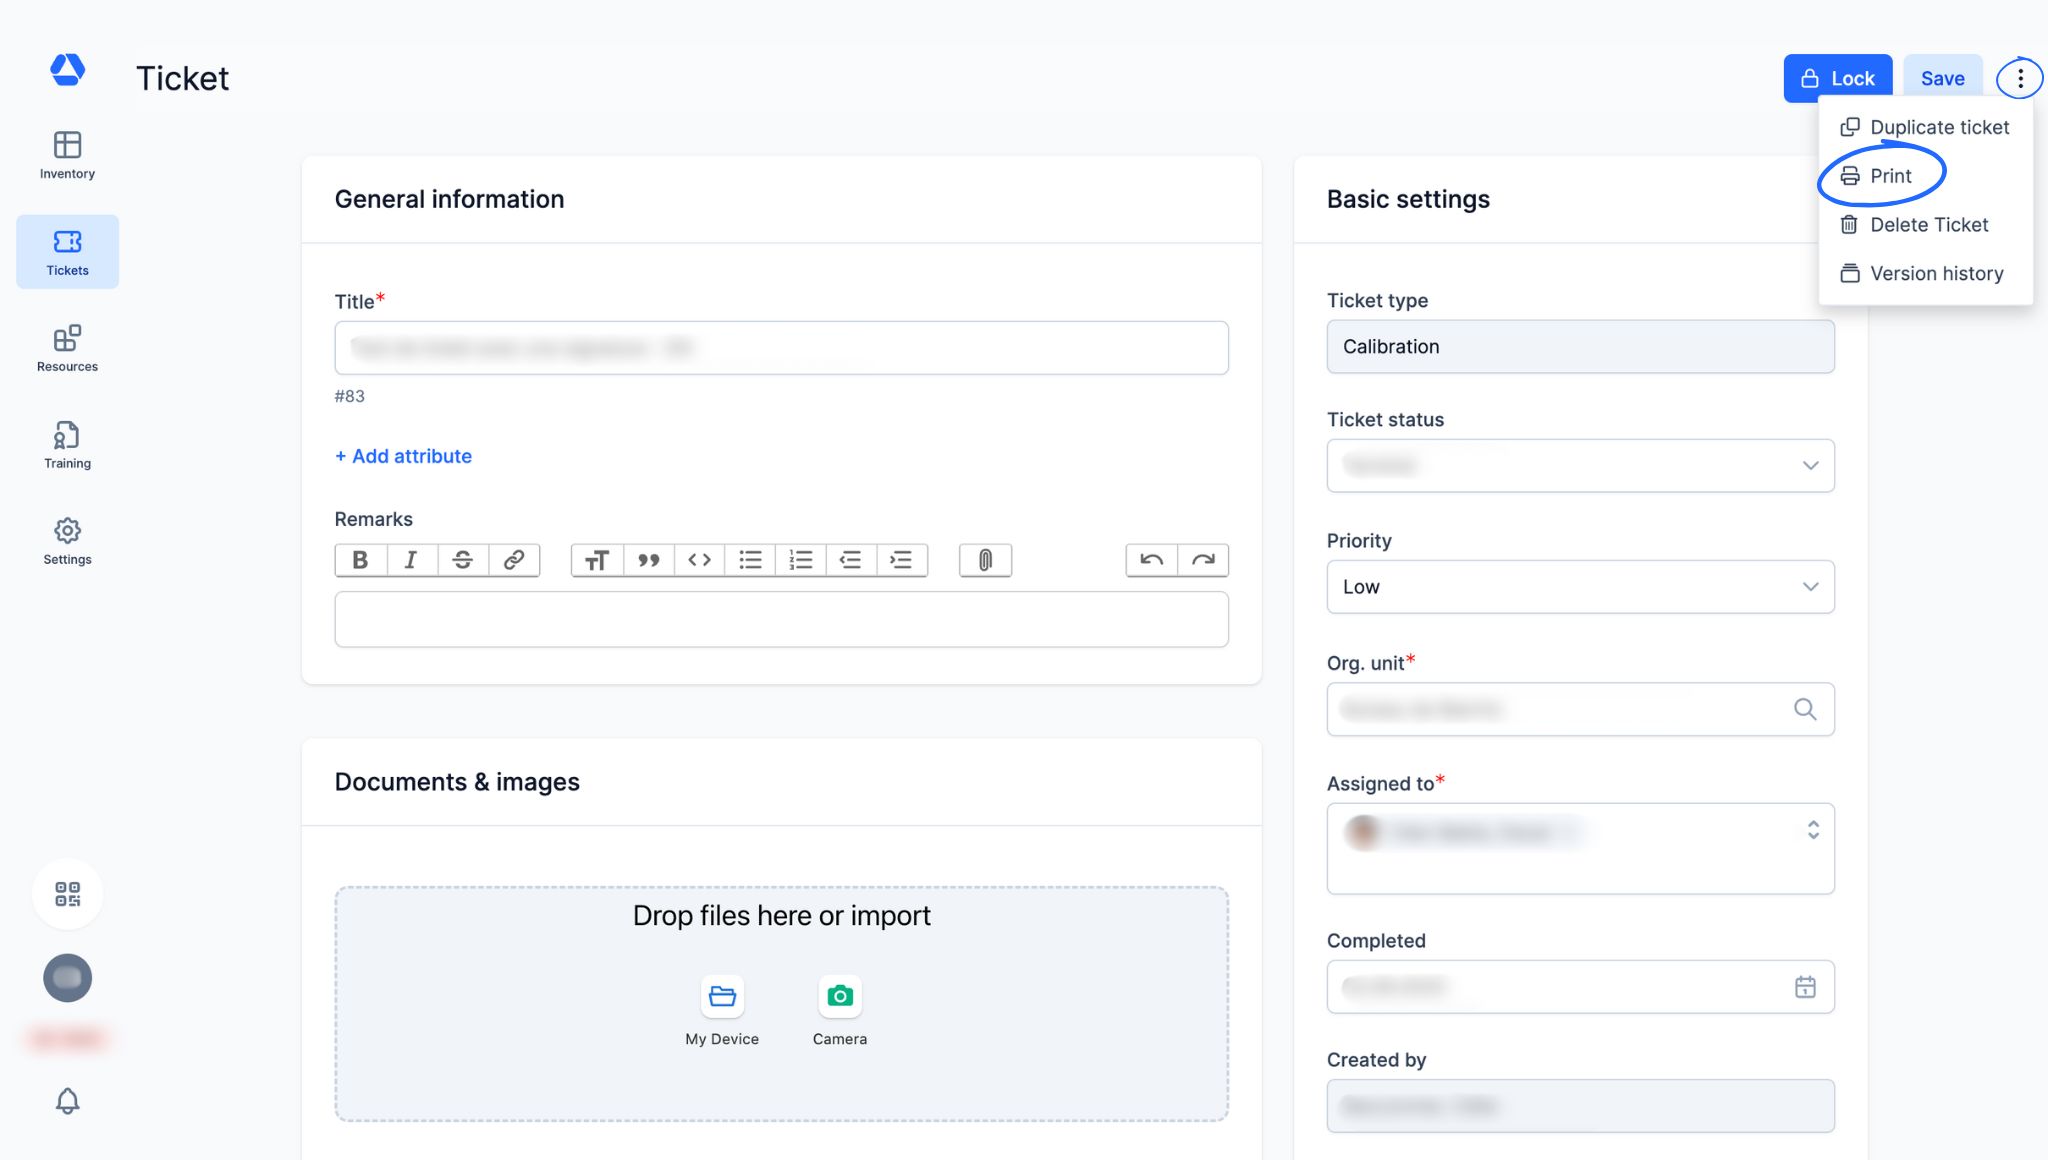
💡 If you have the Ticketing System Pro and the digital signature feature, you can generate a PDF containing all ticket details as well as the signature, date, time, and name of the person who signed it.
- Click this icon:
- Click "Print"
- Save and/or print the PDF file of your ticket
📖 Timly Glossary
Digital Signature: The digital signature allows you to validate an action in Timly, such as returning an item, completing a ticket, or completing a stocktake. It requires the user responsible for the action to sign digitally to validate its completion.
Item: An item is a resource, either tangible or intangible, managed and tracked in Timly. It can be a wide range of items, including computer equipment, tools, vehicles, office supplies, medical equipment, software, etc. Also sometimes referred to as “Asset”.
Item page: The item page is the individual record dedicated to an item, an interface where all related information is displayed:
- Assignments
- Associated documents
- Audit log/history (assignments and movements – visible only by admins)
- Contacts
- General information (name, category, barcode, photo, and technical details)
- GPS position
- Location
- Open associated tickets
- Planning
- Remarks
📖 Find all the definitions in the Timly Glossary.
✅ Required Features & Functions
- Digital signature
- Inventory module
- Stocktaking (Light or Pro)
- Ticketing system (Light or Pro)
🔗 More Resources
- Website: Digital Signature
📩 Do you have more questions? Schedule a free and non-binding demo with one of our experts, or ask us at [email protected].