
How Do I Create Item Categories?
How Do I Create Item Categories?
💡 What You Need to Know
When creating your inventory in Timly, you can either create items manually or import data using the CSV Importer. Before doing either, you need to complete one essential step: setting up your item categories. This establishes a clear and efficient structure for your inventory.
📘 This guide walks you through the essentials of creating item categories.
Categories serve to:
- Organize your inventory: by grouping items by type (machines, furniture, vehicles, etc.), you can maintain a clear structure and quickly access the information you need. You can also, for instance, filter your inventory view to show only selected categories.
- Provide detailed information: assign specific attributes to each category, such as mileage for vehicles or serial numbers for computers.
- Streamline processes: when setting up a ticket category, you can determine which item categories it applies to, and the same goes for ticket templates.
⚙️ The Steps
- Create an item category -
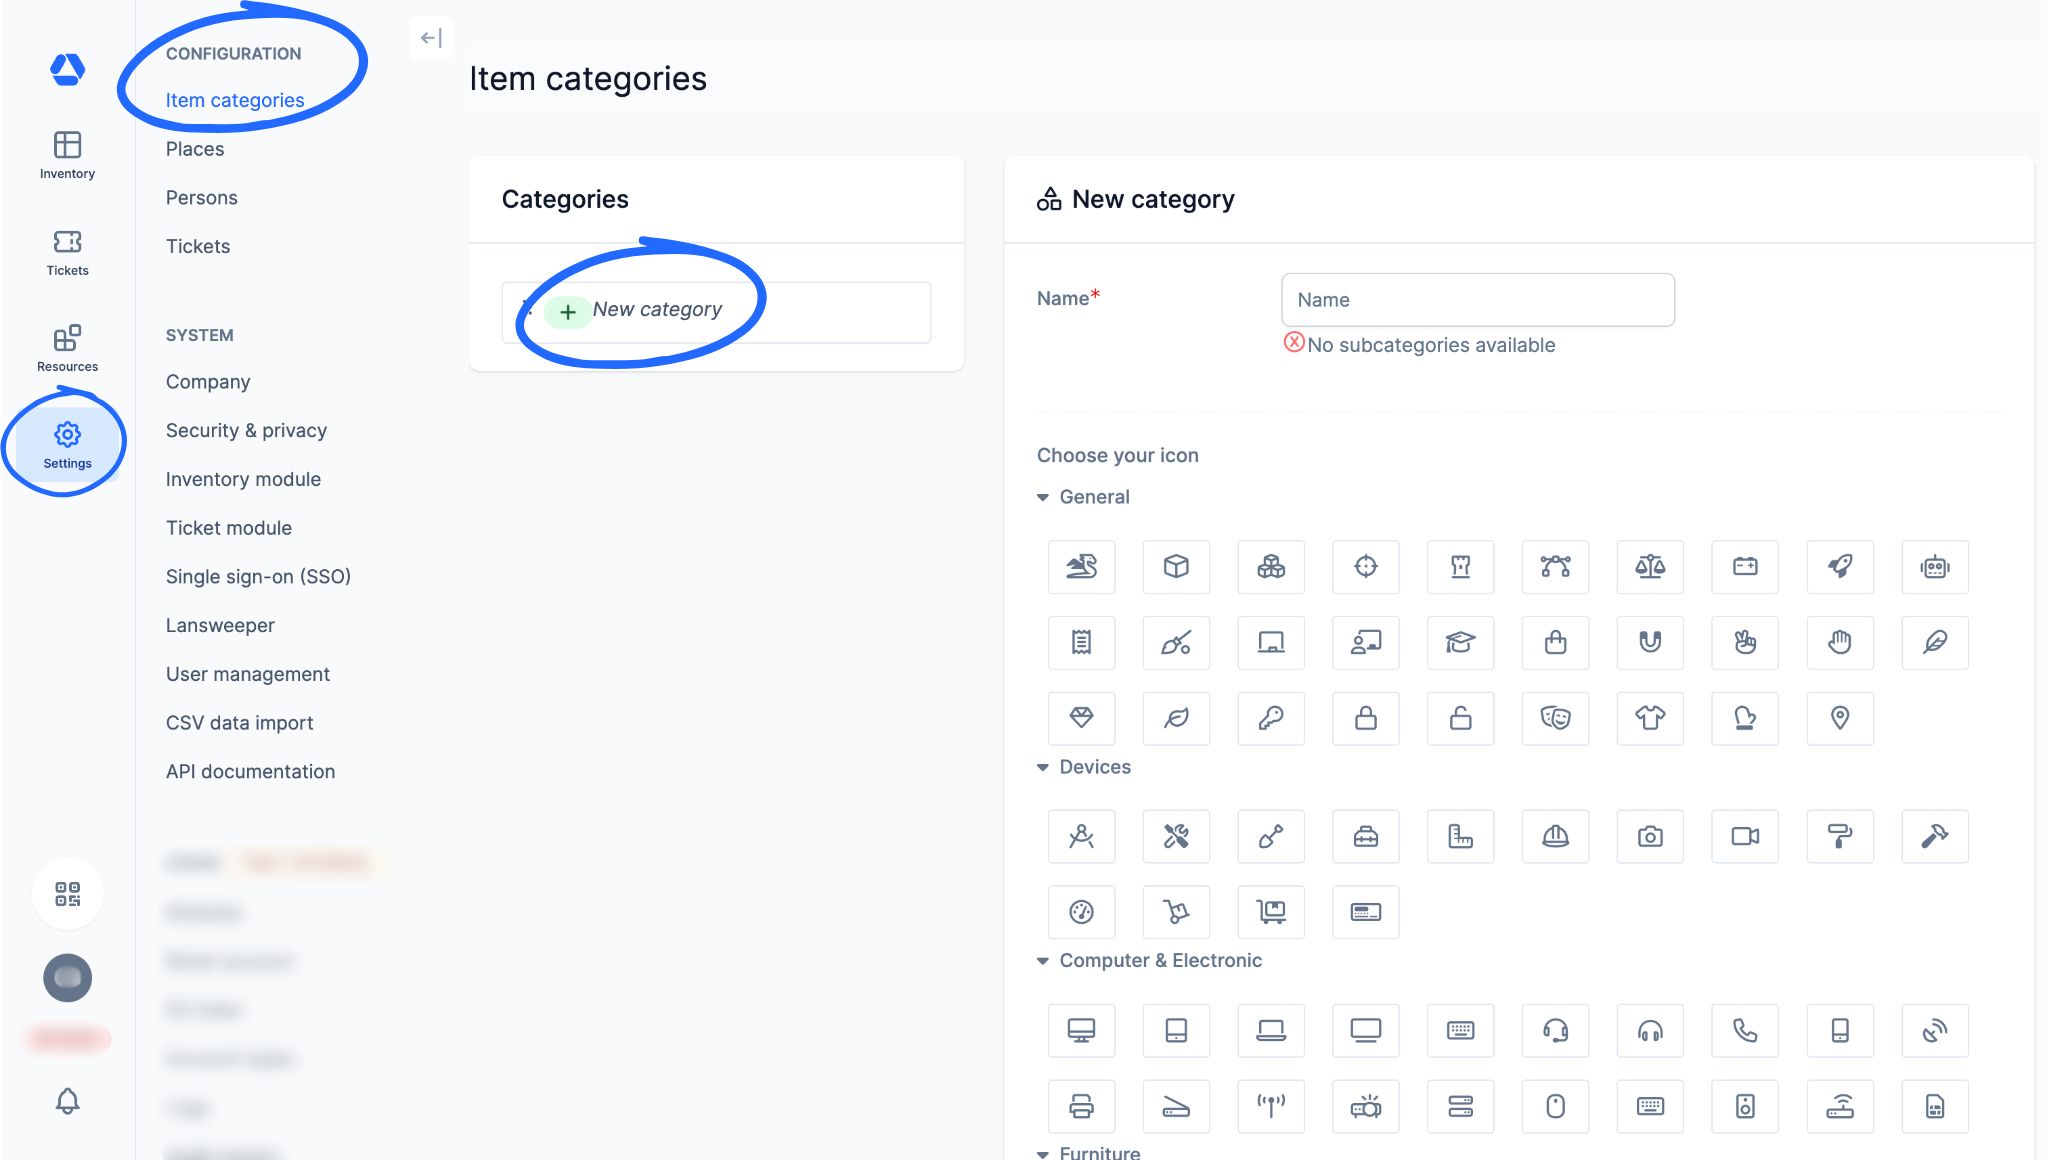
- Click on "Settings", then "Item categories"
Click "New category" to create a main category, then choose an icon to represent it
💡 For example, we will create the main category "IT" here
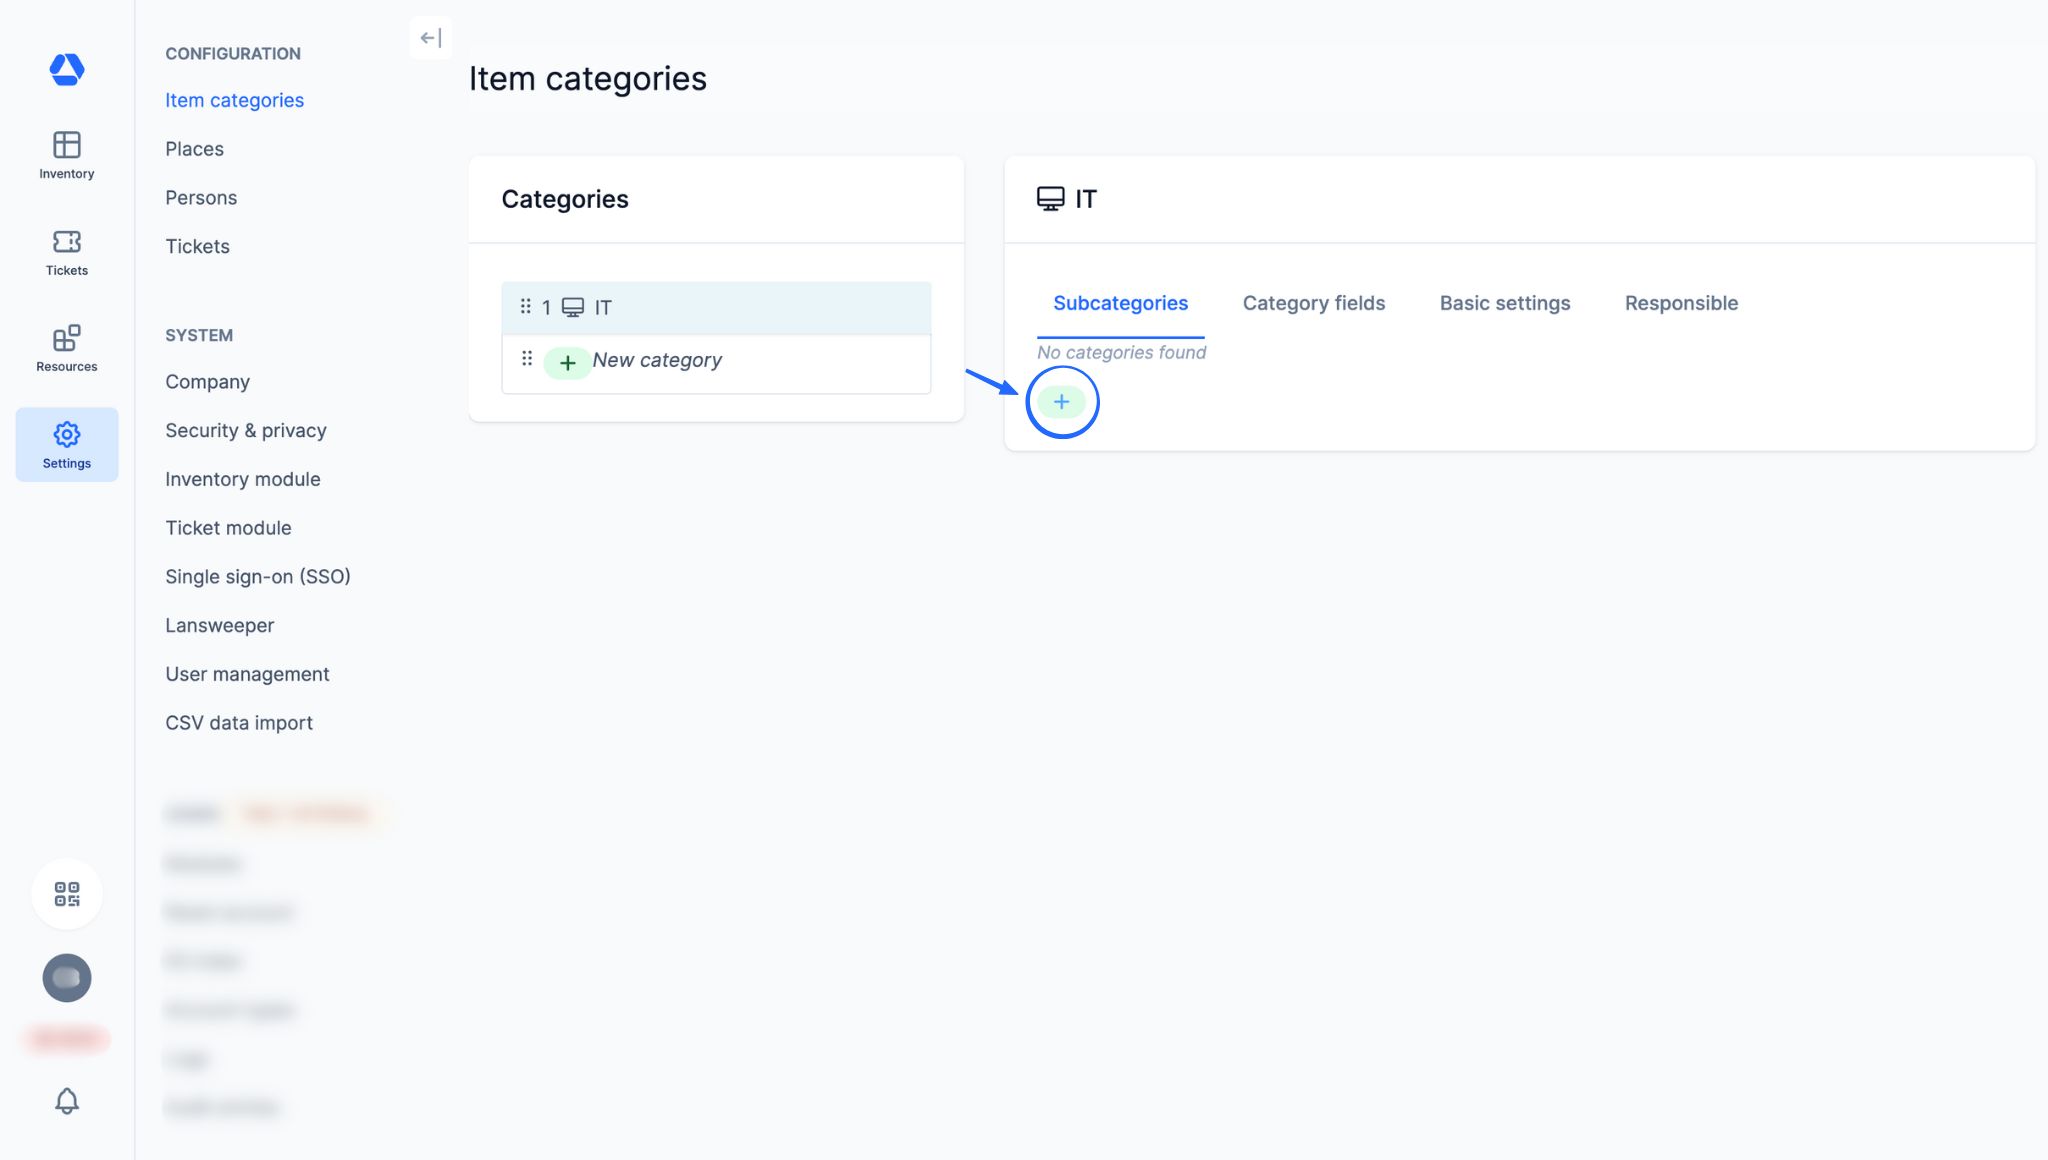
- Next, add subcategories to your main category by clicking the "+" icon
💡 Here, we will create the following subcategories for the "IT" category:
- "External Hard Drives"
- "Keyboards"
- "Laptops"...
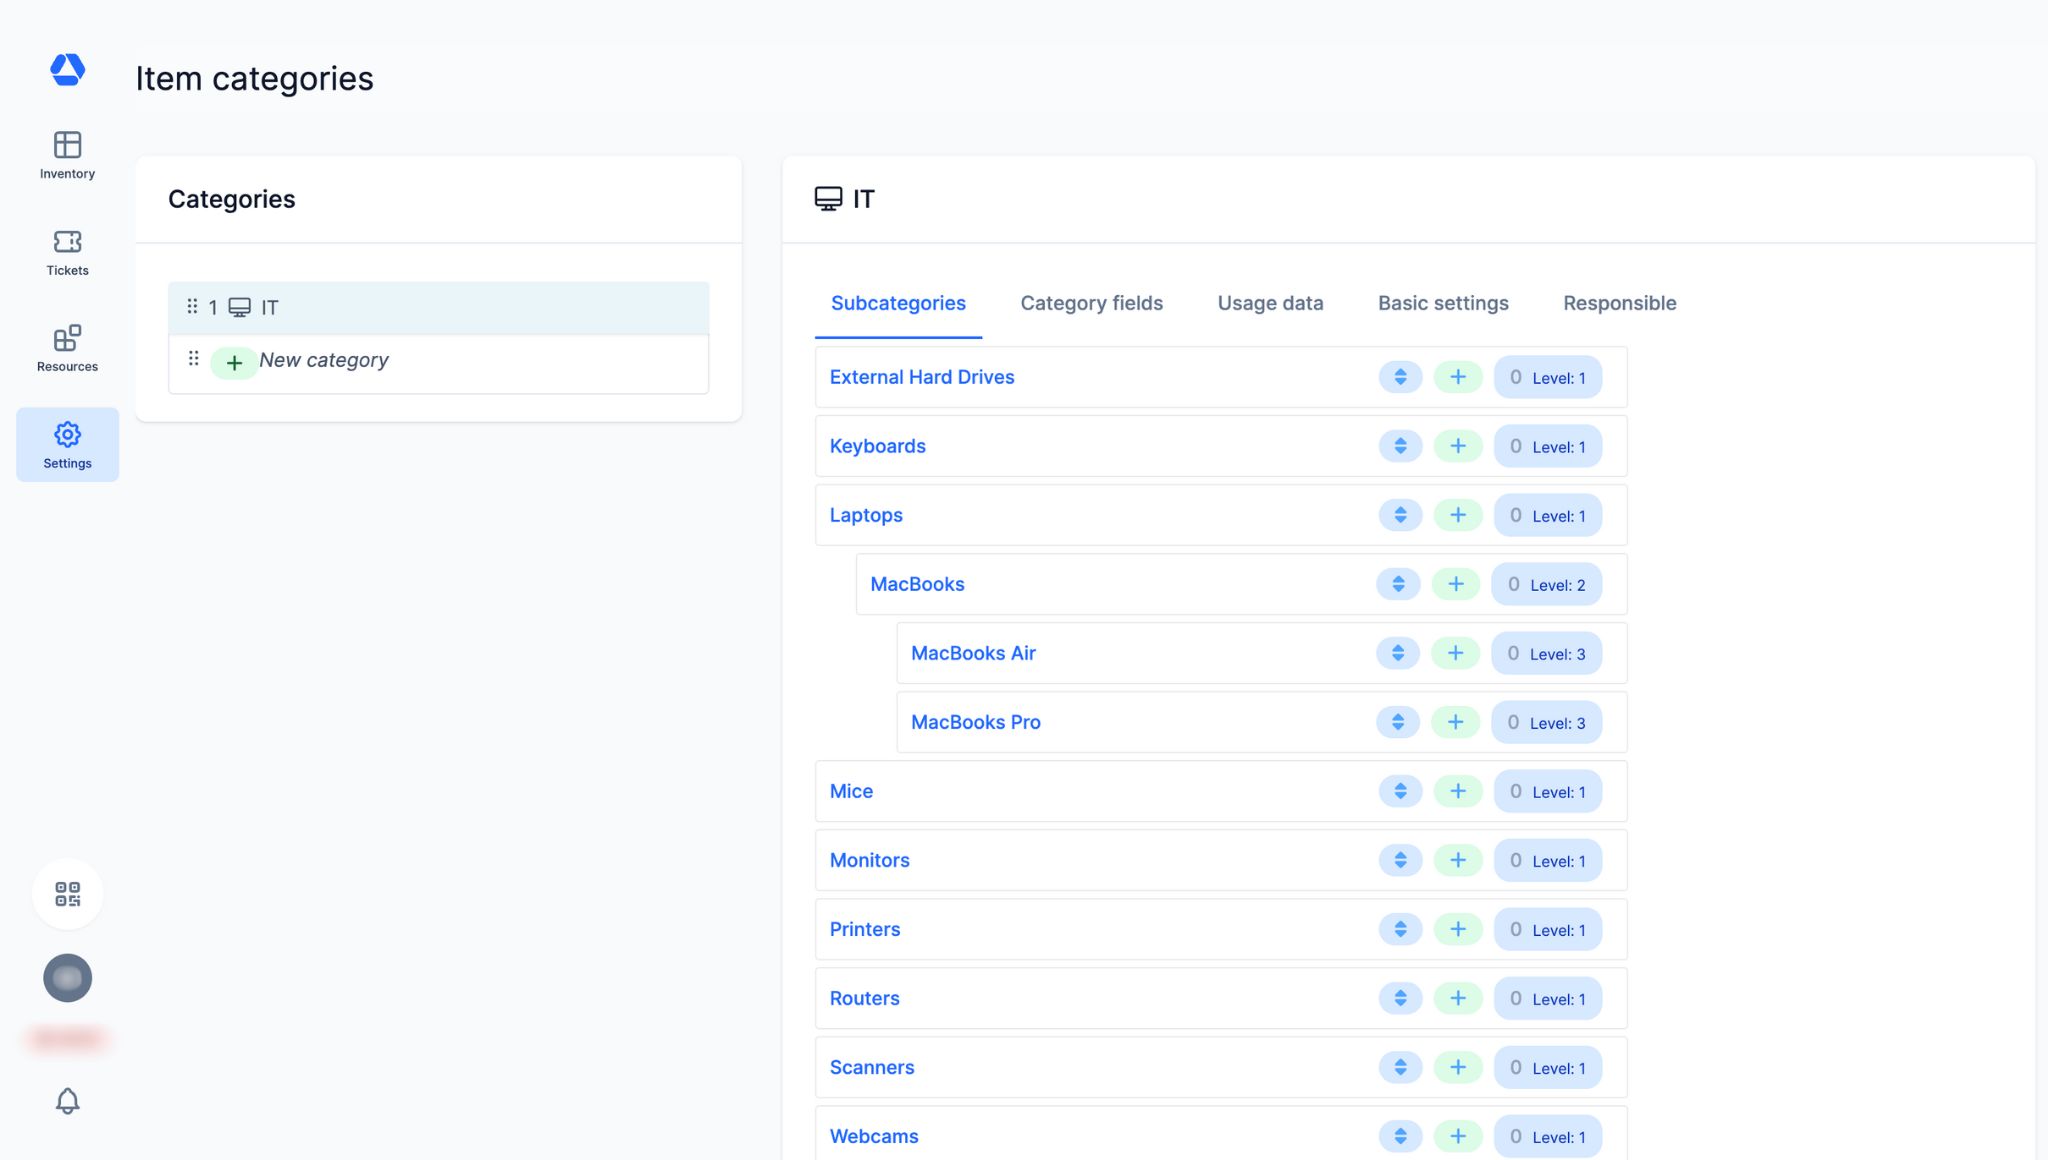
- You can create as many subcategory levels as needed
💡 For example, here we have created the subcategory "Laptops", which is then further refined into sublevels: "MacBooks," then "MacBooks Air" and "MacBooks Pro"
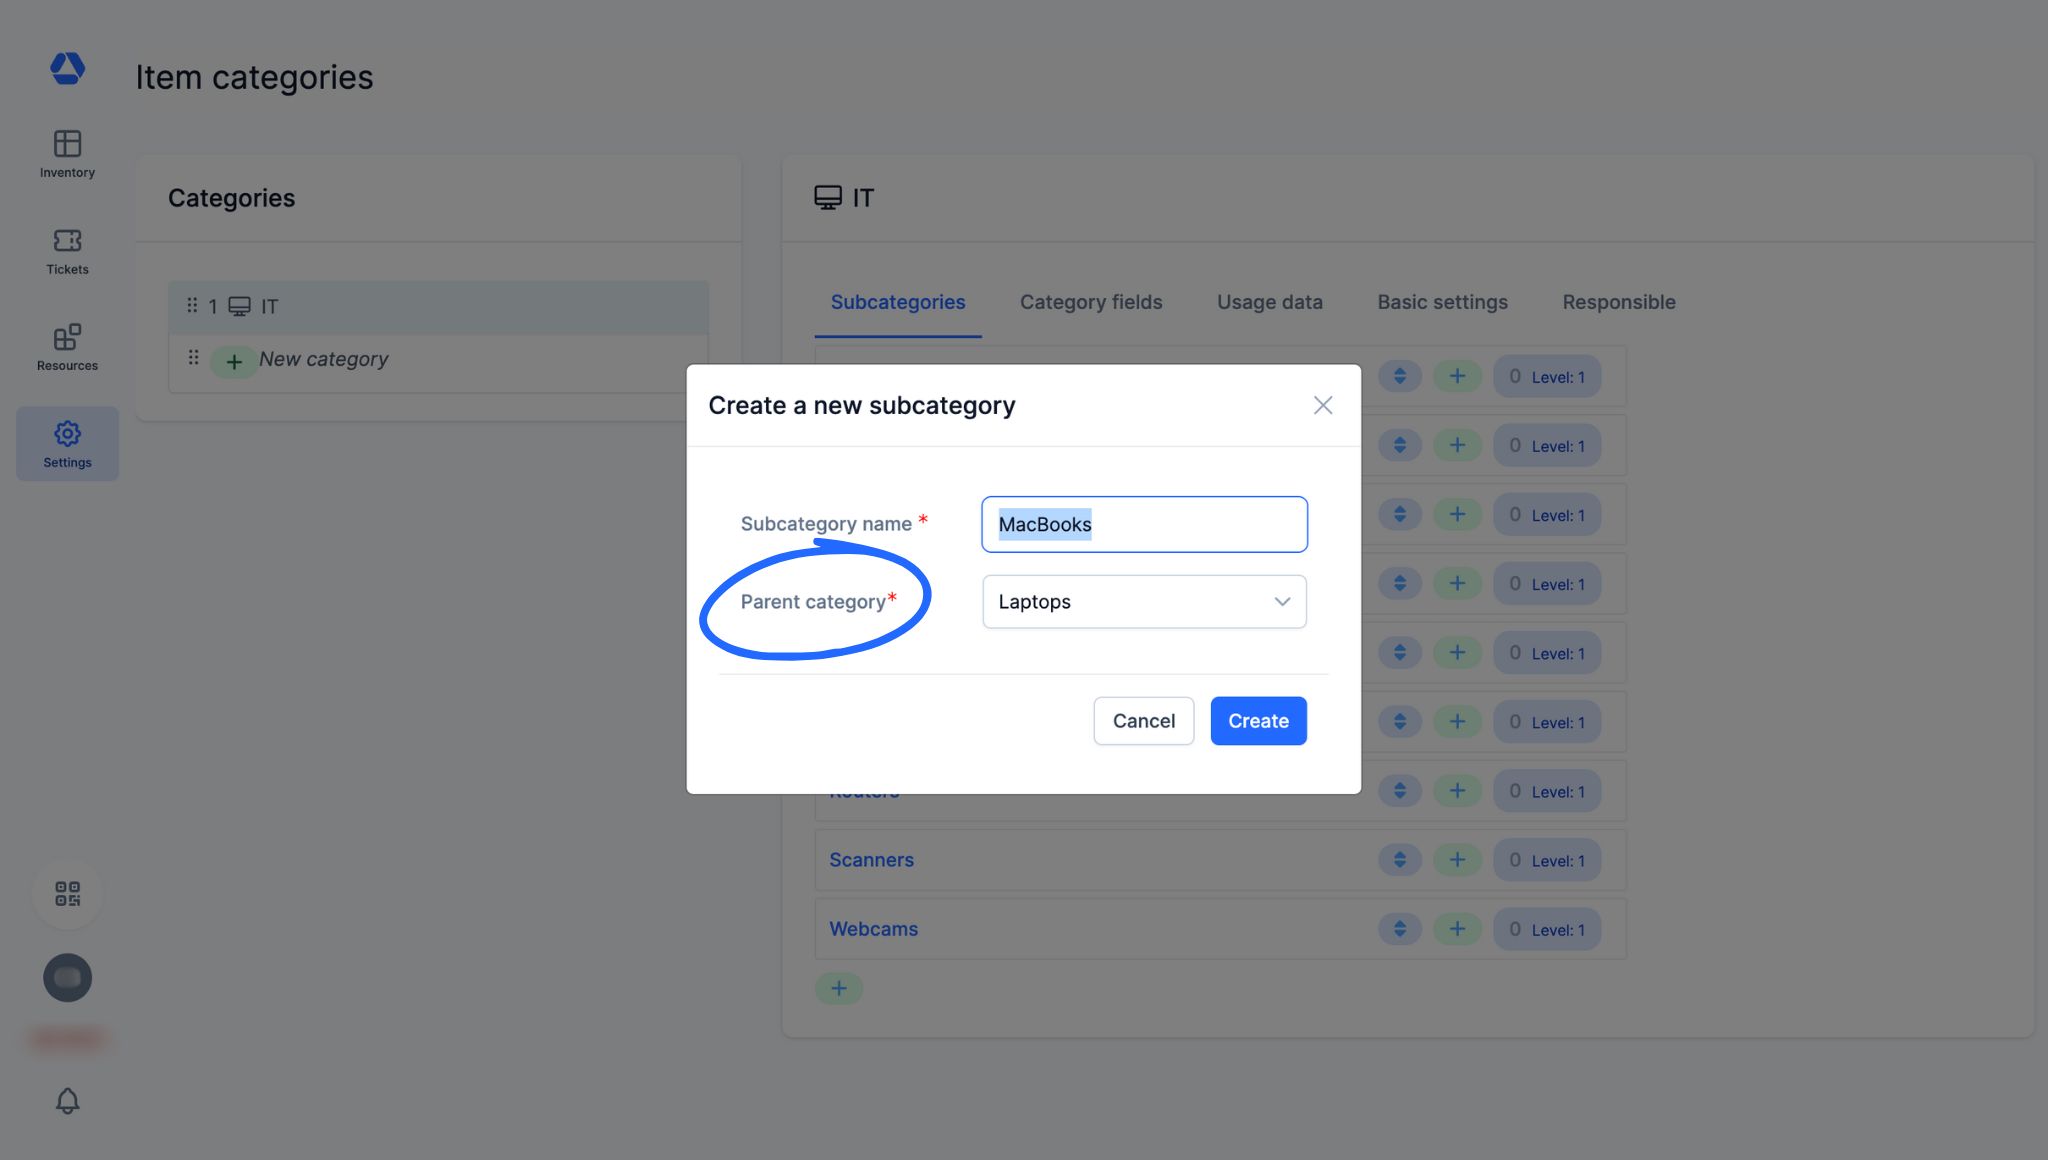
- Creating a subcategory at any level is quick and easy. Just click the "+" icon, add the name of your subcategory, and select its parent category from the dropdown list
- Manage attributes specific to an item category -
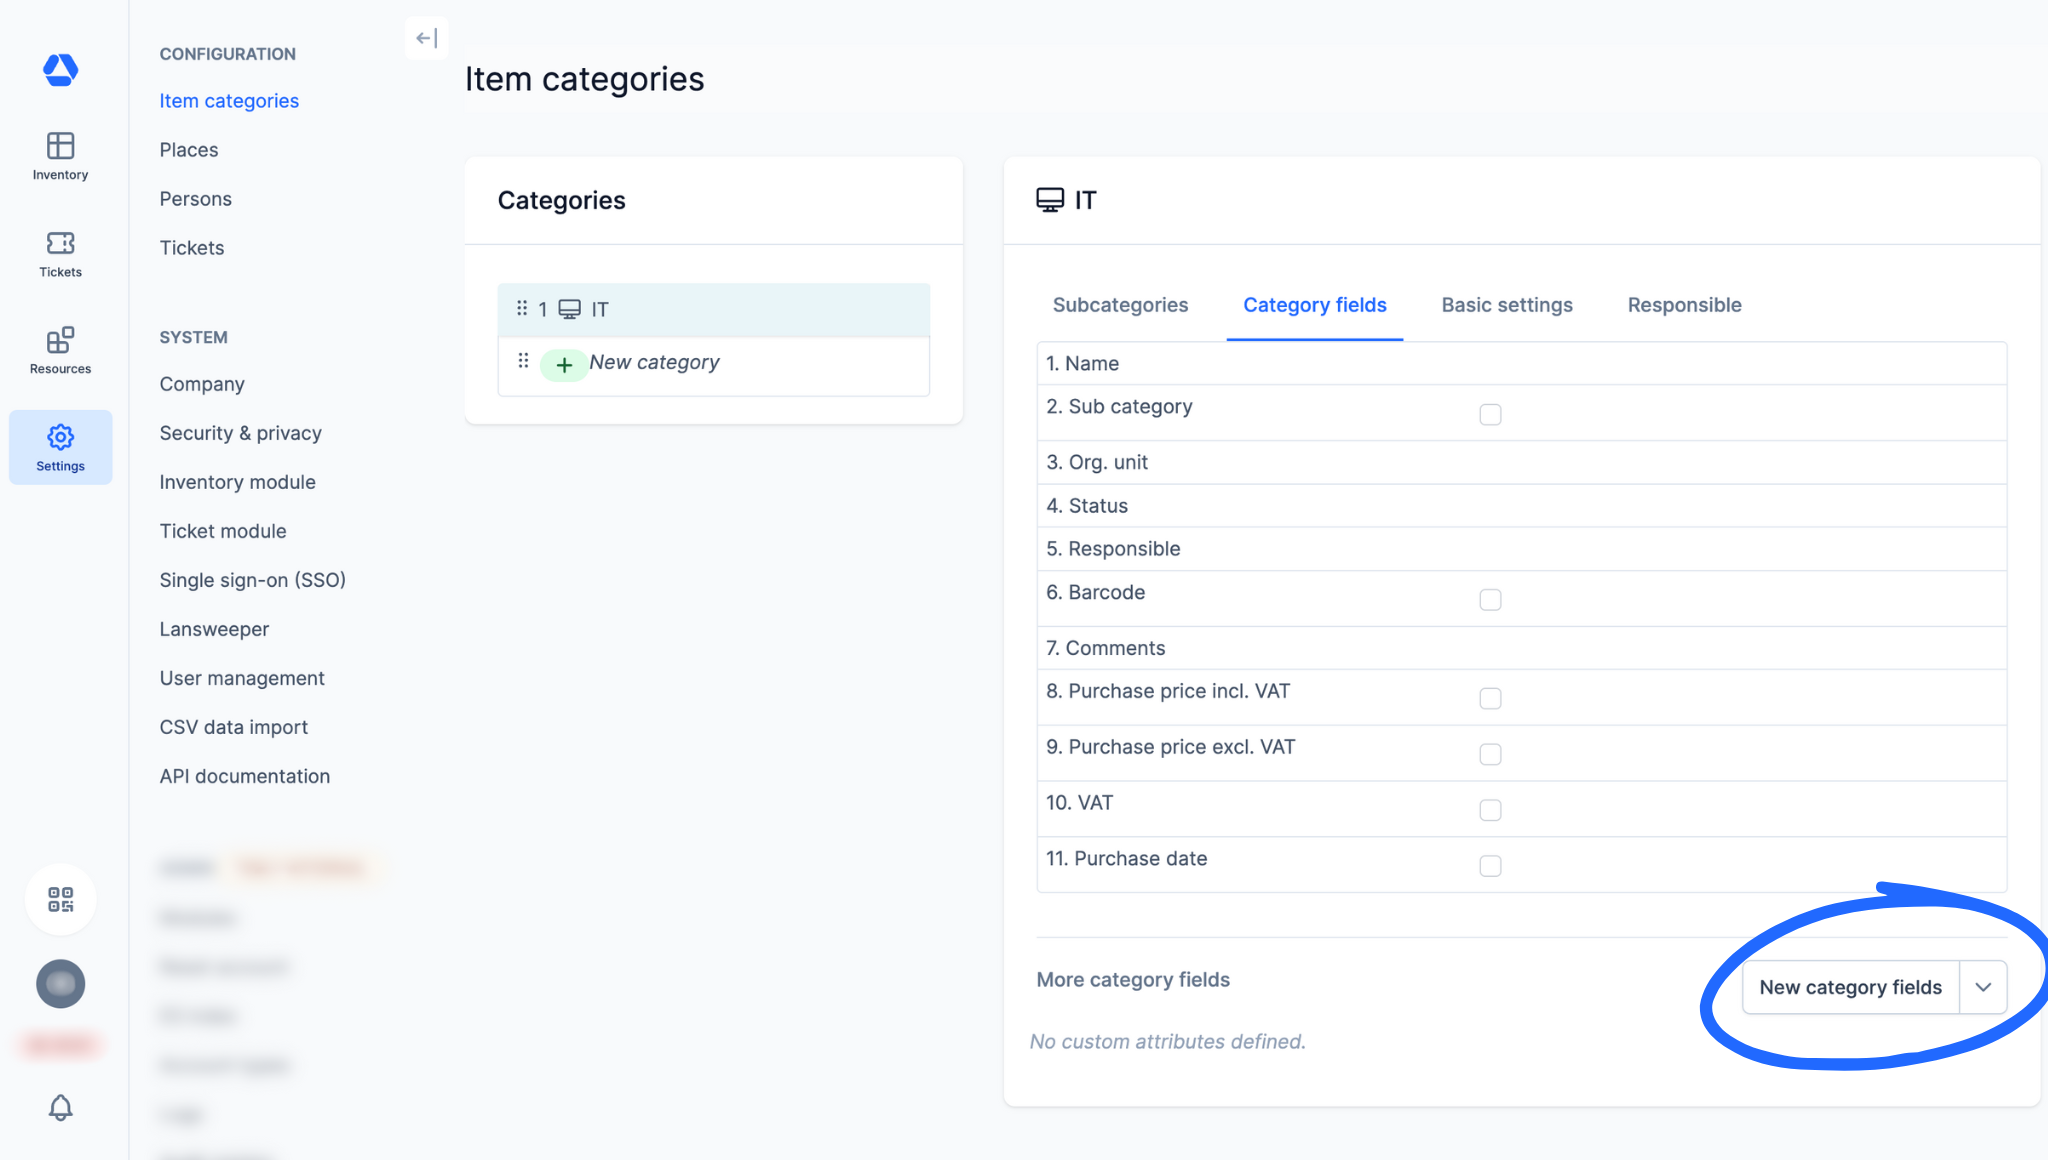
- By clicking on "Category fields", you can manage the attributes you want to make mandatory for each individual item category. Making an attribute mandatory means that all items in this category will have this attribute displayed on their item page
- Default attributes: Pick a default Timly attribute (e.g., "Purchase date")
- Custom attributes: Add your own custom attributes by clicking on "New category fields"
- Manage or delete an item category -
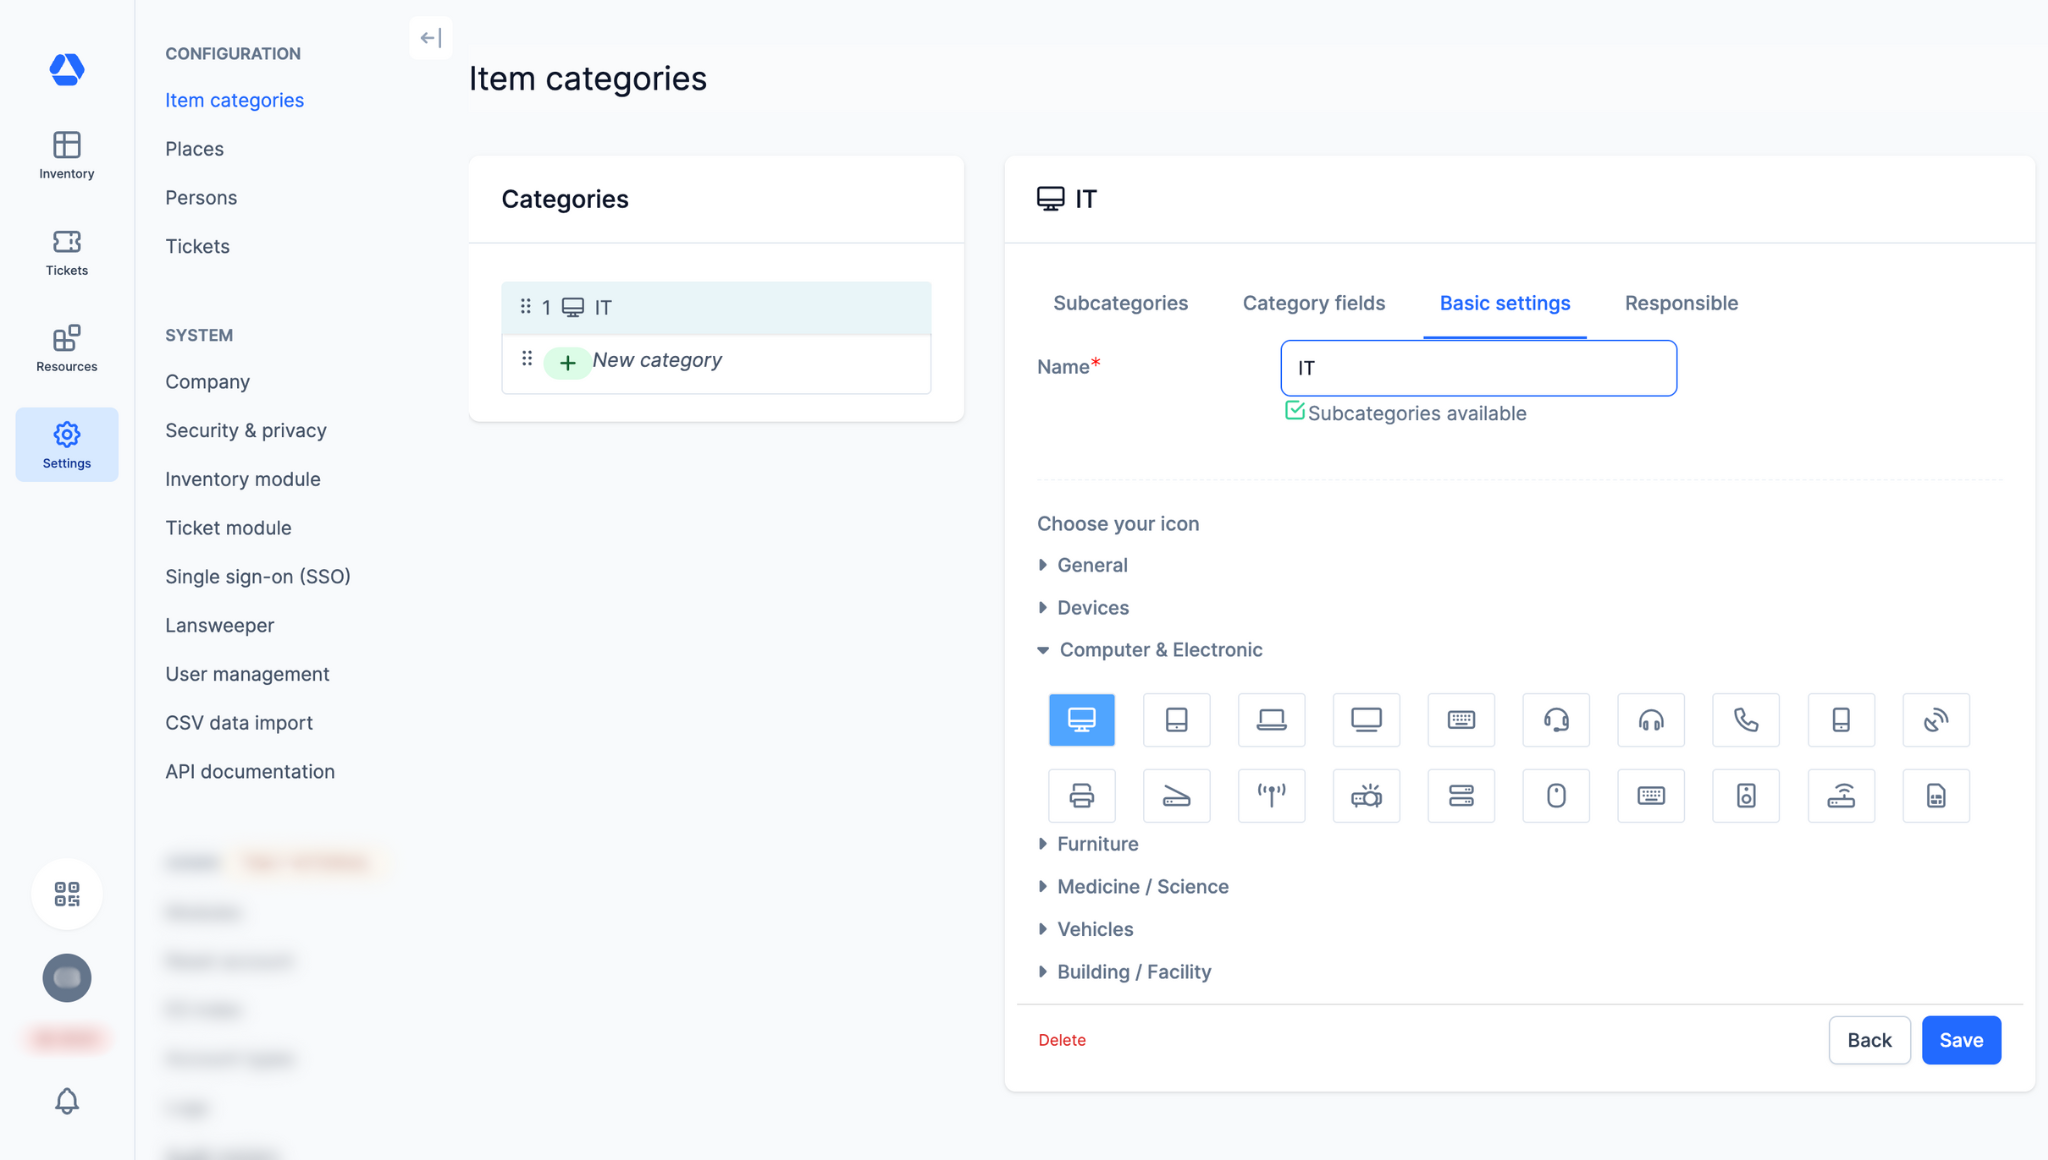
- By clicking on "Basic settings", you can:
- Change the name of a main category
- Change its icon
- Delete this main category
- Set responsible persons for item categories -
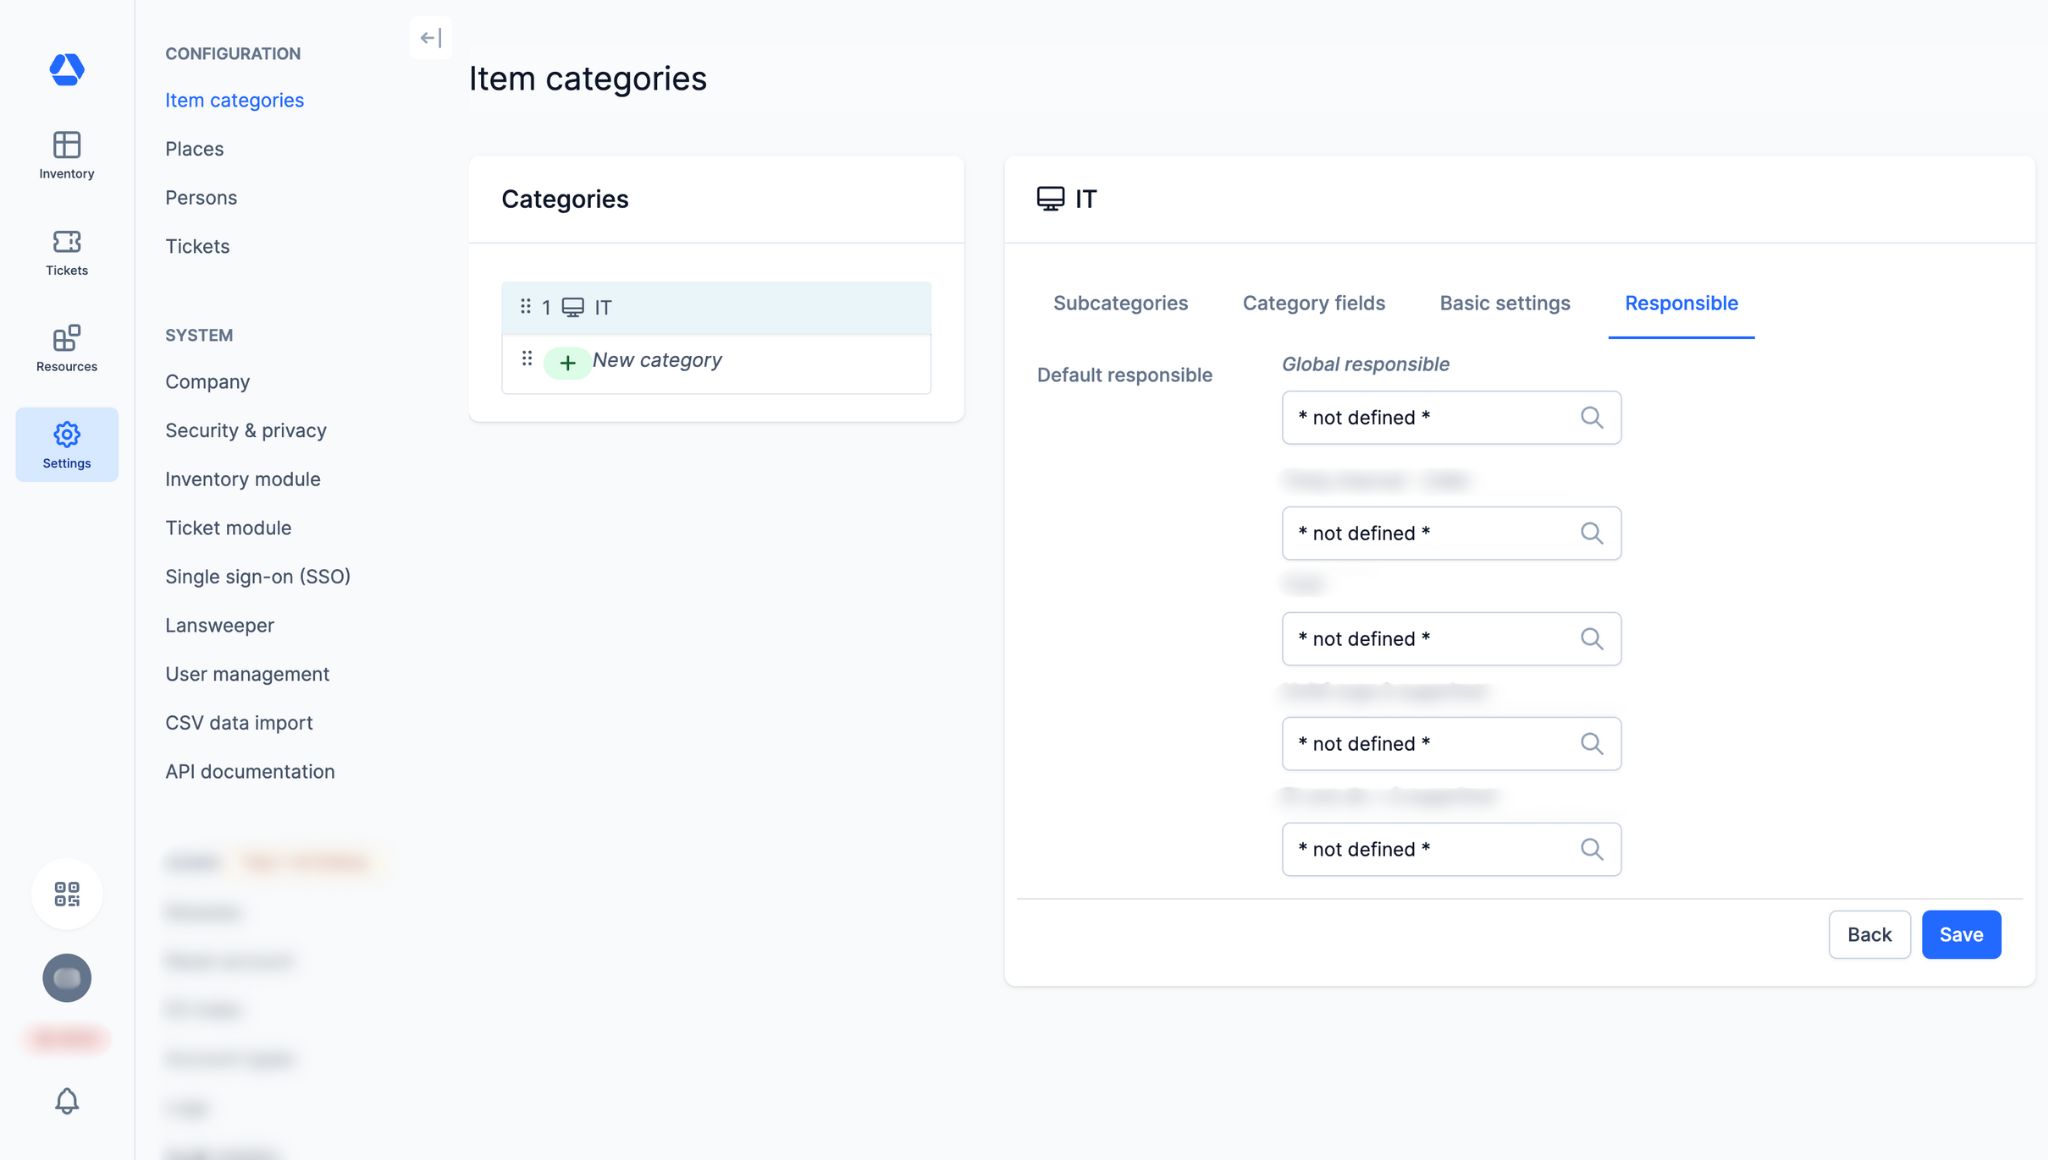
- By clicking on "Responsible", you can define two types of responsible persons for an item category:
- The person responsible for the category
- The person responsible for the category within each organizational unit
📖 Timly Glossary
Category: A category is a structure used to group items based on shared characteristics. For example: “IT Equipment”, “Vehicles”, or “Clothing”. Categories are customizable.
Inventory: The inventory is the set of items you manage and track in Timly.
Item: An item is a resource, either tangible or intangible, managed and tracked in Timly. It can be a wide range of items, including computer equipment, tools, vehicles, office supplies, medical equipment, software, etc. Also sometimes referred to as “Asset”.
📖 Find all the definitions in the Timly Glossary.
✅ Required Features & Functions
Inventory Module.
🔗 More Resources
- Help Center: How Do I Create Items?
- Help Center: How Do I Create Blueprint and Twins?
📩 Do you have more questions? Schedule a free and non-binding demo with one of our experts, or ask us at [email protected].