
How Do I Create Items?
How Do I Create Items?
💡 What You Need to Know
When creating your inventory in Timly, you can either create items manually or import data using the CSV Importer.
📘 This guide provides a structured, step-by-step approach to creating items manually, ensuring your inventory is set up accurately from the start.
⚙️ The Steps
- Step 1: Item Categories -
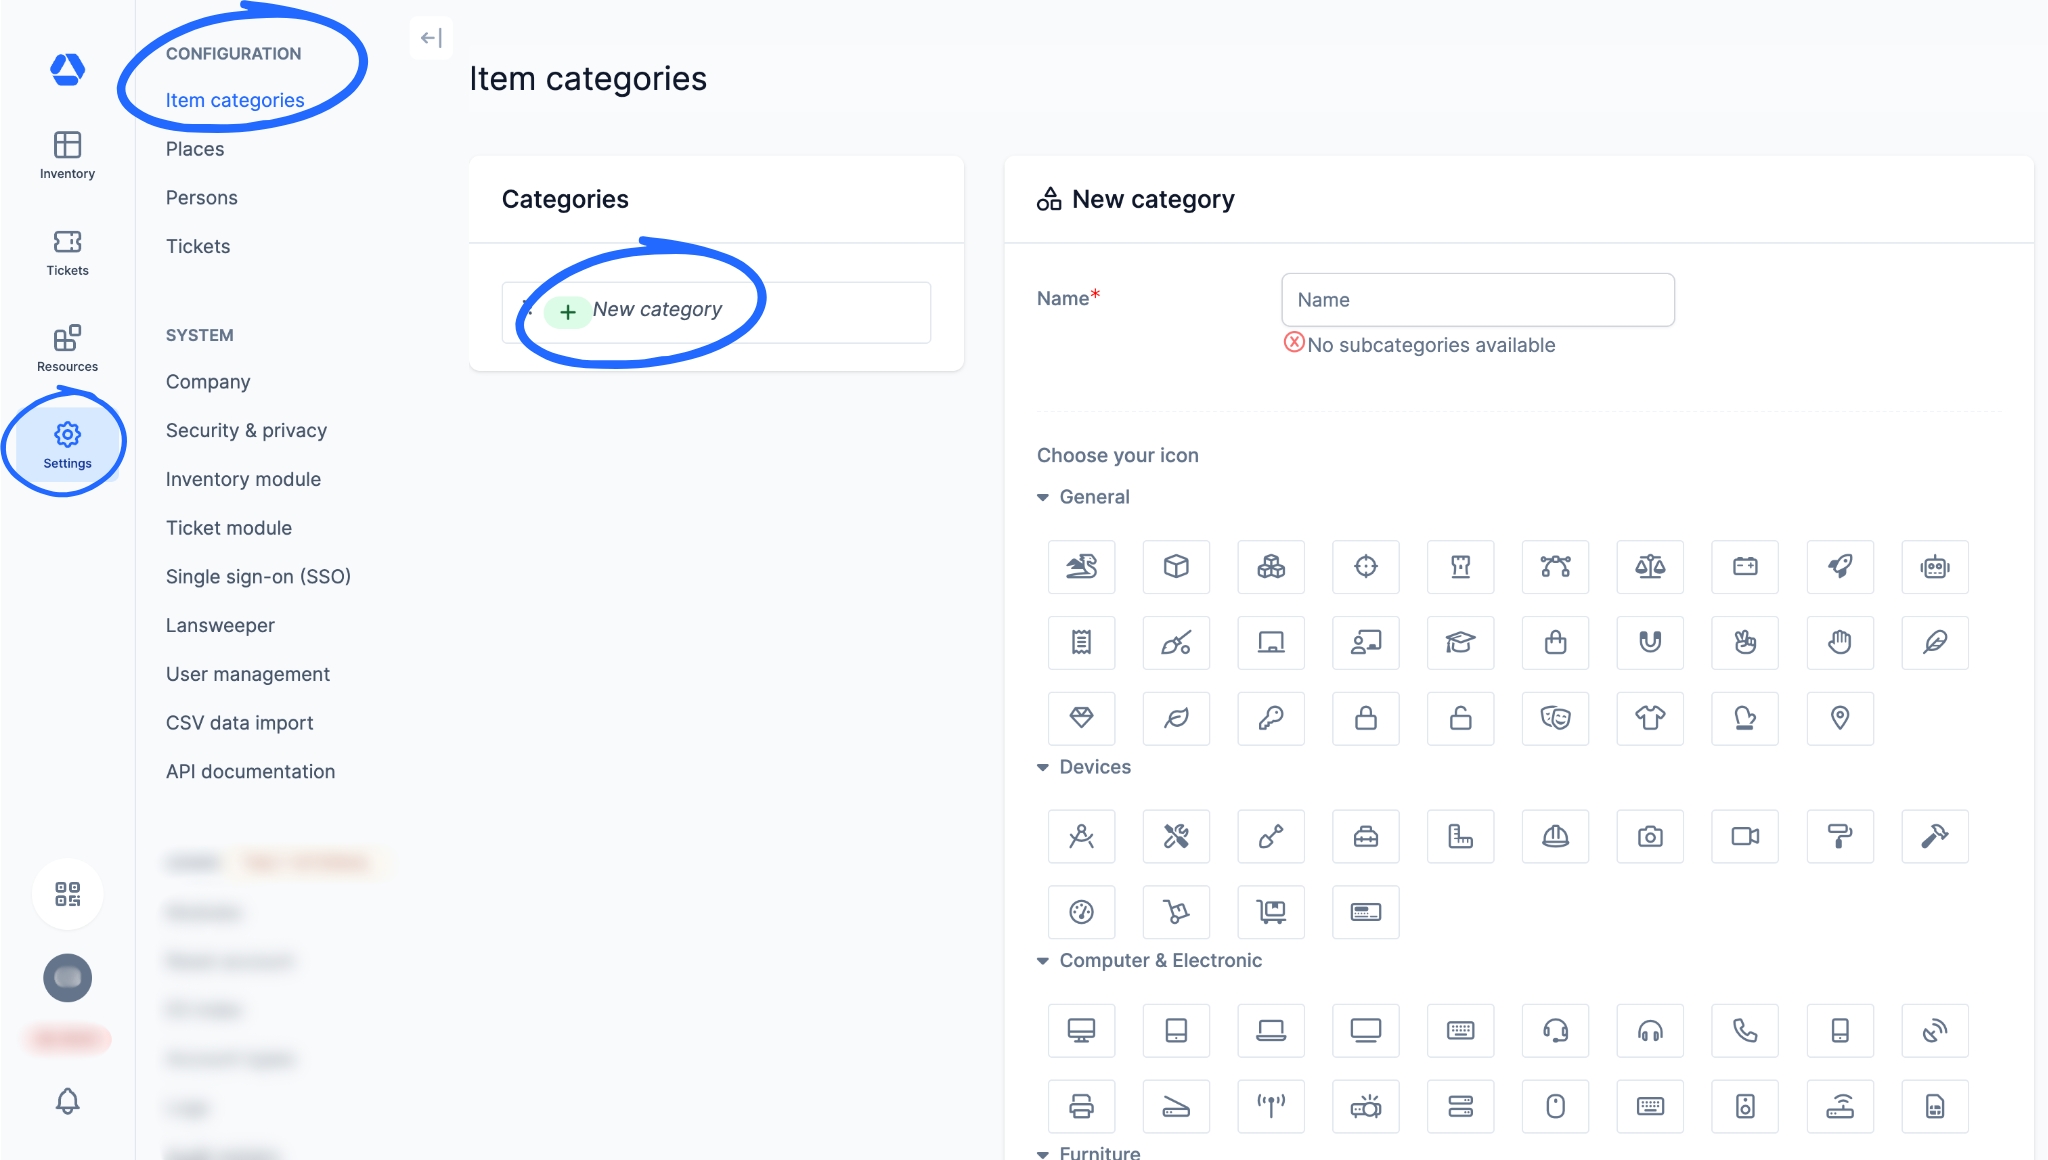
To create your items, you first need to define your categories. They serve as the foundation of your inventory and help organize your data in a clear and systematic way.
📚 Follow our detailed guide to learn how to create your item categories: How Do I Create Item Categories?
- Step 2: Create the Item -
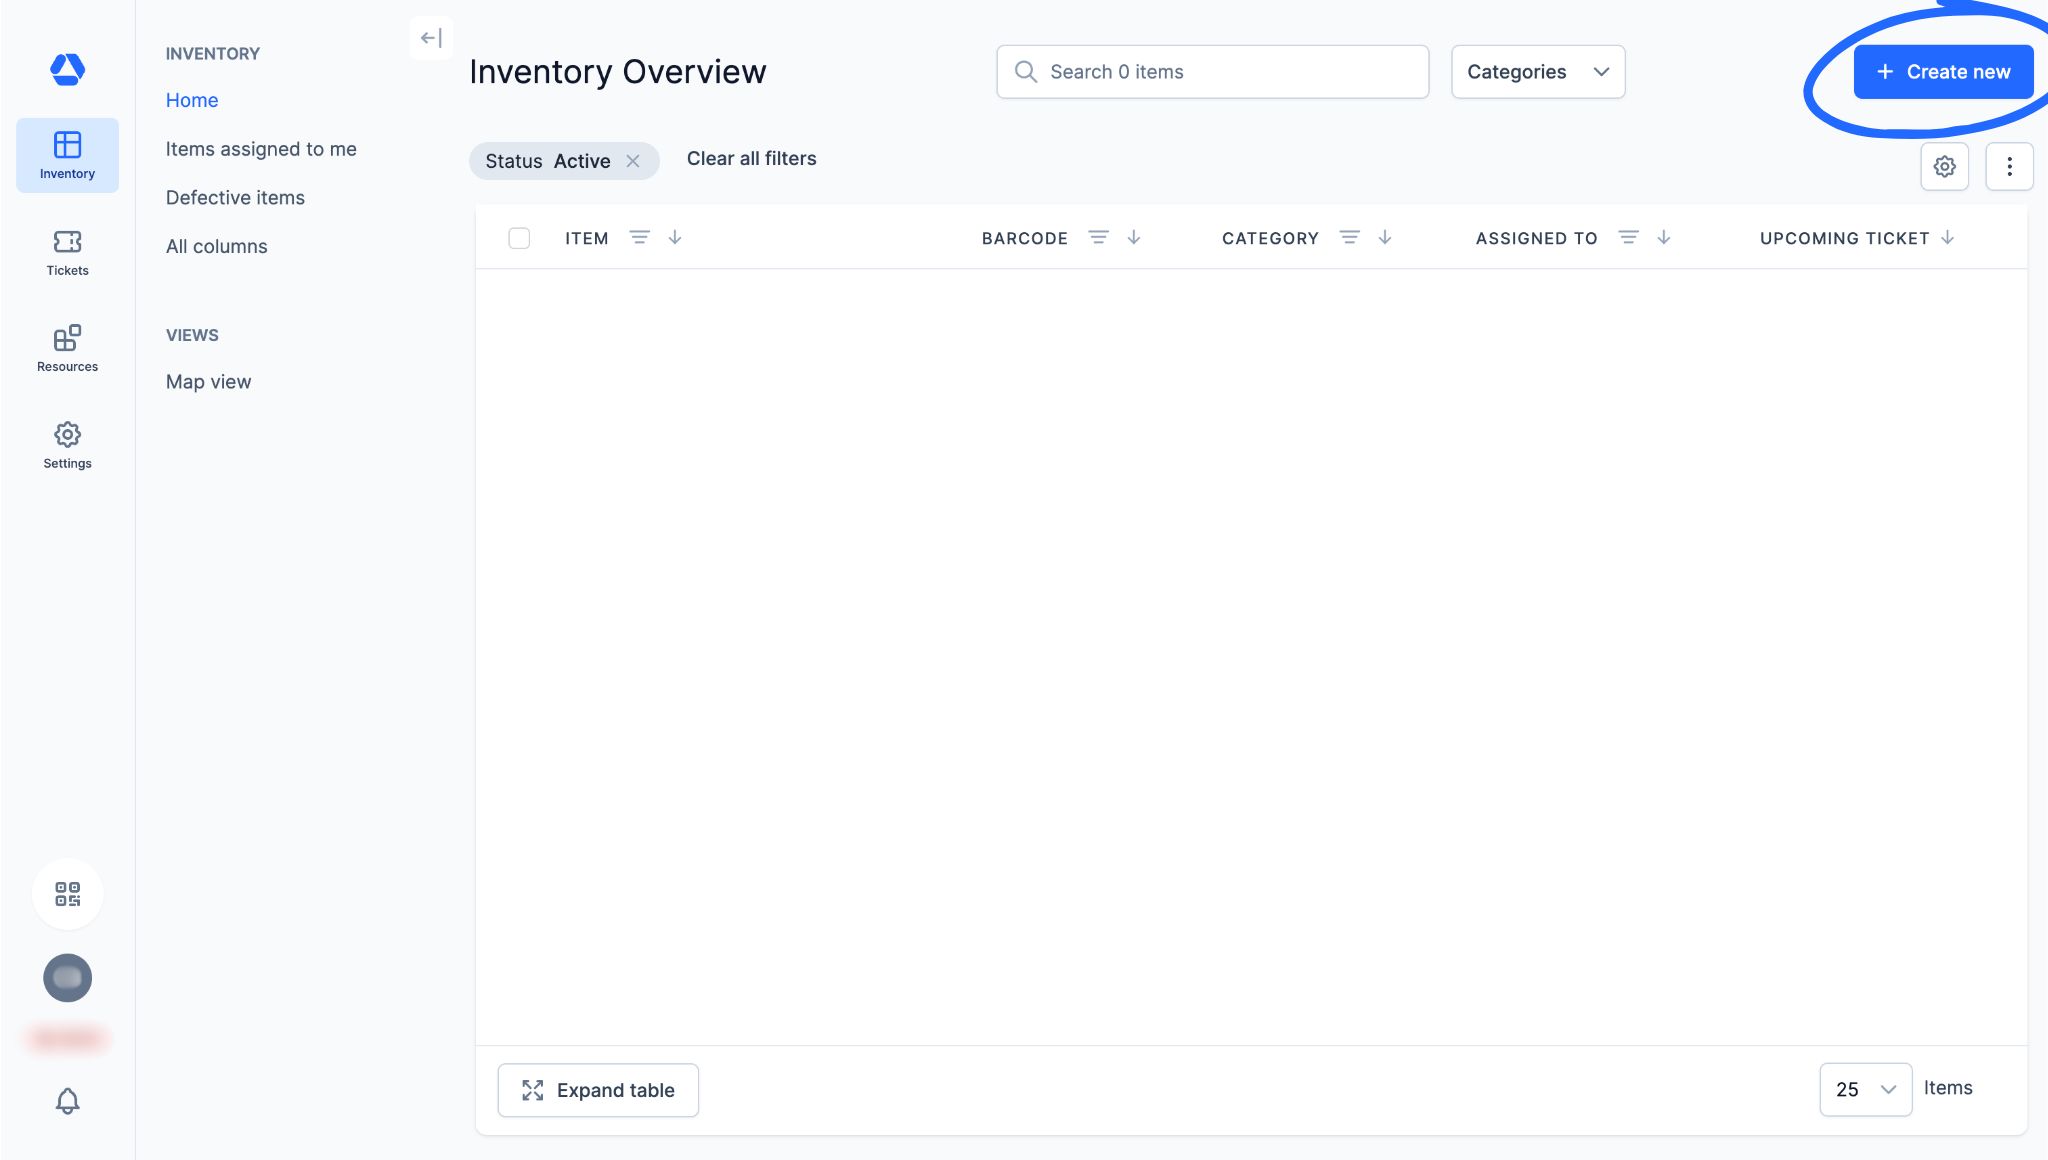
- Go to "Inventory Overview"
- Click on “Create new”
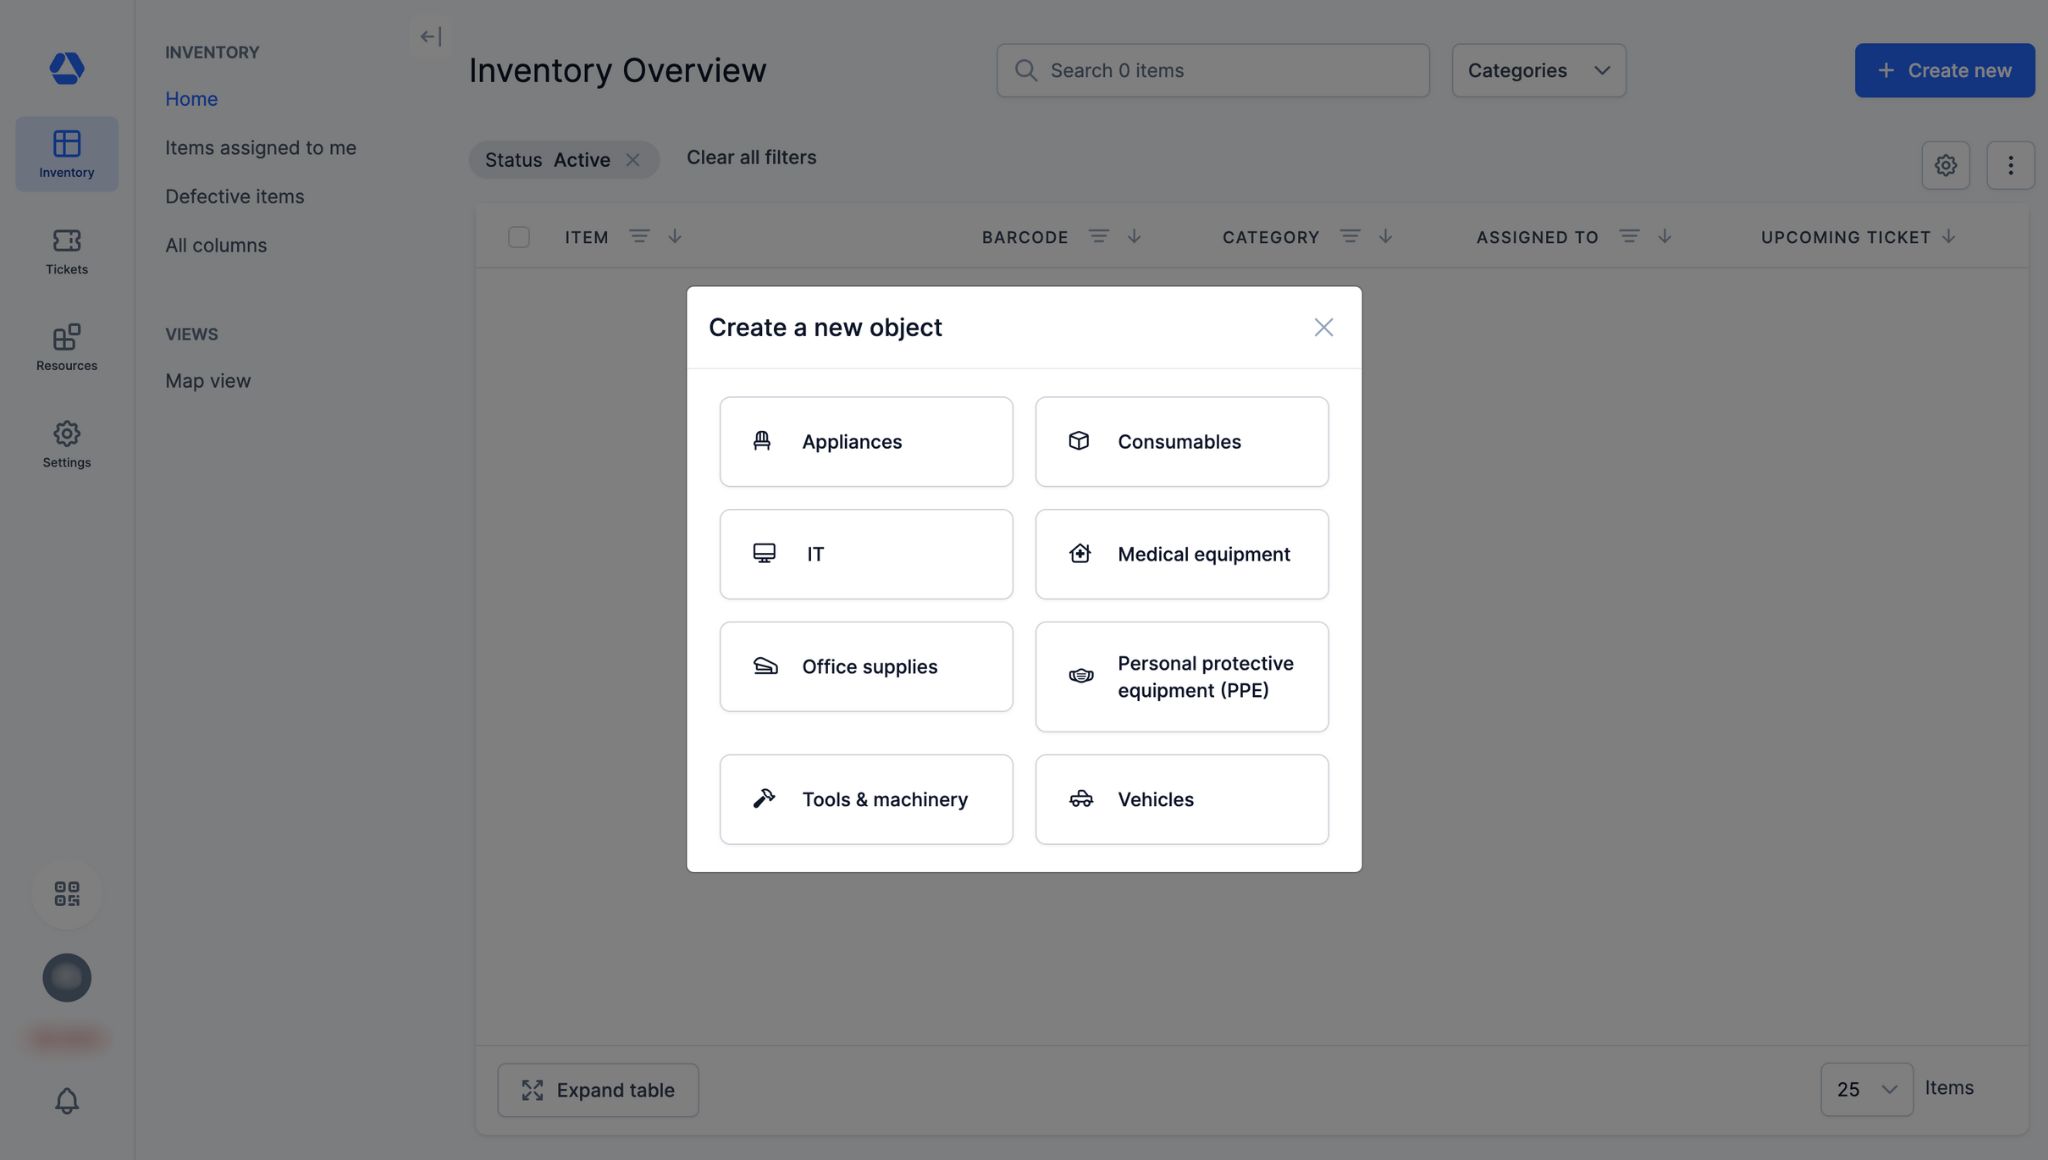
- Select the category under which you want to create an item
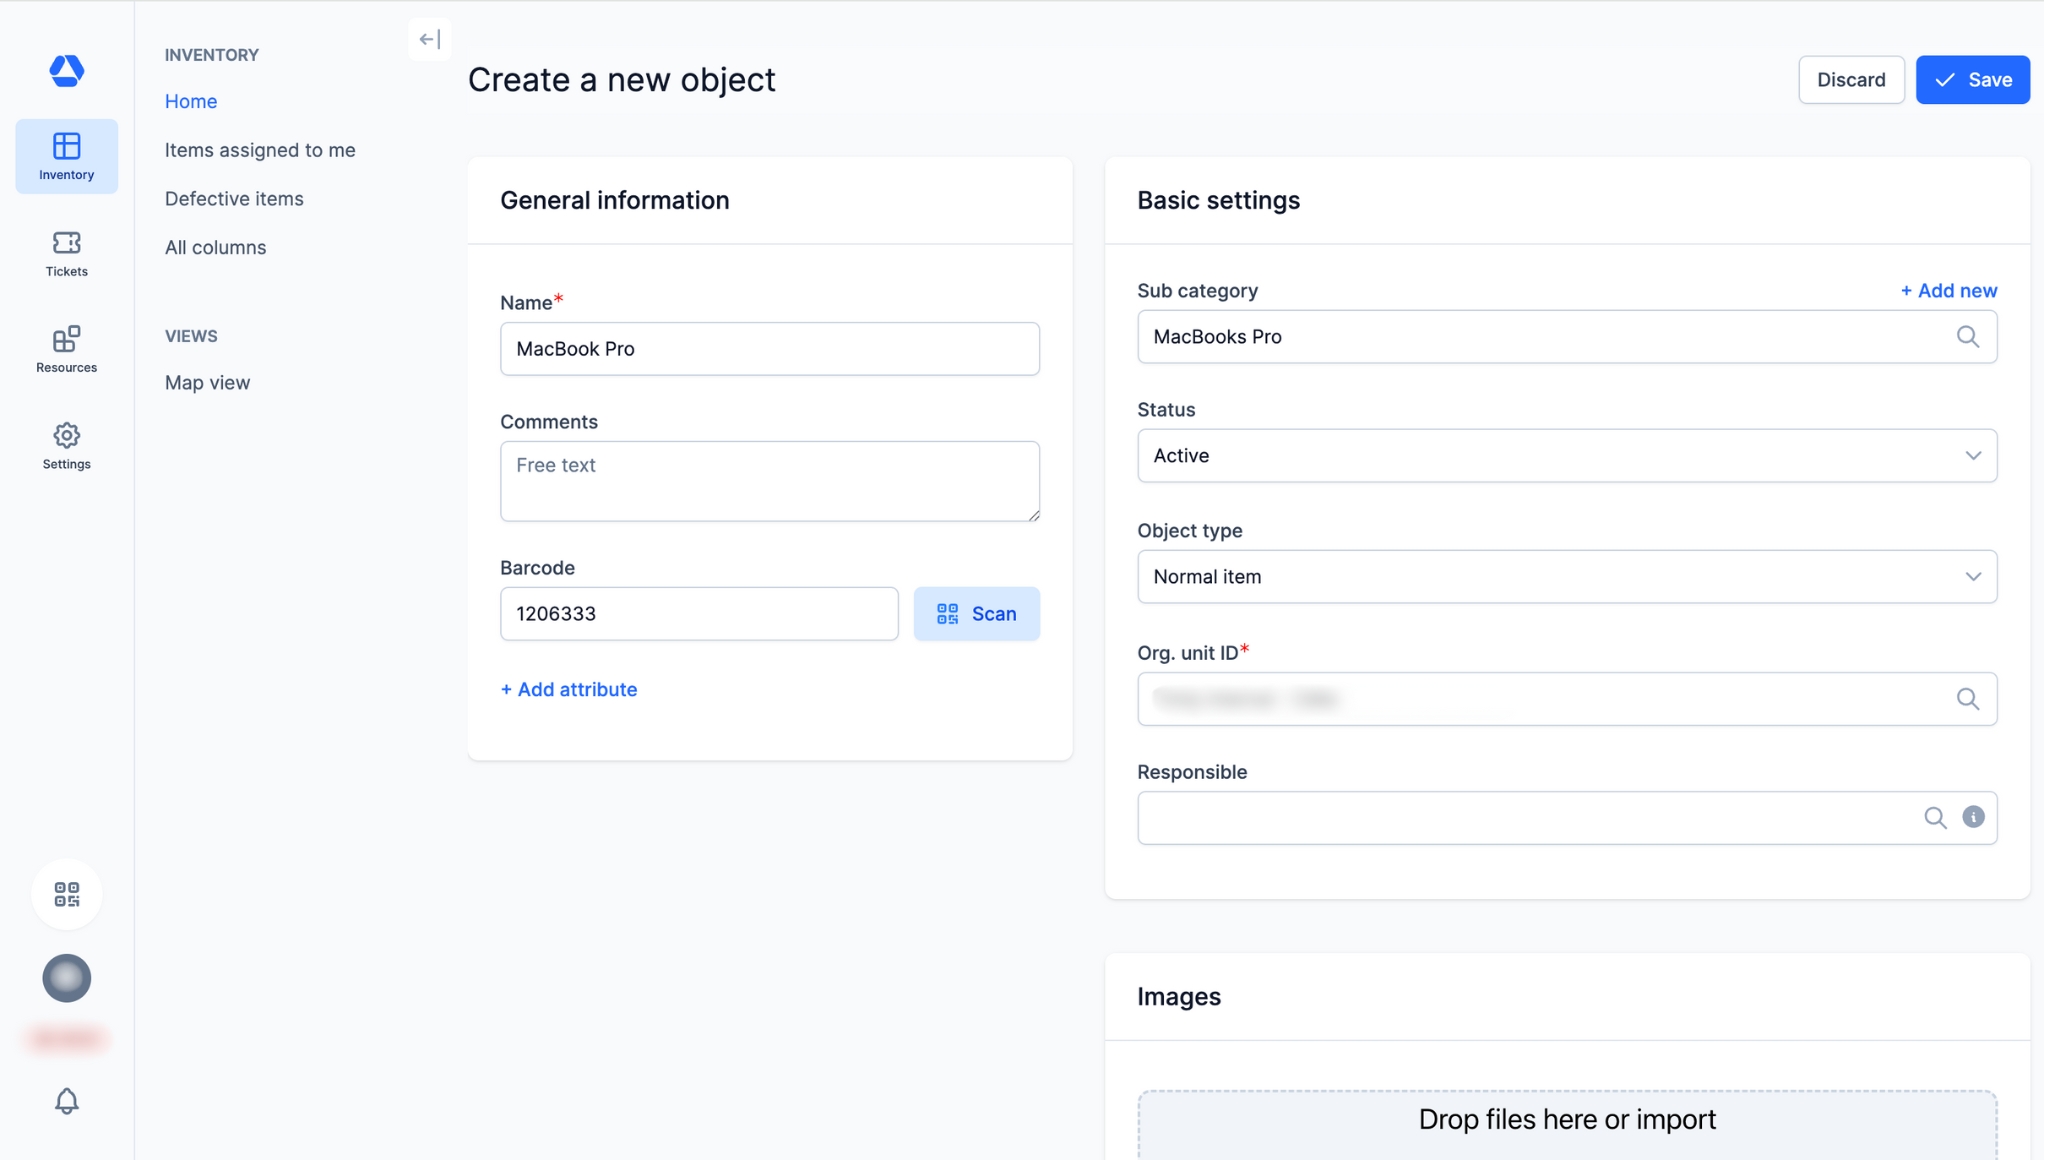
- Fill in the required and optional fields:
Required:
- Enter the item name
- Specify the organizational unit associated with this item
Optional:
- Enter the barcode (either by scanning it or by typing it manually)
- Add attributes
💡 The attributes of item categories selected by the administrator are displayed automatically at this stage. If no attributes were selected, only default attributes will be shown. To add specific attributes for this item, click “Add attribute”.
- Select or add a subcategory for this item
- Specify the item status
- Choose the item type: “Normal item”, “Blueprint”, or “Stock item”
- Assign a responsible person for this item
- Add documents (e.g., purchase invoice, warranty, user manual, contract) and/or photos (e.g., of the item)
- Click “Save” to save this item. This action will take you directly to the item page.
- Step 3: The Item Page -
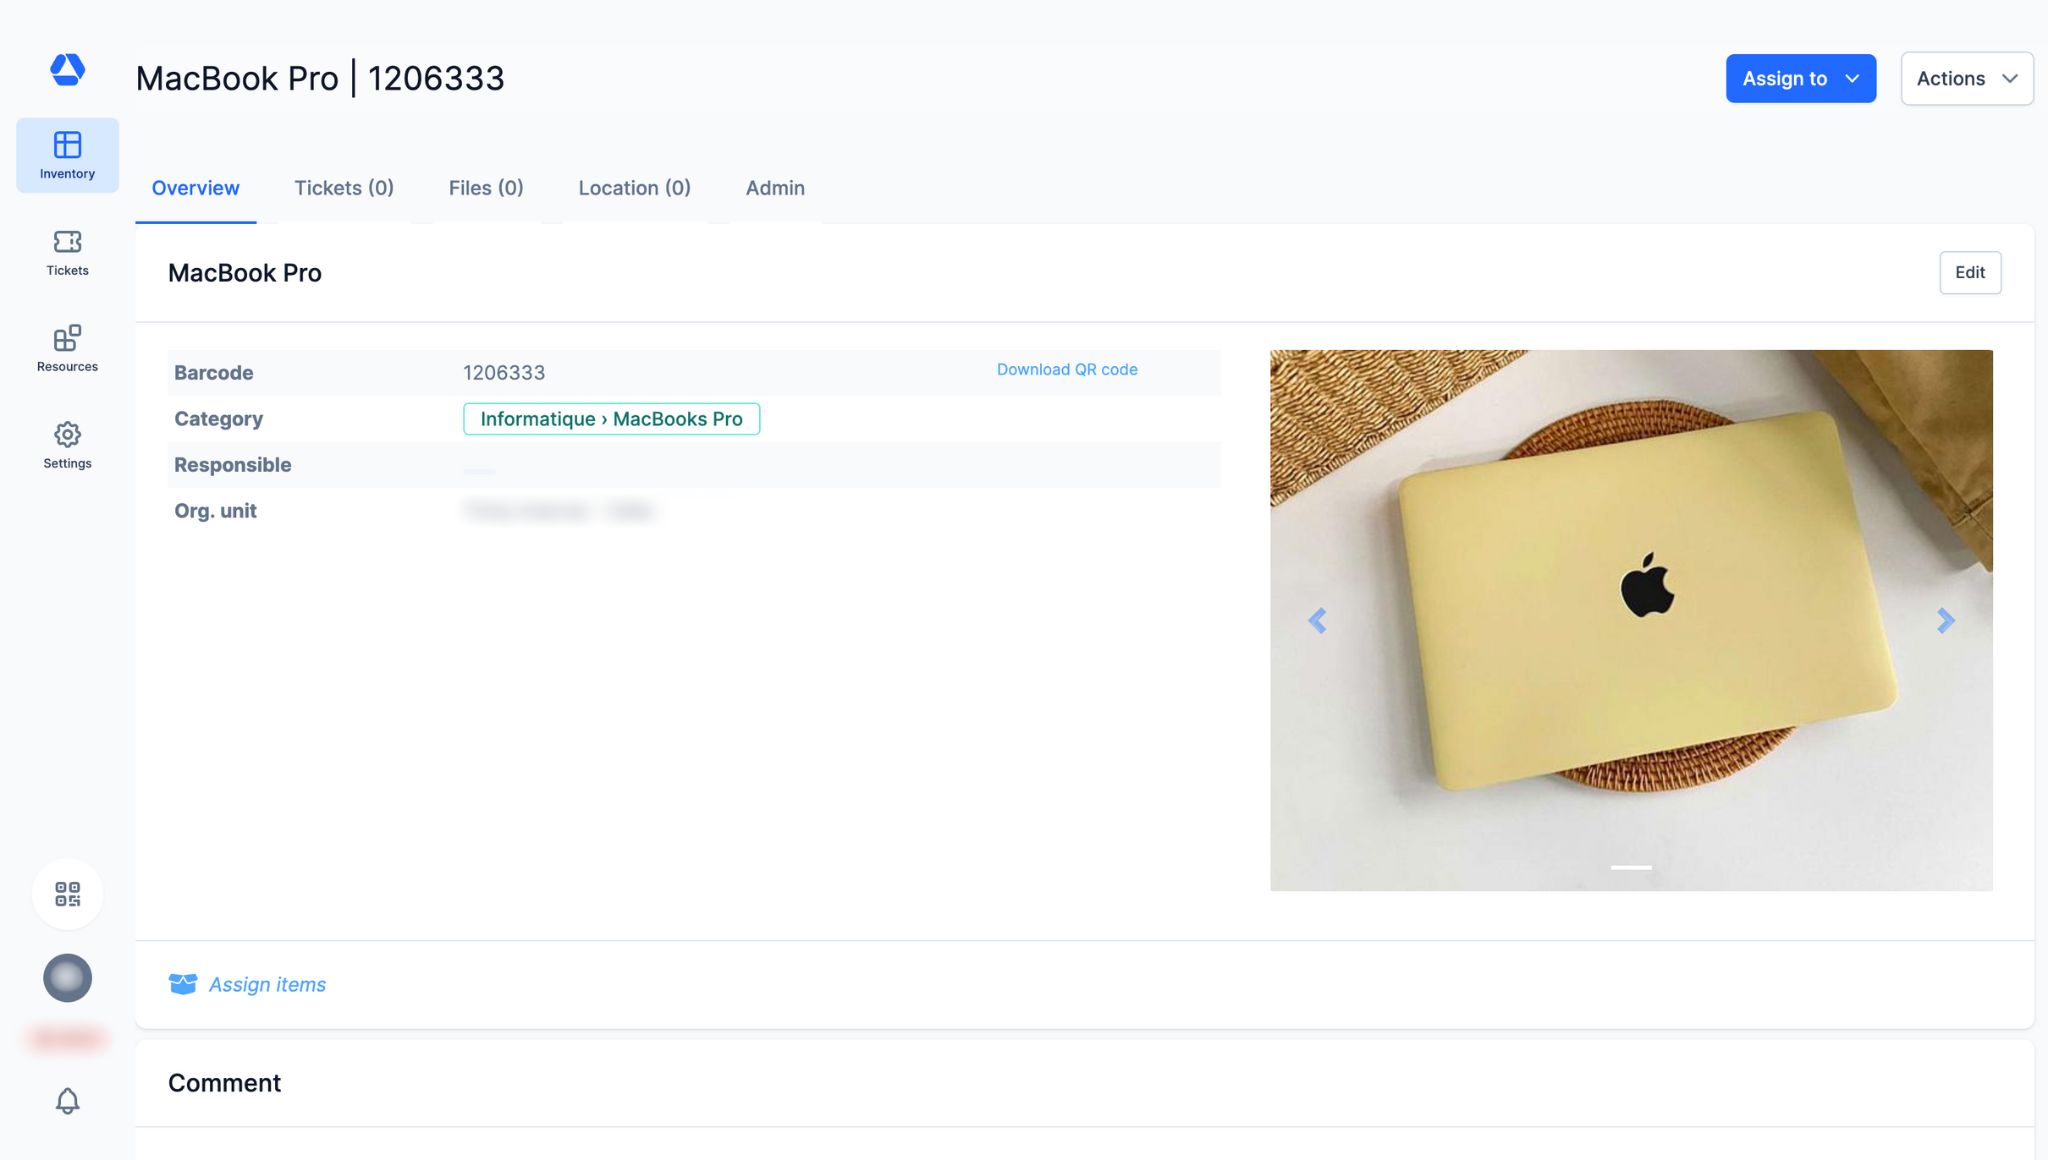
- The item page brings together all the information and actions related to an item. You can:
- Assign this item by clicking “Assign”
- Create a ticket:
- By clicking “Actions” then “New ticket”
- Or by clicking “Create ticket” in the “Open tickets” section
- Duplicate this item by clicking “Actions” then “Duplicate item”
- Convert this item into a container item by clicking “Assign items”
- Comment by tagging someone to notify them about this item
- Add contacts for this item by clicking “Add / edit” in the contacts section
- View the assignment history of this item in the “Item assignments (history)” section
- View tickets assigned to this item in the “Tickets” tab
- Add files and/or photos in the “Files” tab
- View the movement history for this item in the “Admin” tab (Available only for admin accounts)
- Create, deactivate, or reactivate a Direct Access Label by clicking “New direct access token” in the “Admin” tab
💡 Note that tabs and sections may vary depending on the features included in your Timly package.
📖 Timly Glossary
Inventory: The inventory is the set of items you manage and track in Timly.
Item: An item is a resource, either tangible or intangible, managed and tracked in Timly. It can be a wide range of items, including computer equipment, tools, vehicles, office supplies, medical equipment, software, etc. Also sometimes referred to as “Asset”.
Item page: The item page is the individual record dedicated to an item, an interface where all related information is displayed:
- Assignments
- Associated documents
- Audit log/history (assignments and movements – visible only by admins)
- Contacts
- General information (name, category, barcode, photo, and technical details)
- GPS position
- Location
- Open associated tickets
- Planning
- Remarks
- Usage data
📖 Find all the definitions in the Timly Glossary.
✅ Required Features & Functions
Inventory Module.
🔗 More Resources
- Help Center: How Do I Create Item Categories?
- Help Center: How Do I Create Blueprints and Twins?
📩 Do you have more questions? Schedule a free and non-binding demo with one of our experts, or ask us at [email protected].