
How Do I Create and Manage Internal Orders?
How Do I Create And Manage Internal Orders?
💡 What You Need to Know
Timly’s internal ordering system allows you to easily manage and track all equipment requests within your organization.
Every step — from order creation to delivery and return — is recorded for full traceability.
📘 This guide shows you how to create and manage internal orders.
🎥 Interactive Demo
⚙️ The Steps
- Step 1: Create an Order -
- Click the “Orders” menu item, then select “Create new”
- Choose the organizational unit where you want to create the order
- In “Delivery location”, select the resource (a person or a place) who should receive the order
- Select a delivery date
The delivery date is set to the next business day by default (except for holidays)
Optional:
- Add a note (e.g., "Please deliver between 10:00 and 14:00 only")
Notes will appear on the delivery slip
- Add each requested item by clicking “Add item” in the “Requests” section
The “Requests” section acts as a wishlist of desired items. These are free-text fields that you can add, edit, or delete. - Click “Save”
📩 The person who creates the order will receive email updates.
- Step 2: Handling an Order -
Optional:
- Update the order status (Choose between "To do", "In progress", "Done", "Cancelled")
- Update the delivery date
- Add the items corresponding to the request. These are the items you want to assign to the person who created the order. You can add items using two methods:
1. Using the search function
. Click the magnifier icon in the “Items” section.
. Click “Category” to select the item categories you want to display, then click “Show results”.
. Click the “+” icon to add an item.
2. Using the barcode scanner
. Click the barcode icon in the “Items” section.
. Enter the item’s barcode number in the “Enter barcode” field, then click “Confirm”,
or
. Scan the barcode directly
🗓️ Return date guidelines:
- If the scheduler feature is activated, a return date is required for this order. All items will be scheduled accordingly.
- If the scheduler feature is not activated, adding a return date is optional.
💡 Important to note:
- If you click on a stock item added to an order, you can see its movement in the “Stock Management” tab. It will show that the item is ordered from “Name of the org. unit (Order number X)”.
- As long as the order is not completed and time is still pending, both stock items and “normal” items remain reserved. While the order is in progress, they cannot be reassigned. The assignment banner indicates which order the item is currently associated with.
Optional:
- In the “Details” section, you can edit:
. The organizational unit
. The person responsible for the order
- Add a comment (e.g., Delivery confirmed for 11:30)
Comments are visible in the order profile, but do not appear on the delivery slip.
- Click “Save”
- Once the order is ready, click “Complete”
Once completed, items are assigned and the order can no longer be deleted.
Optional:
- Click “Generate delivery slip” to create the delivery note for signature upon delivery.
📩 The person handling the order will receive an email when an order is created, along with update notifications.
- Setting a Default Order Responsible -
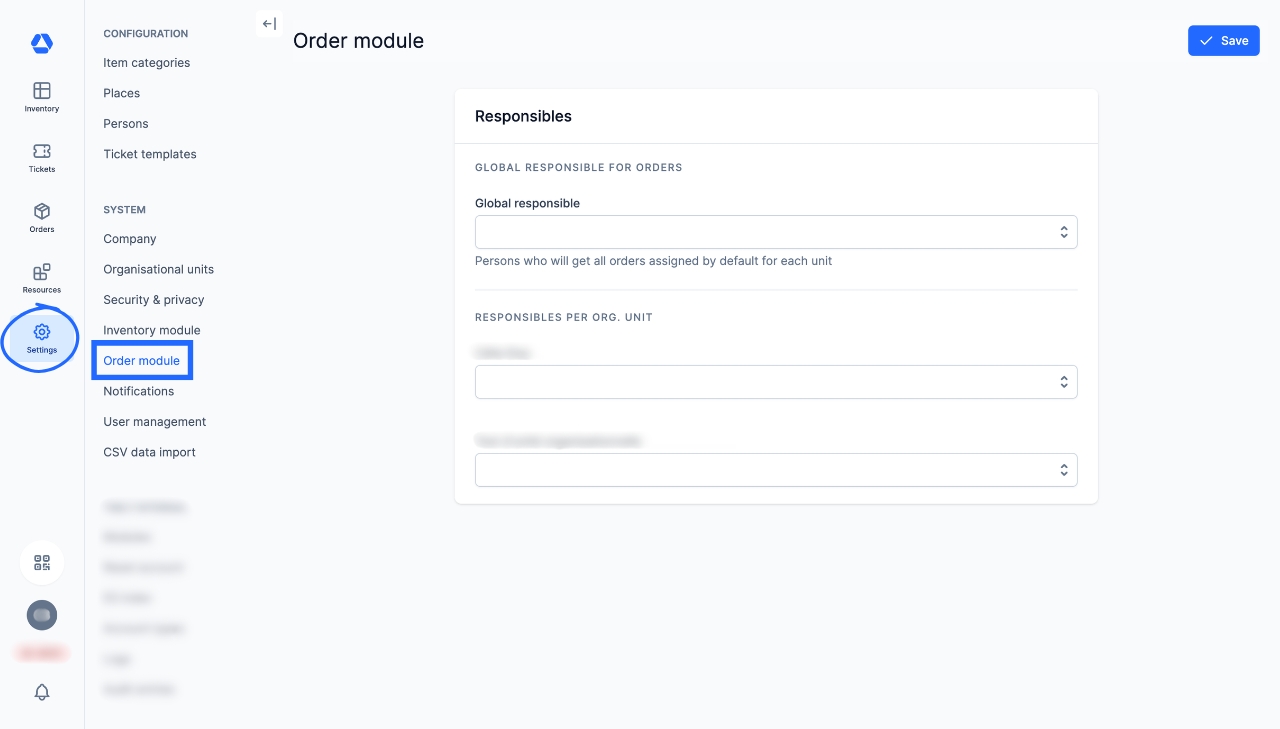
As an administrator, you can define:
. A global default responsible person for all orders
. A default responsible person for each organizational unit
If no specific person is assigned to an organizational unit, the system automatically falls back to the global responsible person.
To do this:
- Click “Settings”
- Under the “SYSTEM” menu, click “Order module”
. Define a global responsible for all orders by selecting a person in the “GLOBAL RESPONSIBLE FOR ORDERS” dropdown.
. Define a responsible per organizational unit by selecting a person in each unit’s dropdown under “RESPONSIBLES PER ORG. UNIT”.
- Overview of Orders -
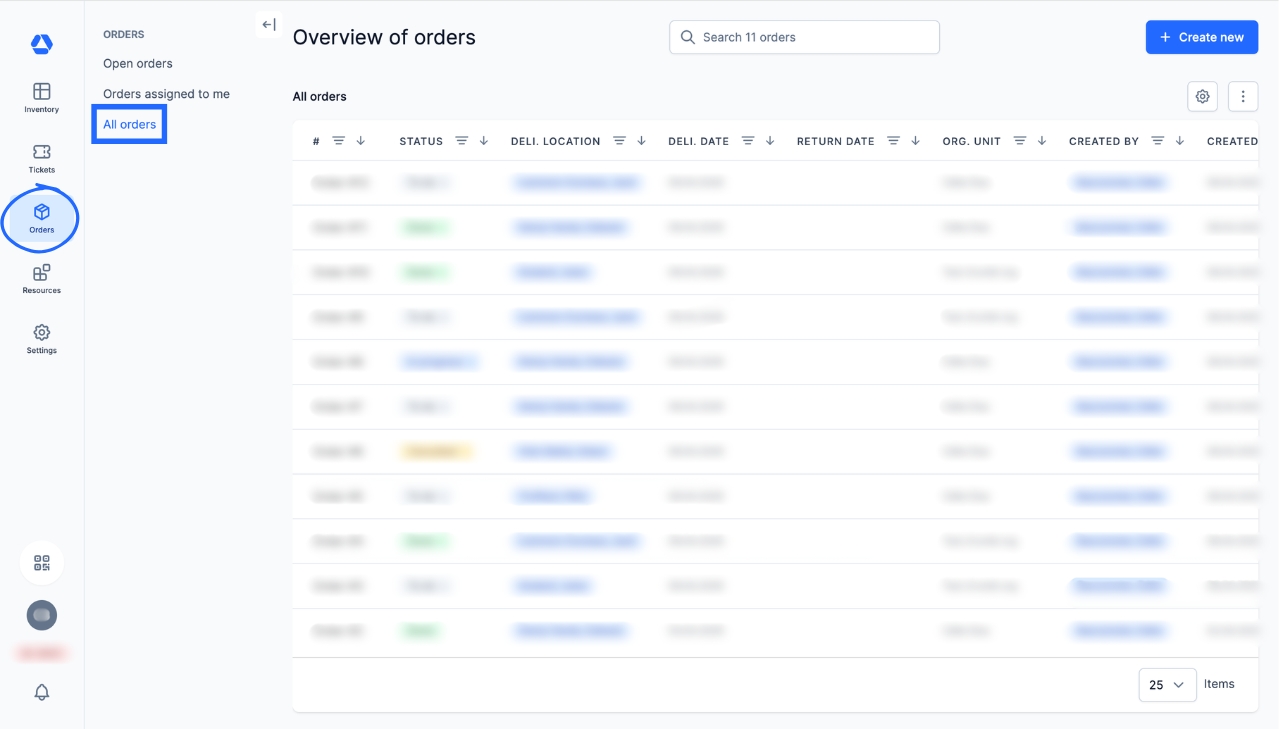
- Click the menu item “Orders”
- Click “All orders”
Here, you can view all orders regardless of their status. You can search and filter by status, delivery location, order date, and more.
📖 Timly Glossary
Inventory: The inventory is the set of items you manage and track in Timly.
Item: An item is a resource, either tangible or intangible, managed and tracked in Timly. It can be a wide range of items, including computer equipment, tools, vehicles, office supplies, medical equipment, software, etc. Also sometimes referred to as “Asset”.
Order: In Timly, an order represents an internal materials request used to reserve, plan, and assign inventory items to specific users or places. When the scheduling feature is active, the order also defines the time period during which these items are allocated.
Scheduler: The scheduler is an interactive calendar that allows you to plan and reserve items for any given period.
Stock item: Stock items are similar items that can be managed and assigned in specific quantities. Stock items can be consumed, in which case they are considered consumables. For example: construction fences, cables, chairs.
📖 Find all the definitions in the Timly Glossary.
✅ Required Features & Functions
Inventory Module; Order module.
🔗 More Resources
- Website: Internal Ordering System
📩 Do you have more questions? Schedule a free and non-binding demo with one of our experts, or ask us at [email protected].