
How Do I Use Item Statuses?
How Do I Use Item Statuses?
💡 What You Need to Know
In Timly, statuses identify the state an item is in: "Active," "Defective," "Missing," or "Inactive." They serve as a common reference to see whether an item is available, unavailable, broken, or lost. Each status represents a specific situation, and all status changes are recorded in the status history on the item page. In addition to these four default statuses, you can create your own custom item statuses and refine the tracking of your inventory lifecycle.
📘 This guide covers the essentials of item statuses in Timly.
You can see the item status:
- In the inventory overview
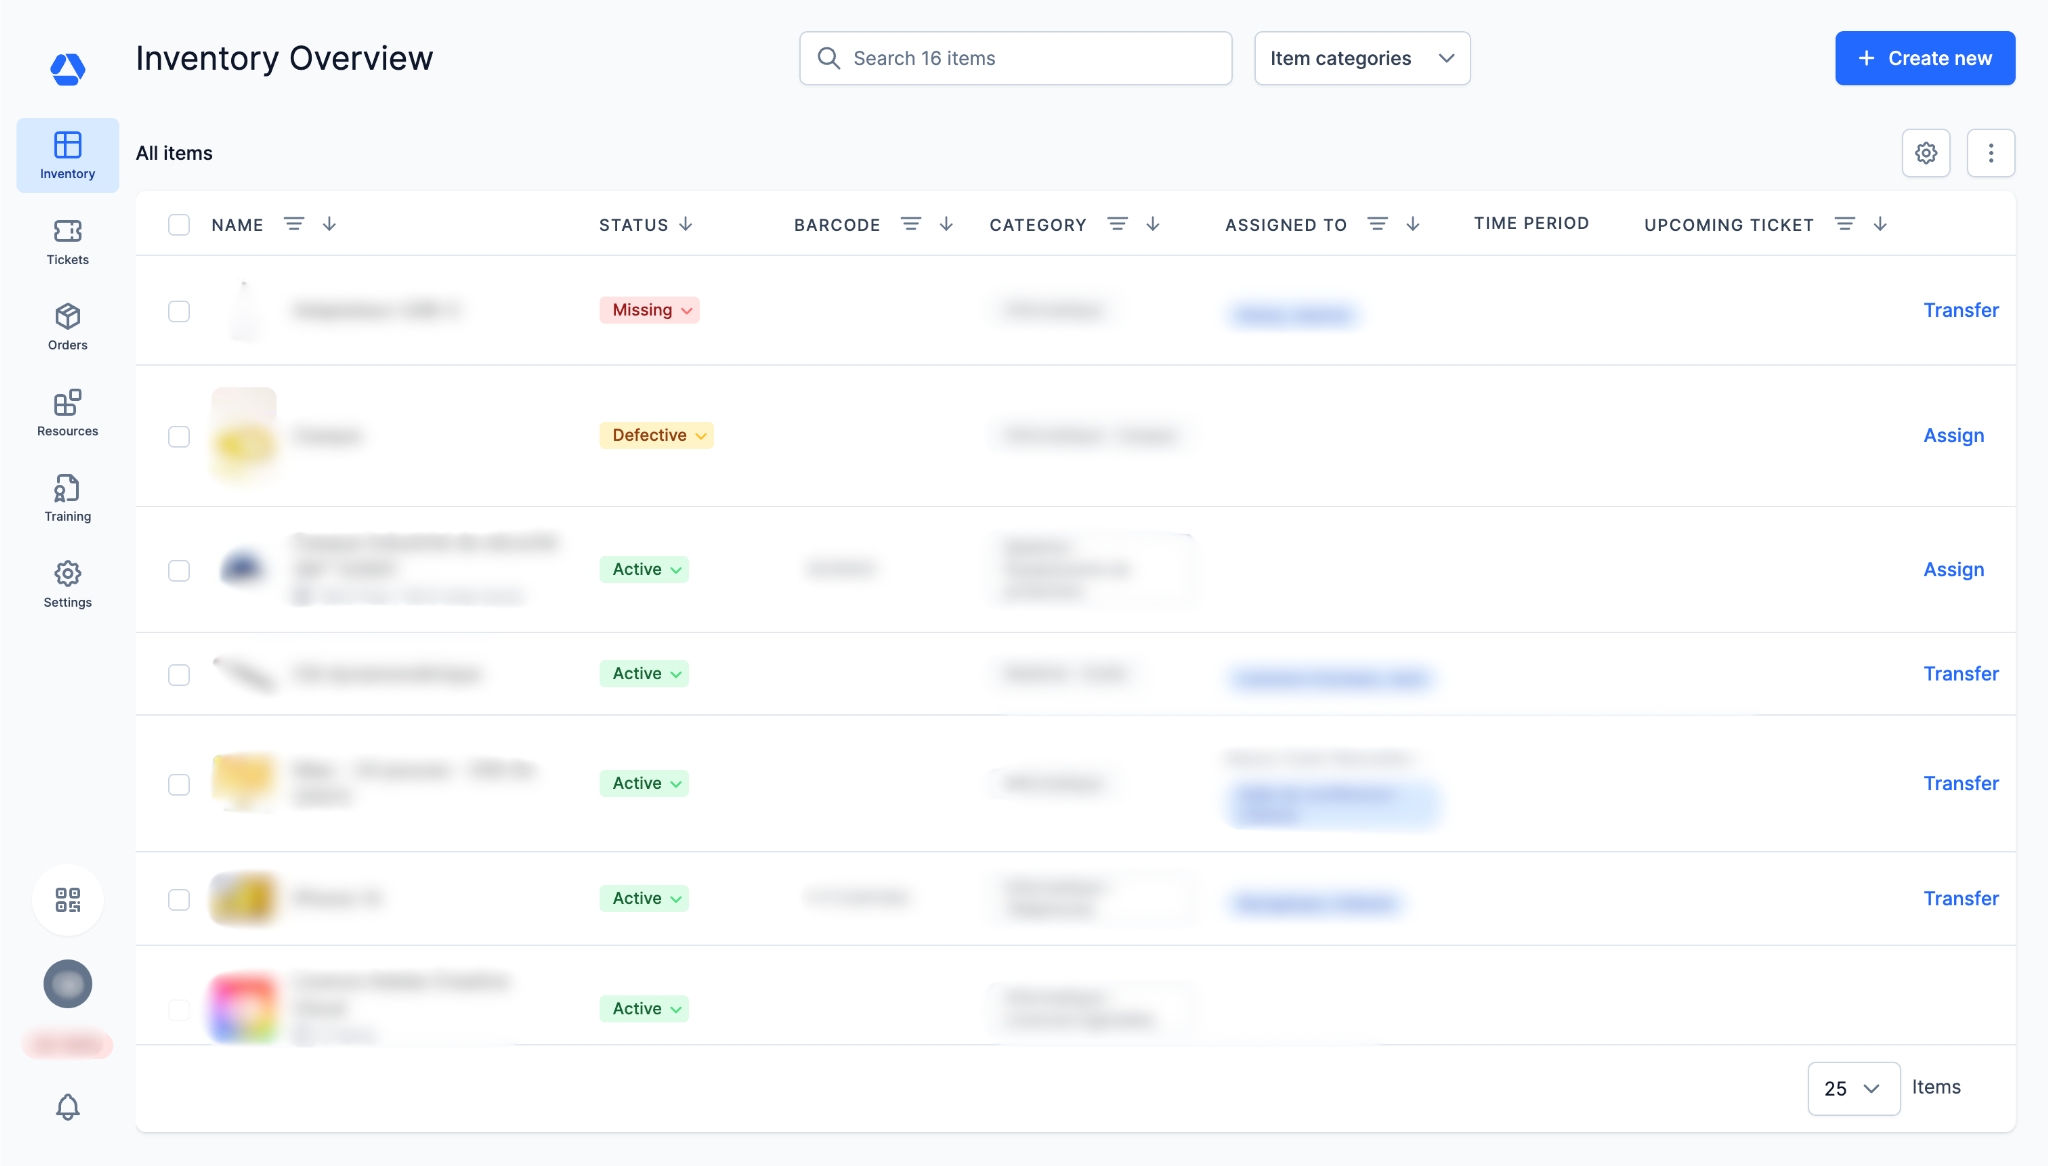
- On the item page
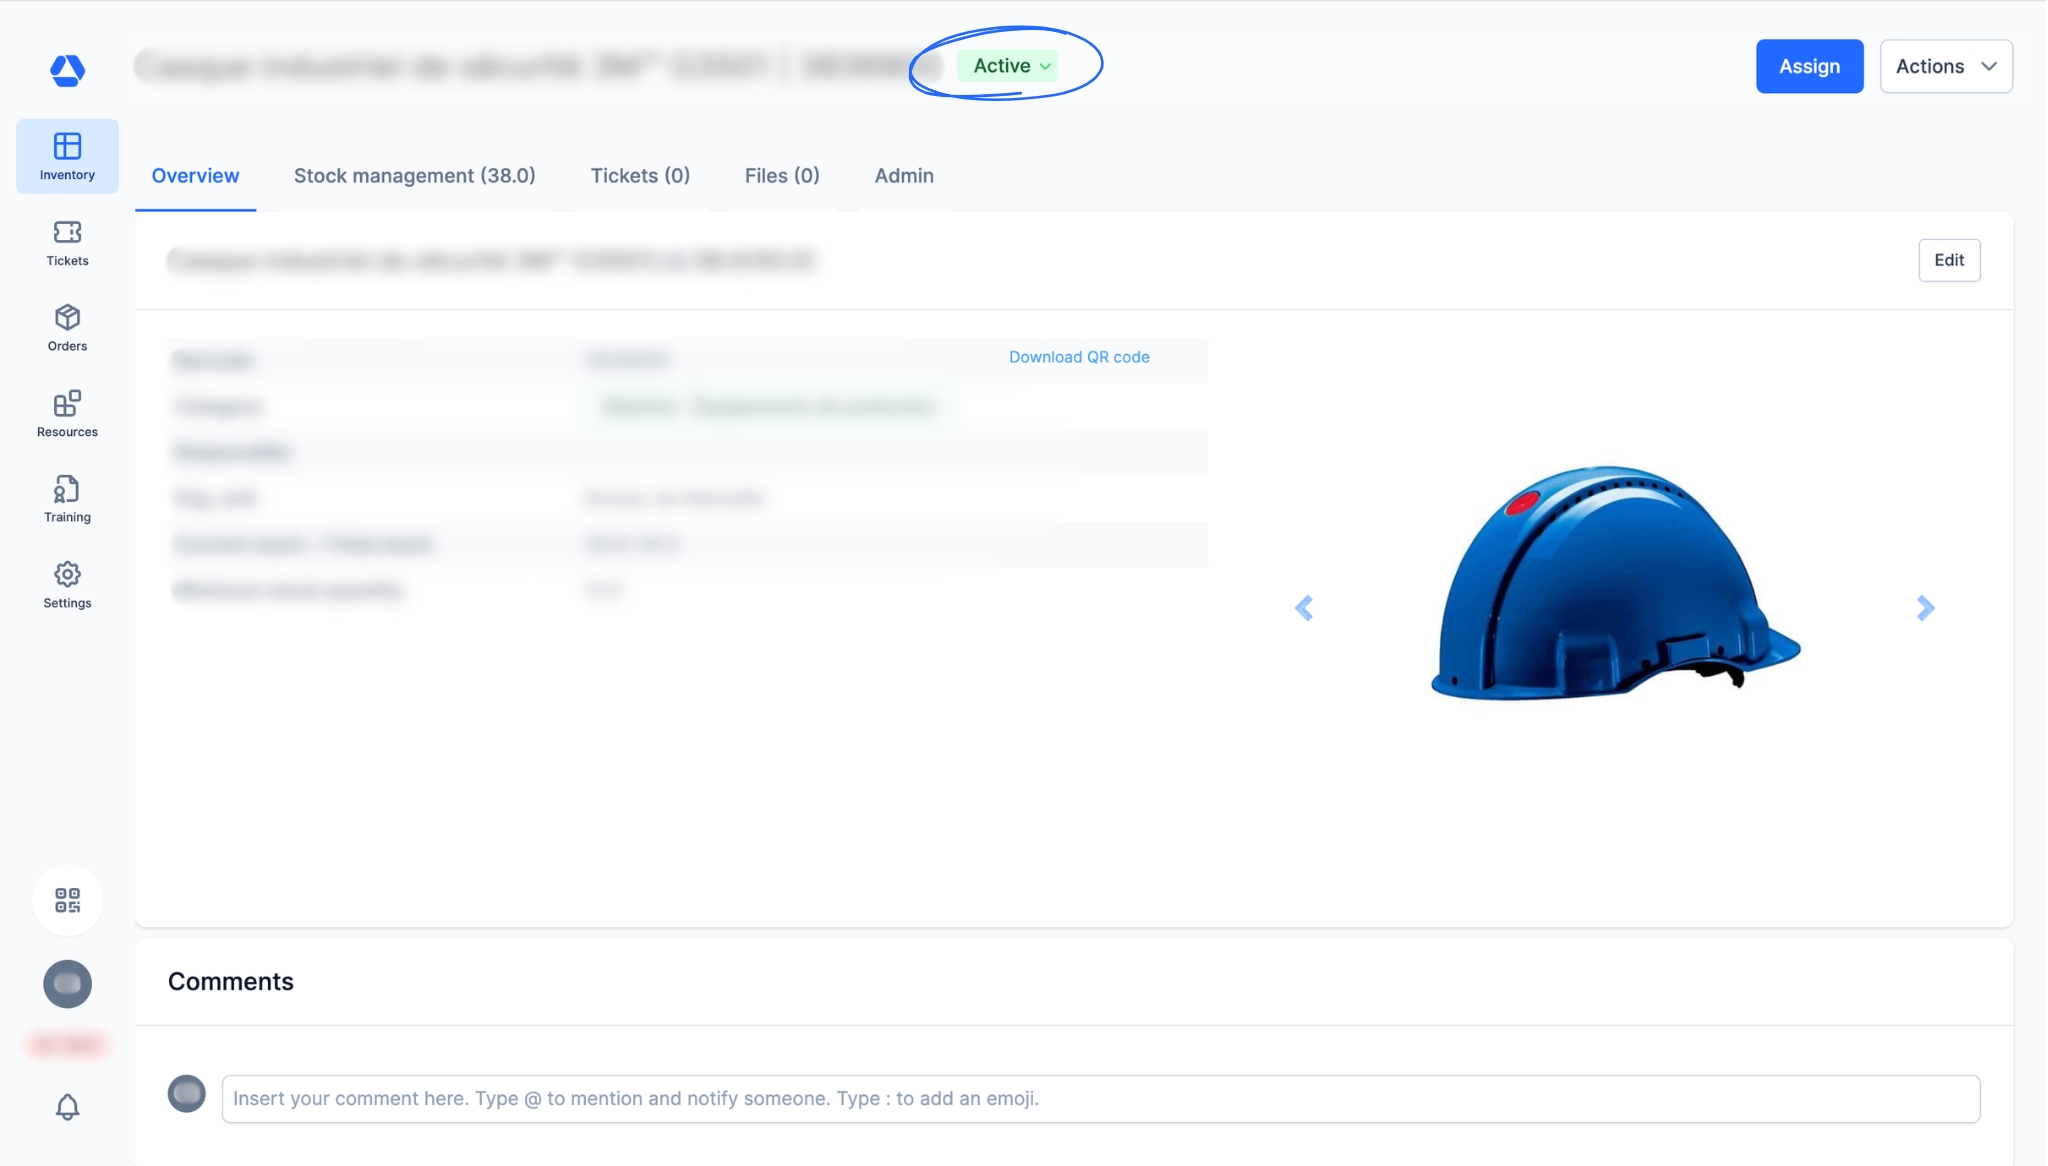
- In actions such as stocktaking (read-only badge)
⚙️ The Steps
- Step 1: Create Custom Item Statuses -
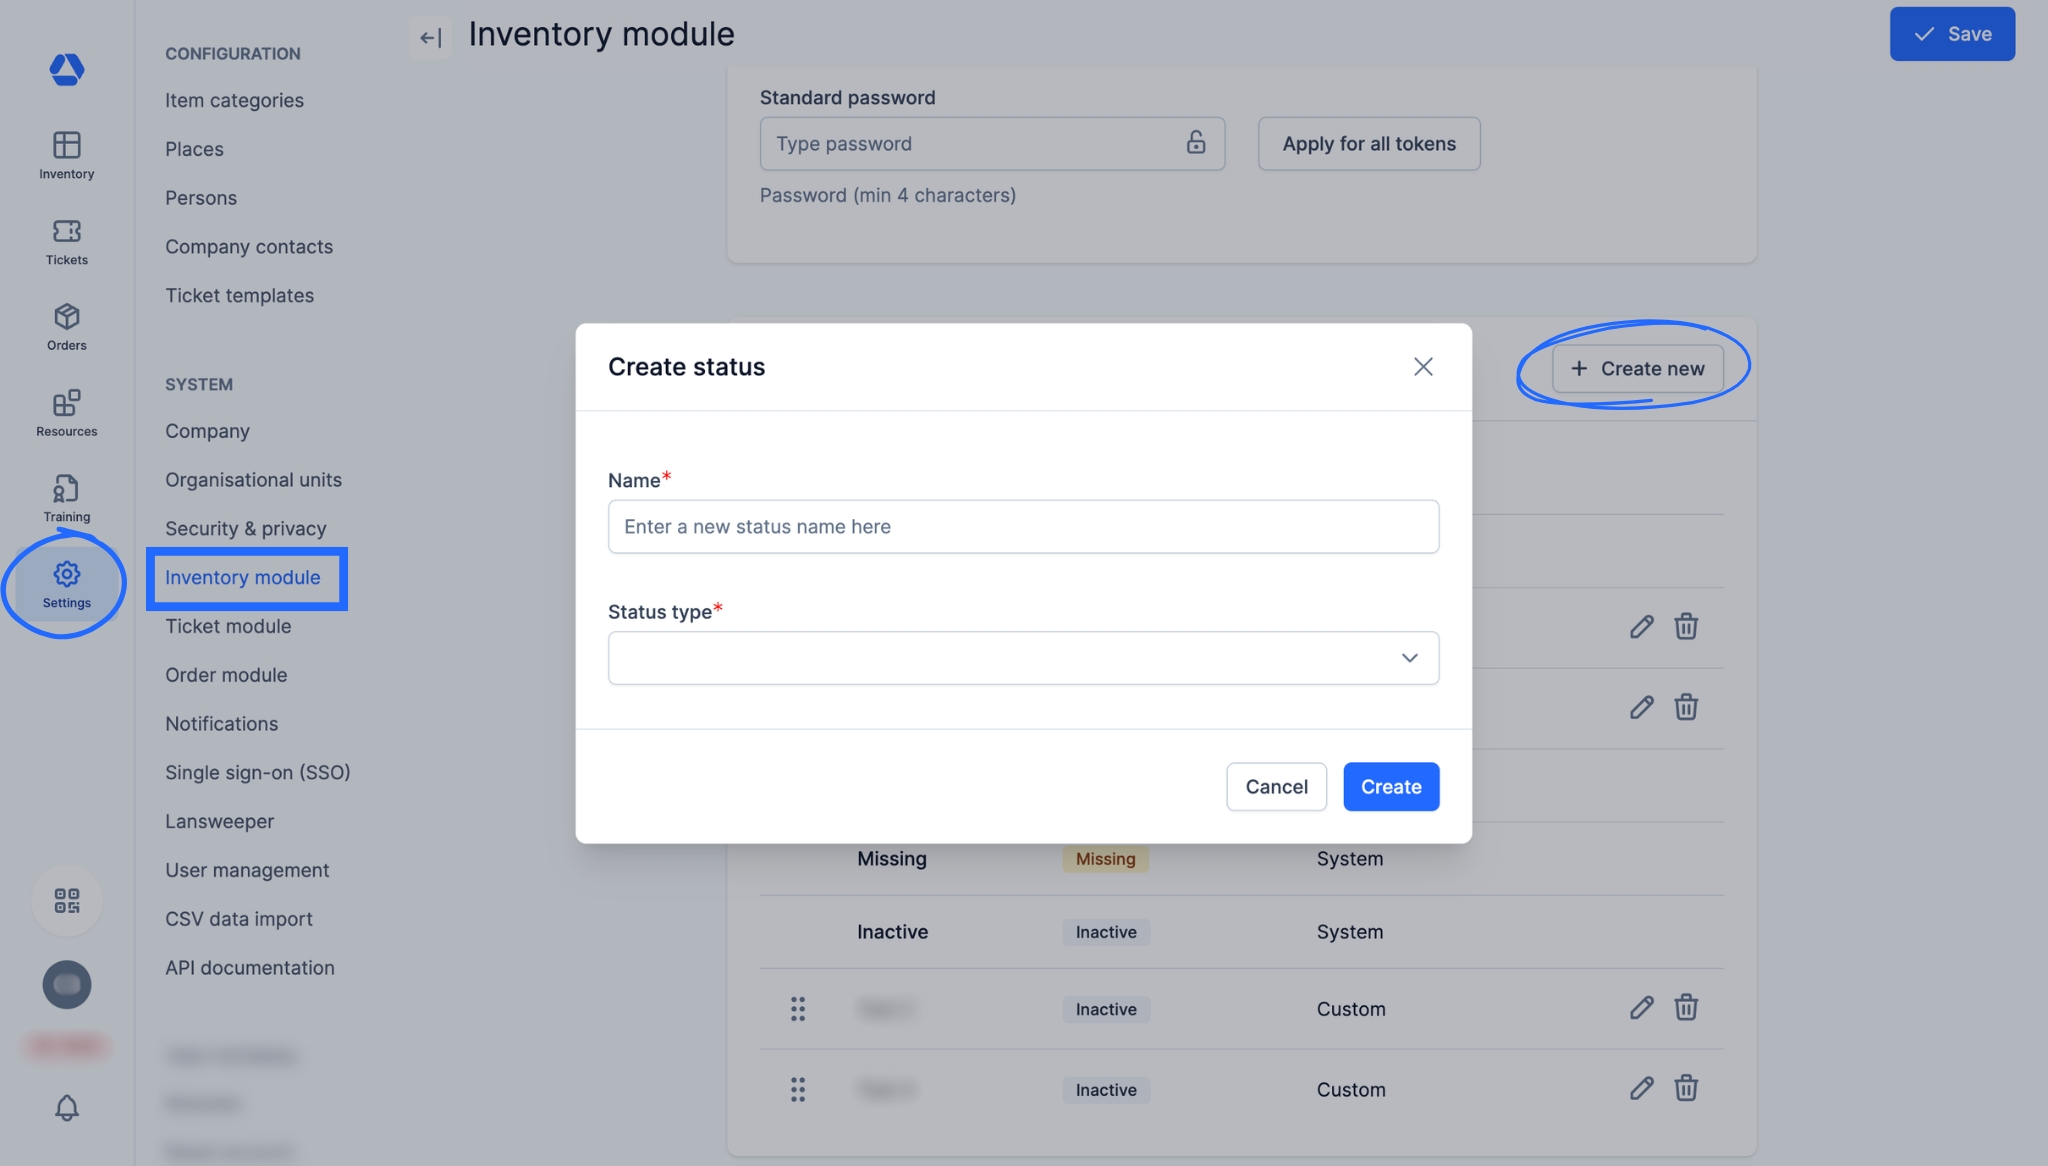
You can create your own custom item statuses.
- Click "Settings", then "Inventory module"
- Scroll to the bottom of the page to the "Statuses" section
- Click "Create new"
- Enter the name you want to give this item status
- Select the type of your custom status
💡 Each custom status is assigned a type ("Active" or "Inactive") which determines how it behaves in the system - Click "Create" to confirm
- Step 2: Manage Custom Item Statuses -
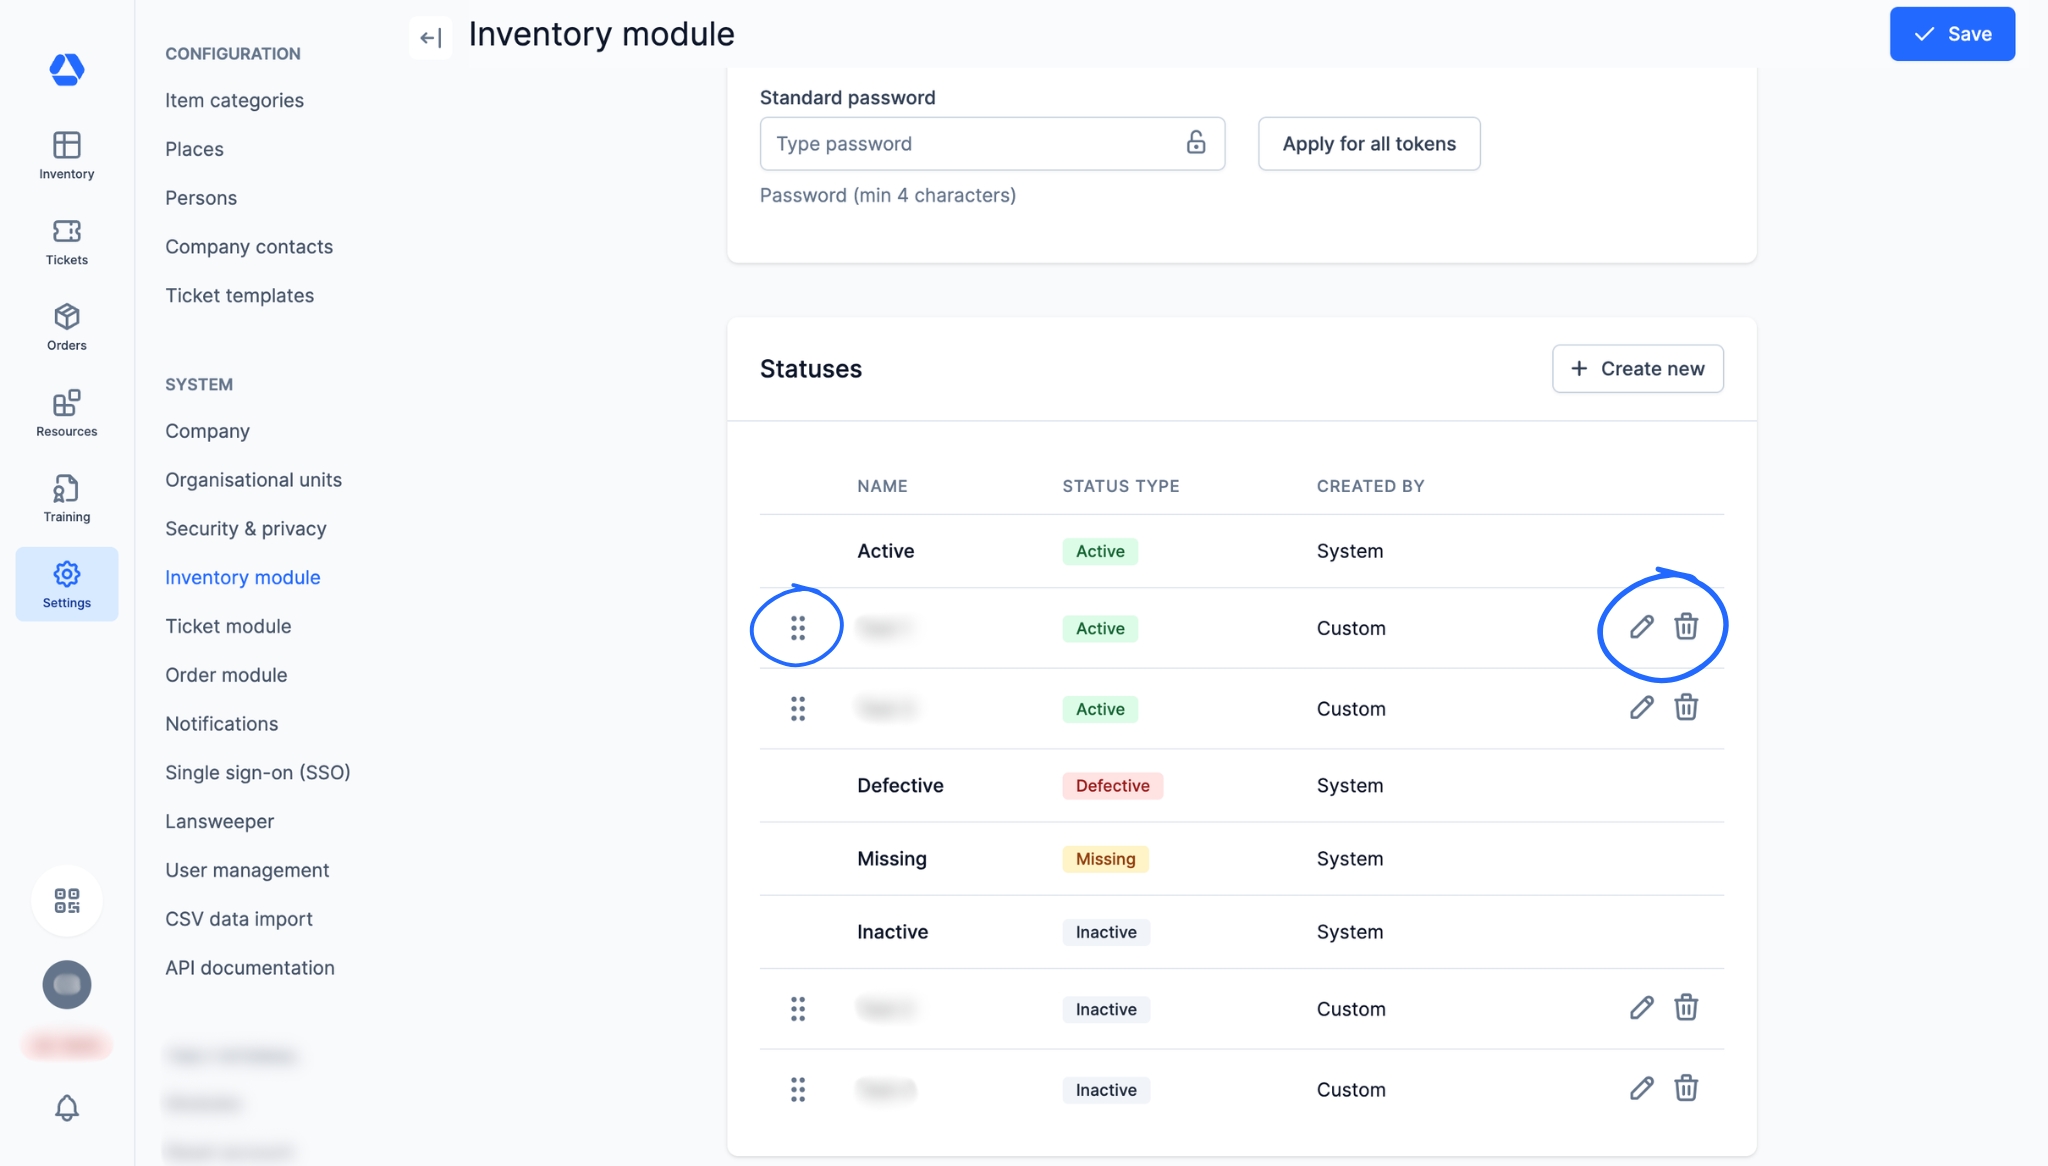
You can manage your custom statuses in several ways:
- Click the drag handle icon to reorder them. This will affect their position in the dropdown menu when you want to update an item status (from the inventory overview or the item page)
- Click the pencil icon to rename an item status. Note that you cannot change its type
- Click the trash icon to delete a custom item status
- Step 3: Update the Status of an Item -
- To update an item's status, click the item's status badge:
- From the inventory overview
- From the item page
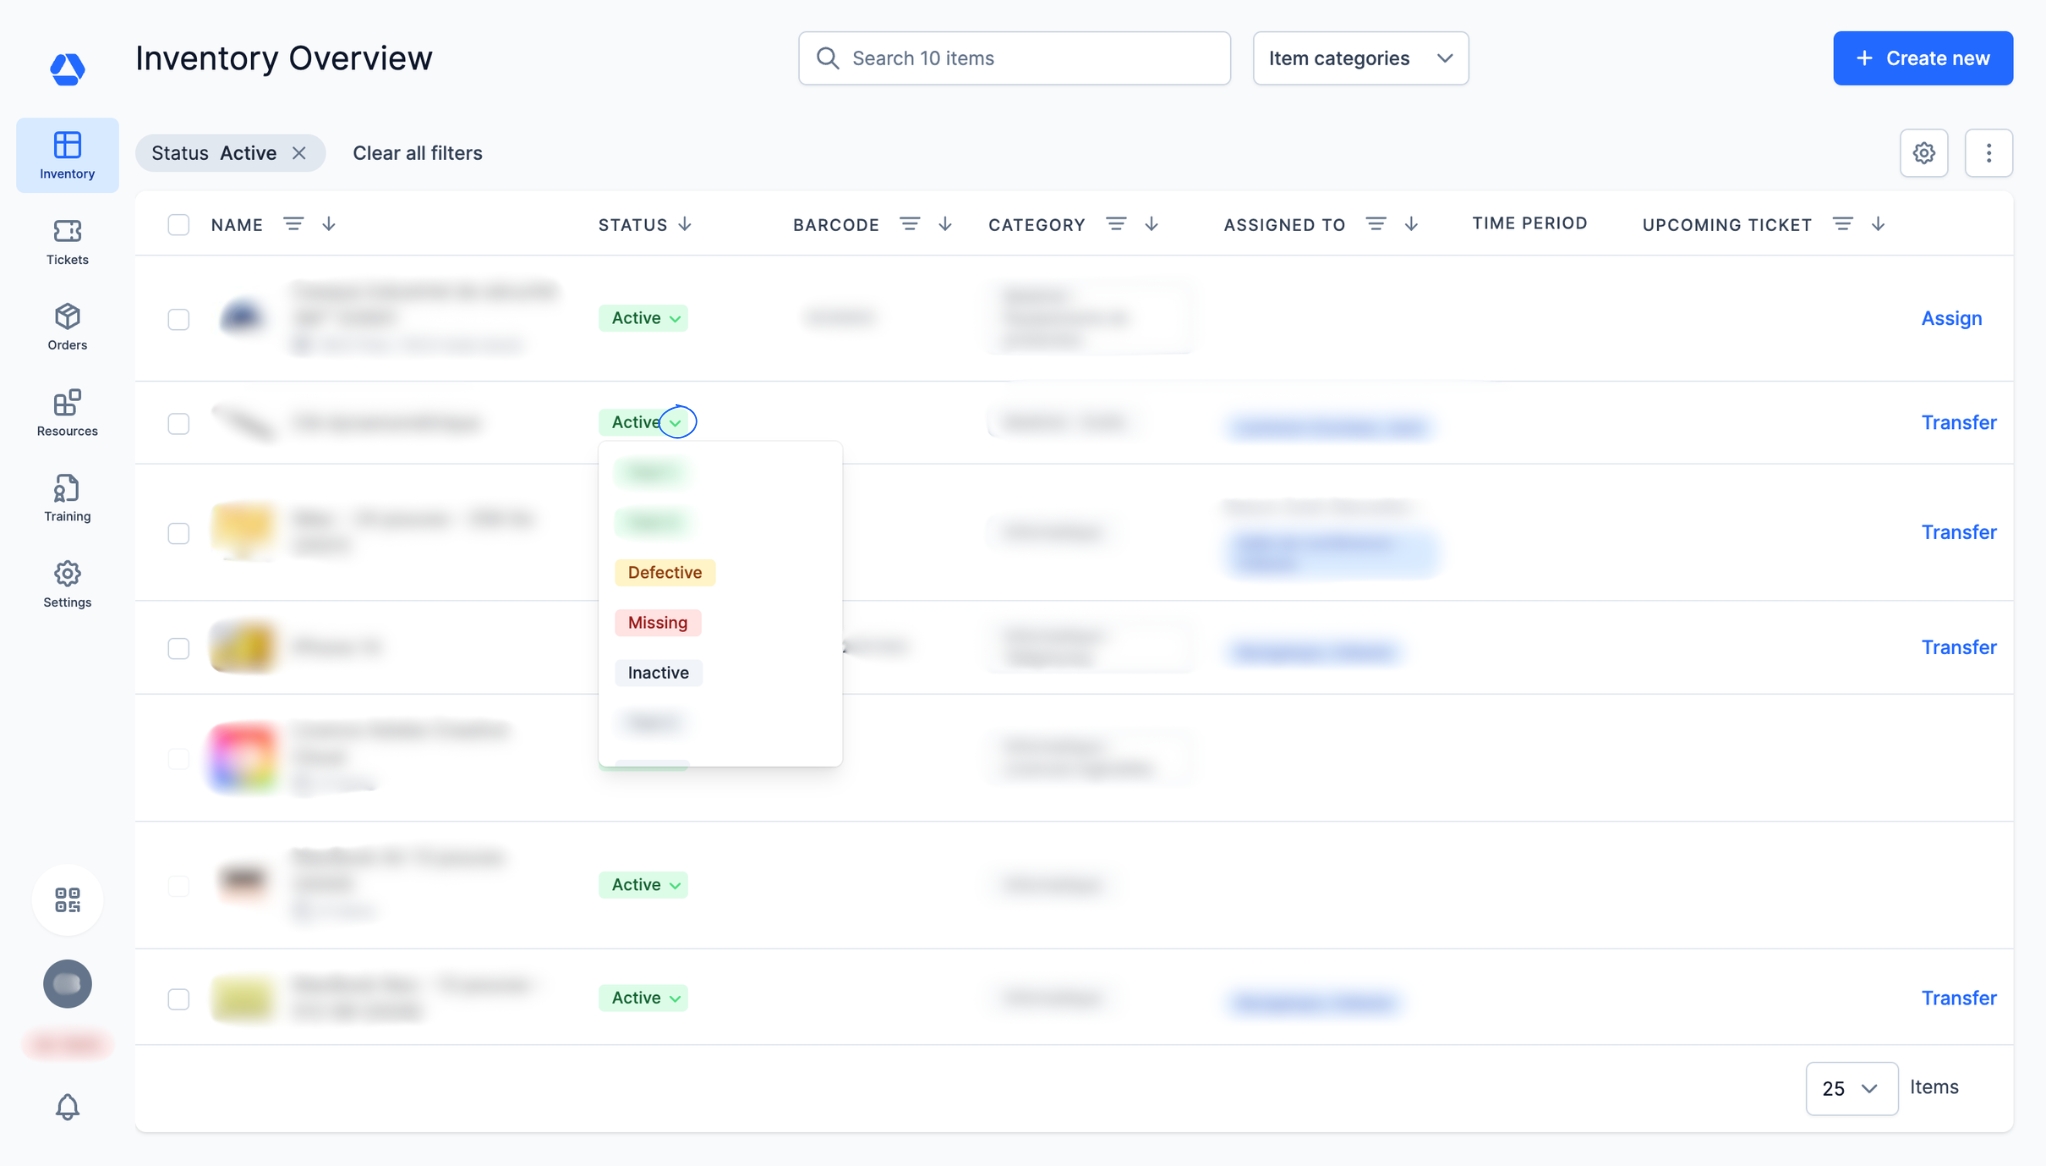
- A dropdown opens where you can select a new status
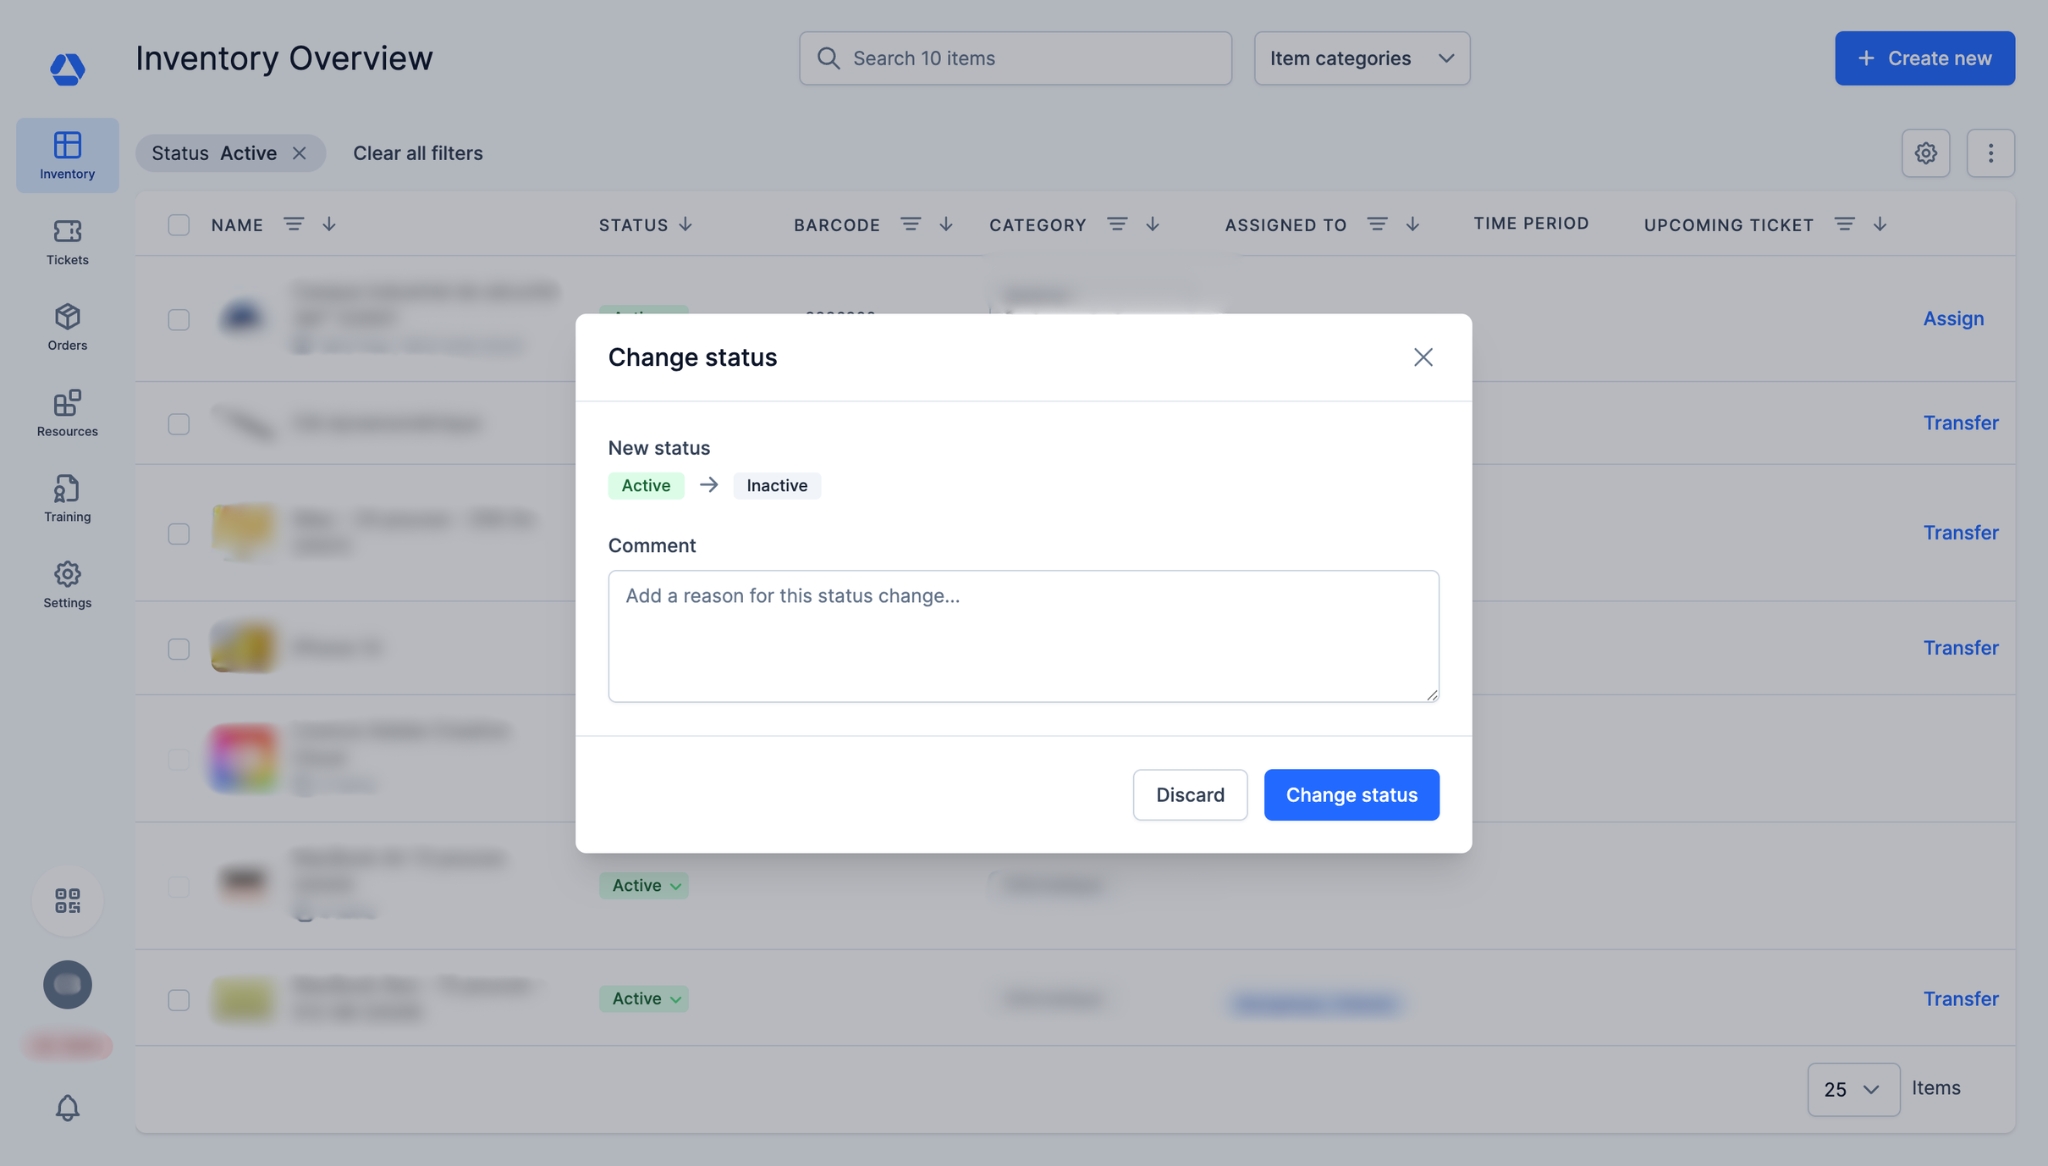
- Updating a status will automatically open a confirmation window
- Optional: Add a comment explaining the reason for the change. This comment is saved on the item page.
- Focus: Item Statuses Permissions -
Due to their importance, item statuses are subject to specific permissions. As a result, not all user types have the same experience with item statuses.
User
- See the status badge: Yes ✅
- Click the status badge to update it: No ❌
- Can see the status history on an item page: Yes ✅
- Can edit the item: No ❌ (the edit form is not visible)
Advanced user
- See the status badge: Yes ✅
- Click the status badge to update it: Yes ✅
- Can see the status history on an item page: Yes ✅
- Can edit the item: No ❌ (the edit form is not visible)
Admin + Power user
- Can do everything ✅ (update status, edit items, batch updates, upload files)
- Focus: Item Status History -
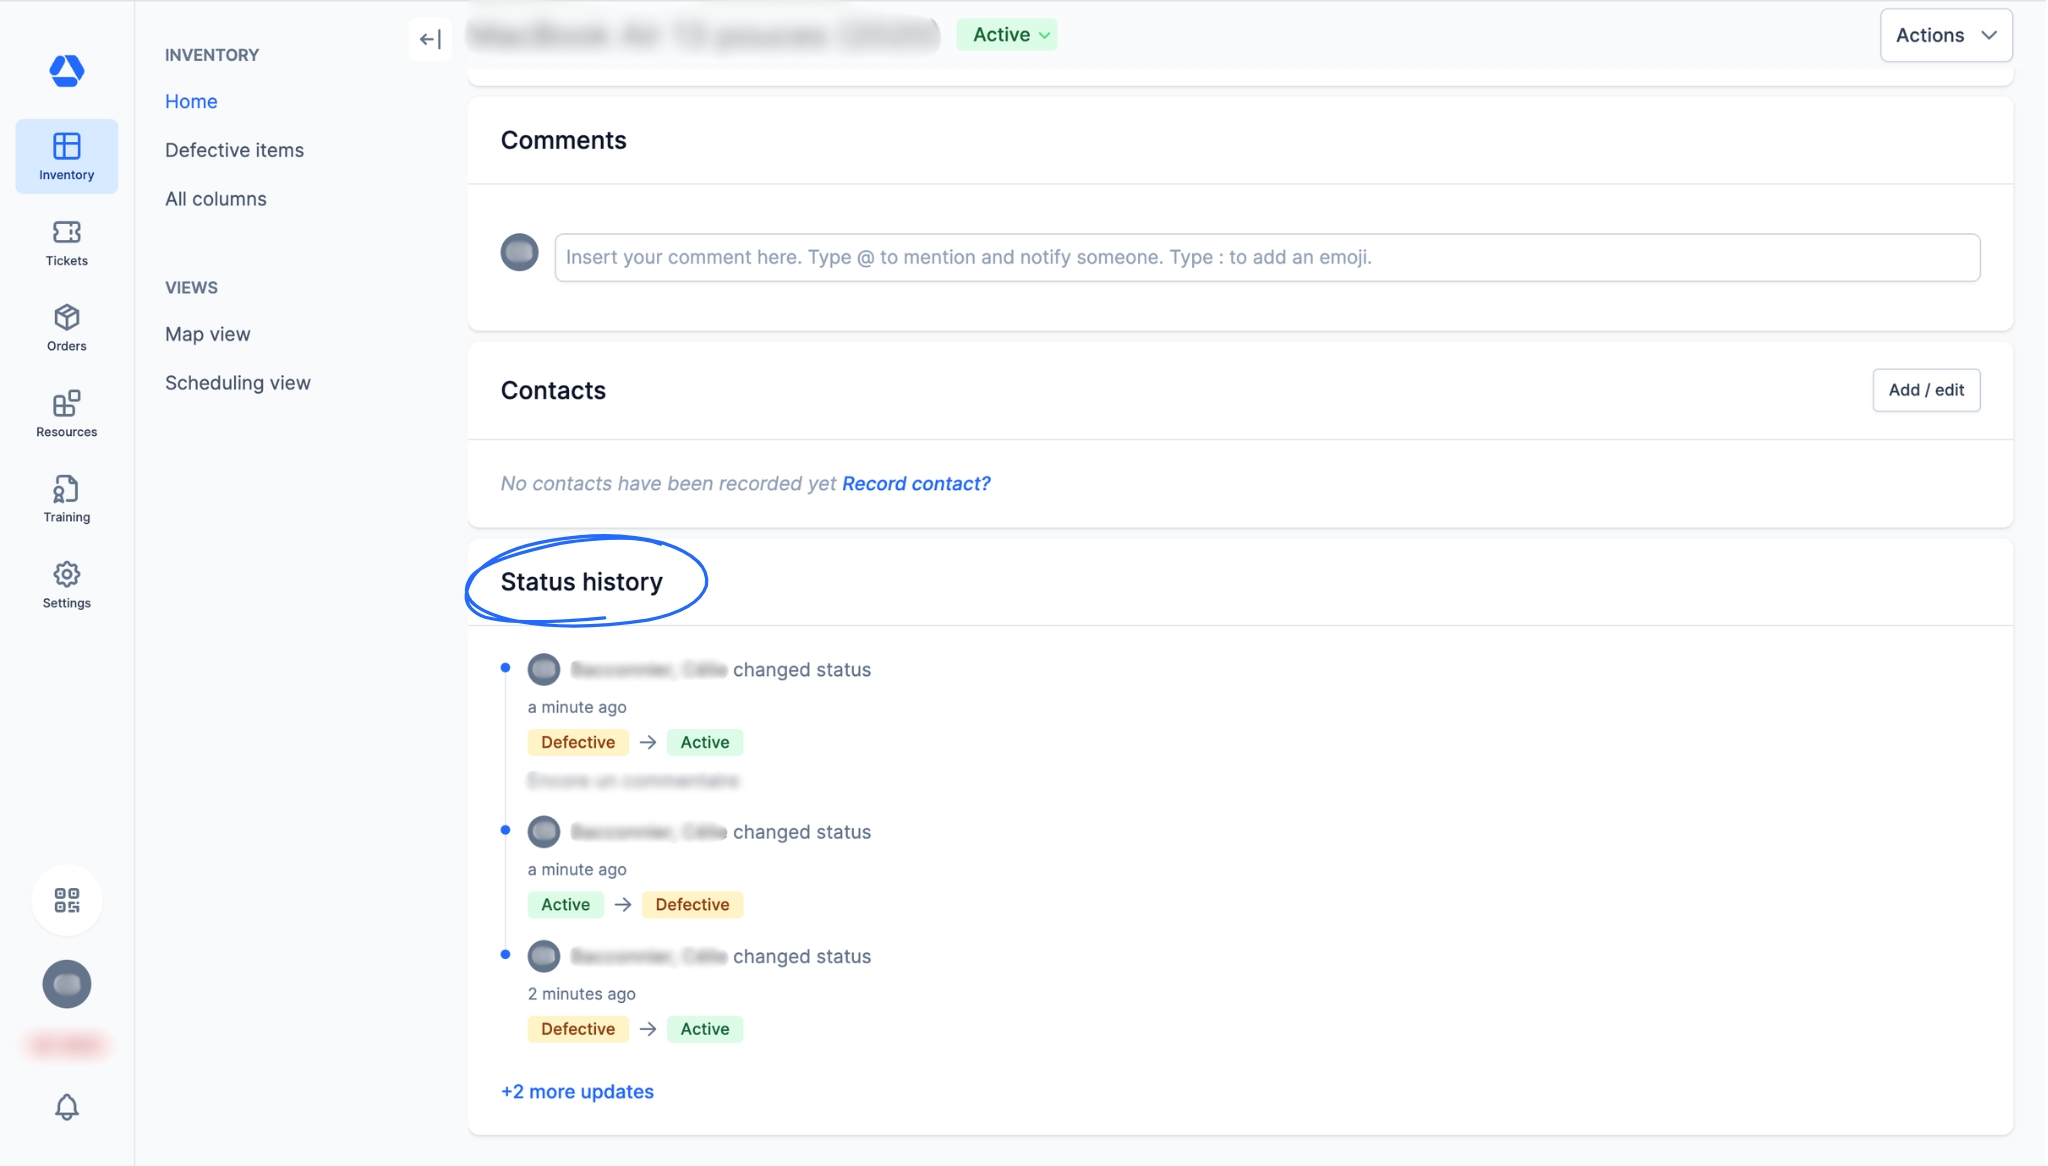
All item status changes are recorded in the ‘Status history’ section on the item page. This history shows:
- The previous status and the new status
- The person who made the change, along with the date and time
- The comment added at the time of the status change (if any)
- Focus: Item Status Fields in API / CSV Exports -
CSV and API exports of your items include:
- The current item status
- The person who set that status, along with the date and time
- The comment added when the status was set (if any)
| Field | Description |
| status | Current item status |
| status_set_by | Name of the user who set the current item status |
| status_set_at | Timestamp when the current status was set |
| status_comment | Comment added at time of status change (empty if none) |
- Focus: Item Status Colors -
Each item status has a specific color for instant identification:
- "Active" = Green
- "Missing" = Red
- "Defective" = Yellow
- "Inactive" = Gray
Custom statuses inherit their badge color based on their type: those created under "Active" display a green badge, while those created under "Inactive" display a gray one.
📖 Timly Glossary
Inventory: The inventory is the set of items you manage and track in Timly.
Item page: The item page is the individual record dedicated to an item, an interface where all related information is displayed:
- Assignments
- Associated documents
- Audit log/history (assignments and movements – visible only by admins)
- Contacts
- General information (name, category, barcode, photo, and technical details)
- GPS position
- Location
- Open associated tickets
- Planning
- Remarks
- Status history
- Usage data
📖 Find all the definitions in the Timly Glossary.
✅ Required Features & Functions
Inventory Module.
🔗 More Resources
- Help Center: How Do I Create Items?
📩 Do you have more questions? Schedule a free and non-binding demo with one of our experts, or or contact us at [email protected].