
F.5 - How to renew the SSO certificate
Your Identity Provider's SSO signing certificate expires periodically (typically every 1–3 years). When it expires, users will no longer be able to log in to Timly via SSO. This guide walks you through renewing it in your IdP and refreshing it in Timly without downtime.
💡 Key Information
When the certificate is approaching expiry:
- Primary account administrators automatically receive email notifications 30 days, 7 days, and 1 day before the certificate expires.
- The current expiry date is shown directly on the SSO configuration page under Certificate expiry, so you can check it at any time.
- A warning banner is displayed next to the SSO configuration as soon as the certificate is close to expiring or has already expired.
🚨 Important Information
- The certificate must be renewed before its expiry date, otherwise users will no longer be able to log in via SSO until the renewal is completed.
- Renew the certificate in your Identity Provider first, and only then refresh it in Timly. The order matters.
🛜 Microsoft Entra ID (Azure)
- If you are using a different Identity Provider (Okta, Google Workspace, etc.), the equivalent action is to generate or rotate
- The SSO signing certificate inside that IdP, then continue with the Timly steps below.
Steps
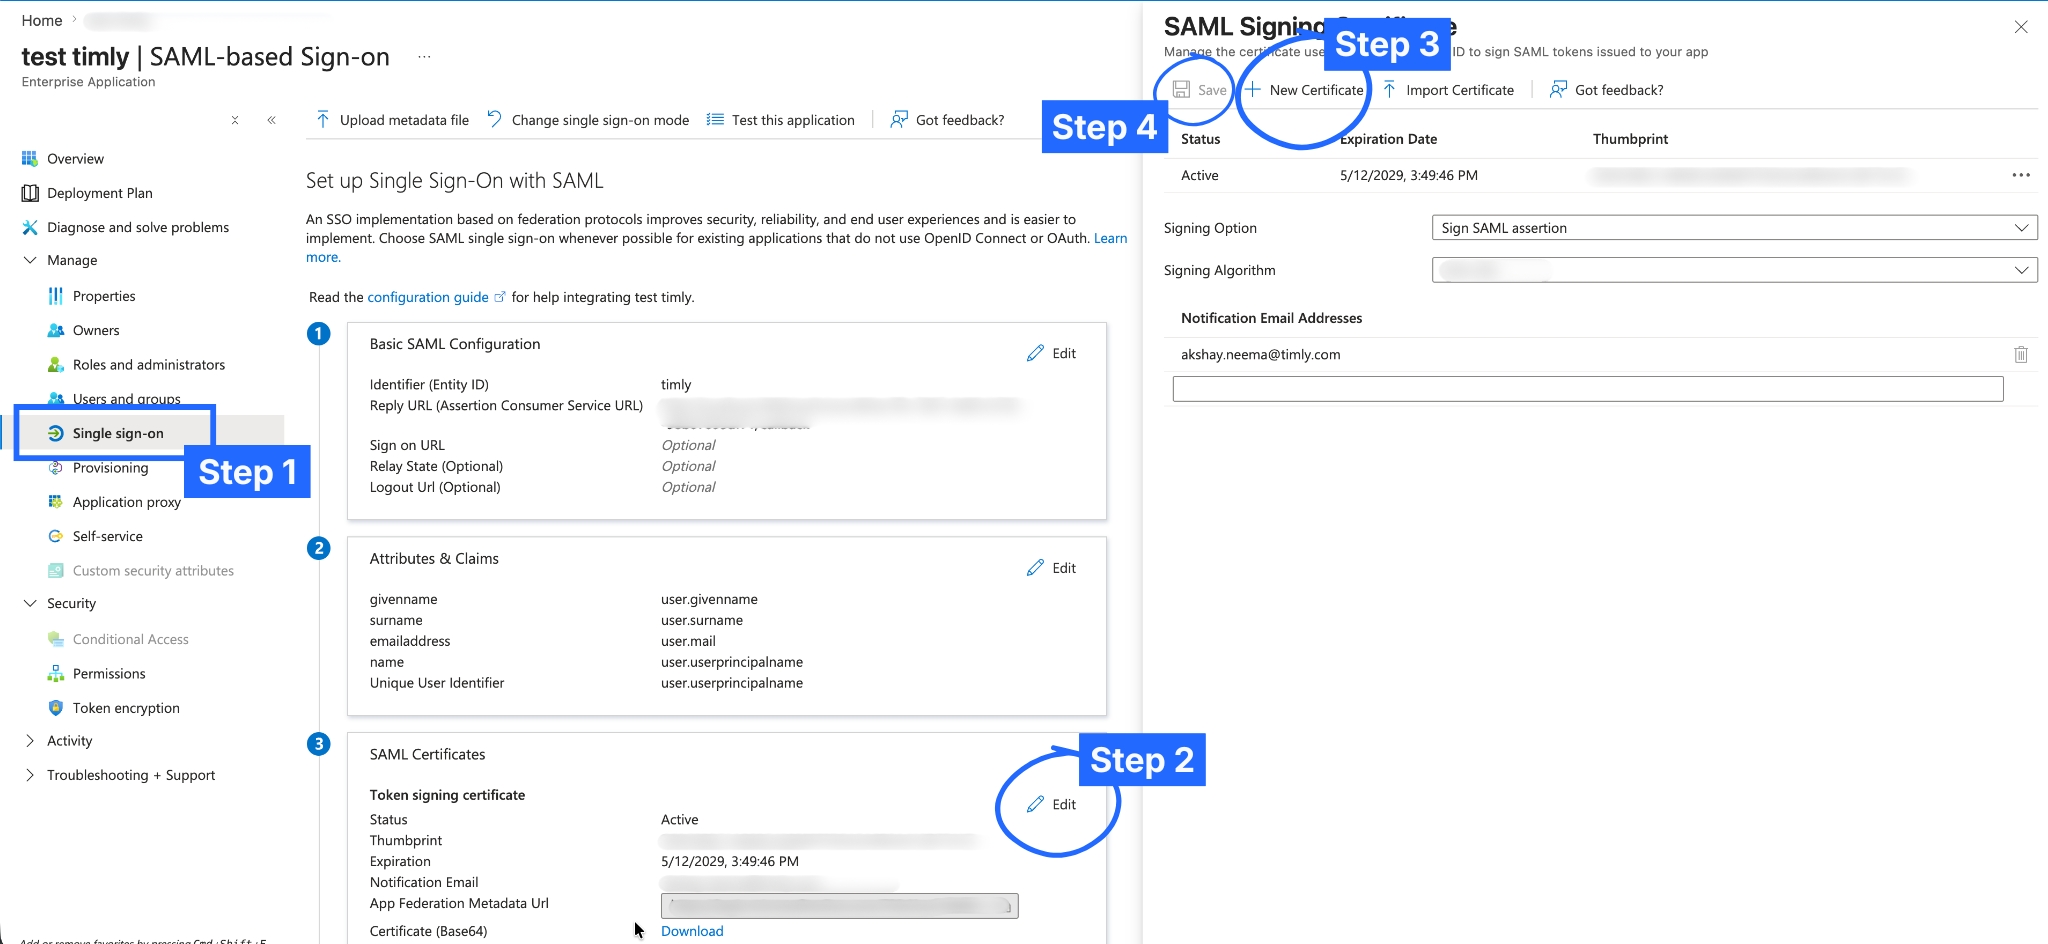
- Sign in to the Microsoft Azure portal and navigate to Enterprise applications
- Search for and open the enterprise application you use for Timly SSO
- In the left-hand menu, select "Single sign-on"
- Scroll down to the SSO Certificates section and click "Edit"
- Choose one of the two available options:
- "New Certificate" — generates a fresh certificate directly in Azure (Recommended option for most cases)
- "Import Certificate" — upload a certificate you have generated externally - Click "Save" to persist the new certificate
- Find the newly created certificate in the list and click the three-dot menu next to it, then select "Make certificate active"
- Confirm the change
- The status of the new certificate should now be shown as "Active"
🛜 Timly-App
Steps
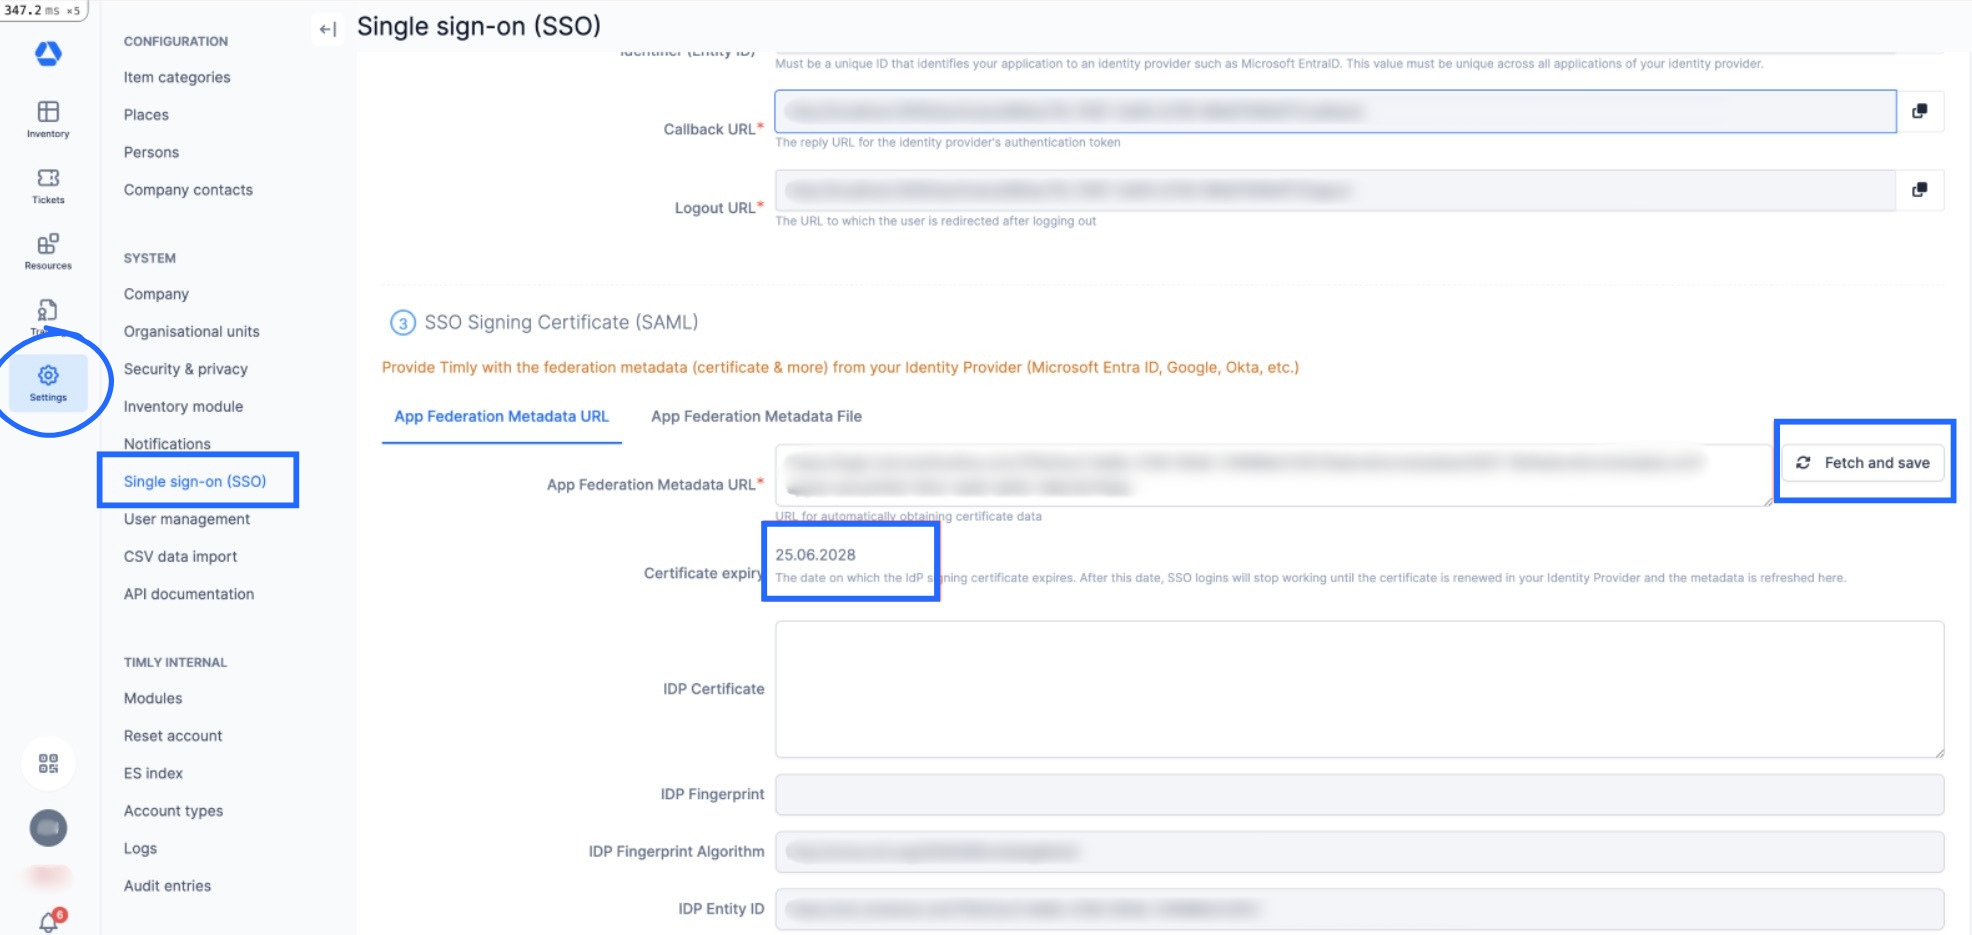
- Log in to Timly as an administrator and navigate to "Settings" → "Single Sign-On (SSO)"
- Click "Edit" beneath the SSO configuration you have just updated in Azure
- Scroll down to the SSO signing certificate section. You will see a button called "Fetch and save"
- Click "Fetch and save"
Timly will:
- Re-fetch the SSO metadata directly from your Identity Provider
- Replace the old certificate with the new one
- Update the Certificate expiry date shown on the page
- Confirm that the new Certificate expiry date matches the validity of the certificate you just created in Azure. The expiry warning banner should now disappear.
📚 More Resources
- Help Center: F.1 - How to configure SSO
- Help Center: F.2 - How to configure user provisioning
- Help Center: F.3 - How to configure person provisioning
- Help Center: F.4 - How to update the provision token
📩 Interested in learning more about our SSO feature? Schedule a free and non-binding demo with one of our experts. For questions, feel free to contact us at [email protected].